

Mulch is a useful tool for gardeners, and there are many different types of mulch for a variety of uses. While premade mulch can be found in most garden supply stores, you can also make your own at home. Leaf mulch is easy to make and is a great way to make use of any fallen leaves around your home. If you’re wondering how to make leaf mulch and what benefits it offers your garden, then this is the guide for you. We’ll walk you through every step of how to make leaf mulch for your garden.
The benefits and drawbacks of leaf mulch
Leaf mulch can benefit your yard and garden in a number of ways. Leaves contain massive amounts of useful nutrients that return to the soil as they break down. Spreading them over your garden adds those nutrients to the soil, giving your plants a boost. Leaf mulch also holds water better than some types of mulch, keeping your plants hydrated. Additionally, like any mulch, a layer of leaf mulch helps insulate the soil, protecting the roots and bulbs of your plant from the cold weather. You can even spread a thin layer of leaf mulch over your lawn for the same benefits.
Leaf mulch can benefit you as well, by giving you something to do with your excess leaves. While you can leave them in your yard for kids to play in or for your local wildlife to make use of, leaves can also be a hazard in high traffic parts of your yard. If you have family members with mobility issues or who are prone to falling, clearing away the leaves before they become slippery is helpful.
There are some drawbacks to leaf mulch, however. If your trees have been afflicted with fungal infections or pests that lay eggs on leaves, then using leaf mulch could spread those to your garden. As with any mulch, applying too much of it over your plants can make it difficult for the plants to push through to the surface in the spring.
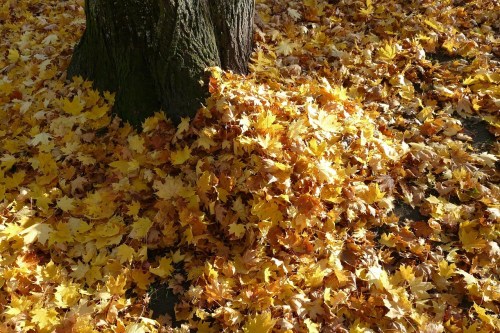
Preparing the leaves
The first step to making leaf mulch is to gather all your leaves. You can rake up any leaves in your yard, or see if any local parks or neighbors are giving away extra leaves. Try to avoid using leaves that may have been sprayed with pesticides or insecticides, since whatever is on the leaves will end up among your plants.
Likewise, try to get rid of any large sticks or rocks. Small rocks or sticks shouldn’t disrupt your leaf mulch too much, but larger ones could get in your way when it comes to spreading the leaf mulch. They could also make it more difficult to mulch your leaves, depending on the method you choose to use.
Mulching your leaves
To mulch your leaves, you’ll need to shred or tear them into smaller pieces. There are a few different ways you can do this, depending on the tools you have available. You can shred your leaves manually, with a rake or pitchfork. This method can take longer and results in larger pieces, but is still fully functional. You can leave them whole, but they won’t be as effective. Whole leaves are better suited for making leaf mold, another form of leaf mulch, but take longer to become leaf mold than shredded leaves.
However, there’s an easier method. Many lawn mowers have a mulching attachment, which works wonders for shredding leaves into leaf mulch. If you don’t have a mulching attachment, some larger retailers and landscaping companies have them available as rentals.
Using your leaf mulch
Once your leaves are shredded, you can use them right away or turn them into leaf mold. Leaf mold is a form of leaf mulch that has already partially decomposed. This means that the nutrients are more readily available to your plants, and it retains more water. However, since leaf mold is partially decomposed, it takes considerably longer to make.
To make leaf mold, pile all of your leaf scraps together. Keep them moist, but not soaked, and covered over with a tarp. Moisture and darkness help speed up the decomposition, but making good leaf mold can still take between one and three years.
Whether you use your scraps right away or turn them into leaf mold, the way you use them is the same. Spread a layer of leaf mulch over your garden and around your plants. The layer should be a couple inches thick, typically between two and four inches. This will help insulate the roots of your plants, as well as any bulbs you have planted for spring. If you have any plants that are prone to fungal infections or abrasions, leave a small gap between the mulch and the stem or trunk of the plant. When the mulch is damp, it can rub up against the plant, causing small scrapes over time.
Disposing of the extras
The good news is that any extra leaf mulch or leaf mold you have is easy to use in other ways or store for later. Extra leaf mulch can be set to the side and turned into leaf mold, but both can also be packed into an empty garbage bag and set out of the way, somewhere cool and dry, for use next year. You can also add excess leaf mulch or leaf mold to any compost pile or bin you have.
If you find yourself with far more than you need, but don’t have a compost bin and don’t want to save it for later, then consider bagging it up and giving it away. Get in touch with any local gardeners you know and ask if they could use some leaf mulch for their gardens. It can be a great way to make new friends that share a hobby with you.
Of course, leaf mulch is also fully biodegradable. This means you don’t need to worry about disposing of it in any particular way. You can leave it in your yard to finish decomposing, or dispose of it in any way that your city allows leaves to be disposed of.
Now you’re fully equipped to deal with all those troublesome fallen leaves in a productive way. Making leaf mulch is a simple process that results in great rewards. It’s an easy way to protect your more sensitive plant roots and give the soil a much needed nutrient boost. Plus, all the extra leaves that would be covering your yard and turning your walkways into a slipping hazard are instead transformed into a useful mulch.
Editors' Recommendations
- What are water globes, and why should you use them for plants?
- Are mulched leaves good for grass? Here’s how to mulch a lawn full of leaves this fall
- Is it illegal to collect rainwater? What you should know before setting up your rain barrels
- How to transplant moss – and when you should
- What you need to know about finding the perfect peony fertilizer and how to choose one for lush blooms
