
Gardening is typically thought of as a spring, summer, and fall activity. Your garden doesn’t just disappear over winter, though. So what can you do to keep your perennials safe through winter, and to make sure your soil is ready for the next round of planting? The answer is to turn down your garden. If you’ve never heard of this, or aren’t sure where to begin, don’t worry. We’ll lay out all the facts for you.
What is turning down a garden?
Turning down is the process used to get your garden ready for winter. There are a variety of tasks that make up this process, and the exact tasks can vary depending on a few different factors. This process can also be called winterizing, transitioning, putting your garden to bed, or just preparing.
There are a few reasons gardeners do this. Firstly, it protects any perennials in your garden, helping them survive the winter so they can bloom or fruit again in spring. It helps keep your soil quality high, and can even prevent weeds from taking over your garden while it isn’t in use. Turning down your garden can even help reduce the risk of certain plant diseases, fungi, or pests rearing their heads in spring.
What to consider before you start
The main thing to consider before beginning is what your goal or goals are. Do you have perennials that you want to keep alive through winter, or are you looking to prepare your garden for spring planting? Keeping your goal or goals in mind is important, since some of the tasks typically involved in turning down a garden only really benefit one goal.
Additionally, if you have a different, less common goal for turning down your garden, keep that in mind as you read through the steps listed below. Consider how each task benefits your goal, or if it benefits you at all. This helps you narrow down which tasks are truly necessary, and which may not be worth it for you.
How to turn down your garden
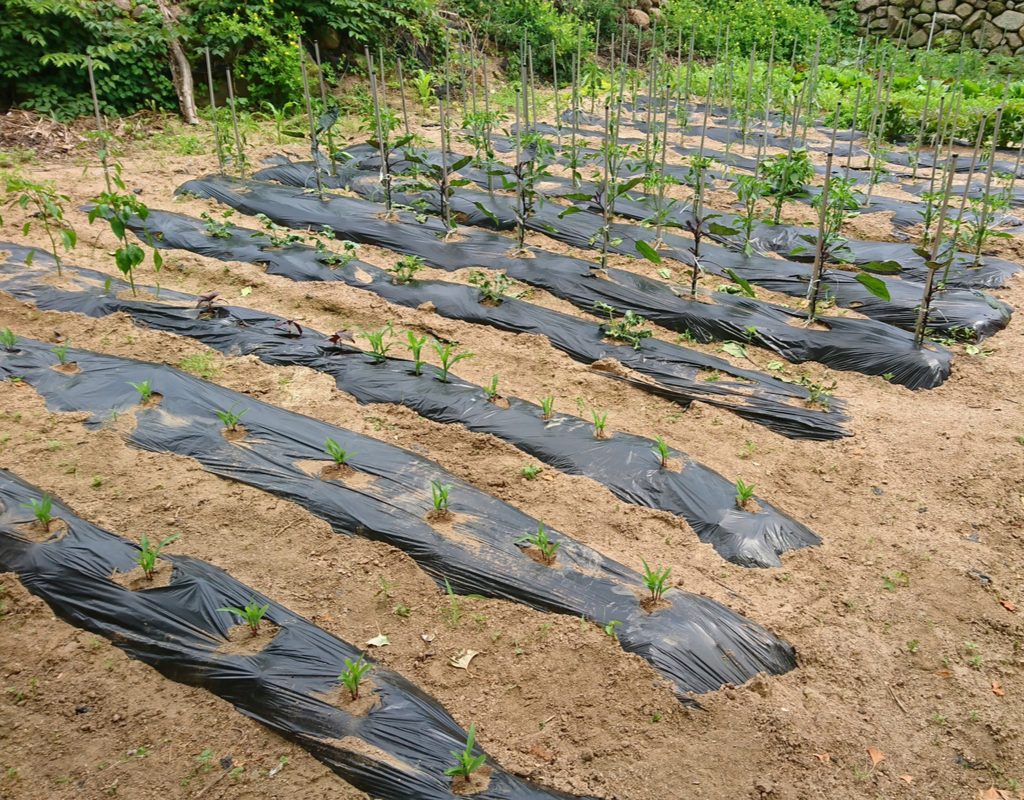
The first step is to clear out any plants that are dead, dying, or that you don’t want in your garden come spring. If a plant is diseased or has a fungal infection, dig it up carefully and throw it away to keep the disease or fungus from spreading. Healthy plants can be added to your compost. Any plants that self-seed should be left until they’ve dropped their seeds, unless you don’t plan on growing that plant again. This frees up space for new plants, gets rid of pest habitats, and the compost can be used to keep the soil warm and add nutrients.
Next you’ll want to add soil amendments. These are things that replenish the nutrients in the soil. Fertilizers aren’t typically used for this, since the sudden burst of nutrients they provide can encourage plants to wake up from dormancy too soon, putting out new growth that quickly dies. Use compost instead of fertilizers to avoid this reaction.
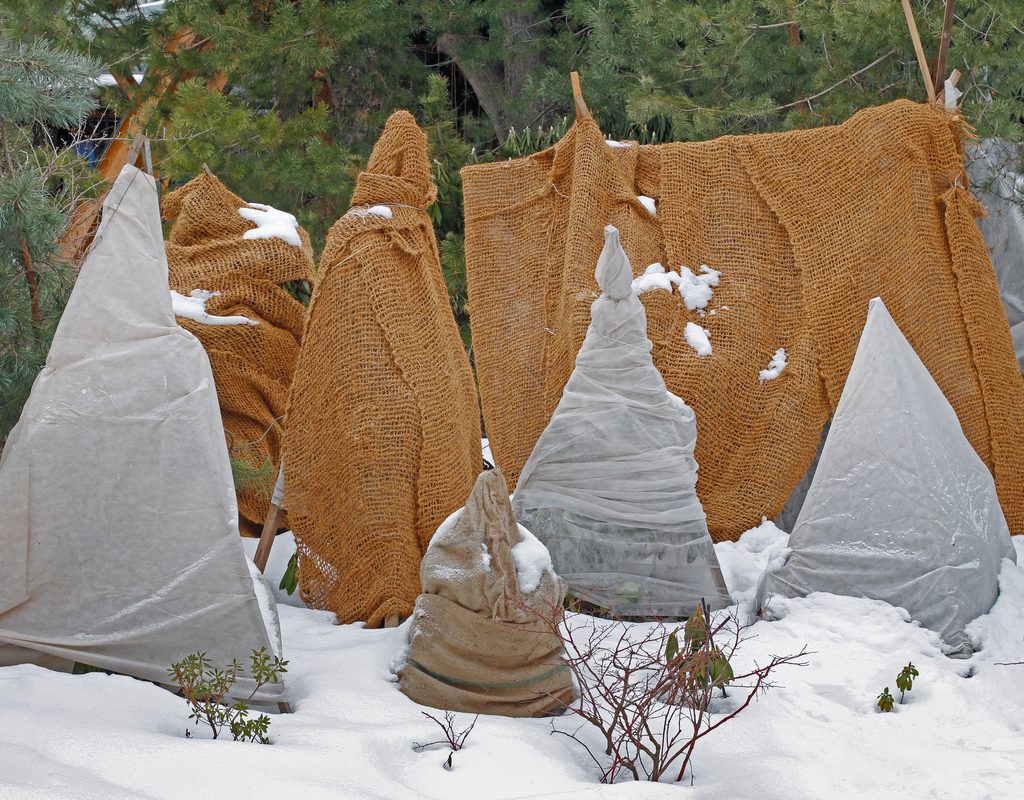
If you’re keeping perennials alive through winter, you’ll need to keep them warm. Mulch is your friend, it keeps the soil warm and it stops weeds from moving into your garden. In areas that are cold and wet, you may have an issue with ice or frost burn on leaves. Plant covers help keep water off of your plant. You can get them from most gardening stores or online. If you want to make your own, be sure to choose a material that will repel, not absorb, water.
If you don’t have perennials, or only have a few, you may want to consider planting a cover crop. During winter, it’s best to choose either a crop that will survive winter or a crop that won’t, but grows thickly enough that it will protect the soil, even in death. Oats are one of the most common cover crops that fall into the second category, while the first category includes winter rye and hairy vetch.
What not to do when turning down your garden
When turning down your garden for winter, the easiest mistake to make is to leave your garden empty and exposed. If your garden is a patch of loose earth throughout winter, then you’re likely to experience soil and nutrient loss as wind and water whittles your garden away. You should provide your garden with some type of cover, whether that’s a cover crop, mulch, or even just a tarp.
Some mistakes are more specific to garden conditions. If you use drip irrigation or have any sort of hose, rain barrel, or water feature, remember to drain it. If they freeze, it could cause damage that you’d need to repair come spring. Other issues are caused by beginning the process too soon. This is especially common when it comes to watering. Most plants go dormant in the winter, so they don’t need water. However, you do need to keep watering them until then.
Now you know everything you need to know about turning your garden down for winter. Follow these tips and your garden can withstand winter and be ready to blossom and thrive in spring. Just remember not to leave your garden bare, and keep your plants and soil warm. You’ll be glad you did, and your garden will be glad too!


