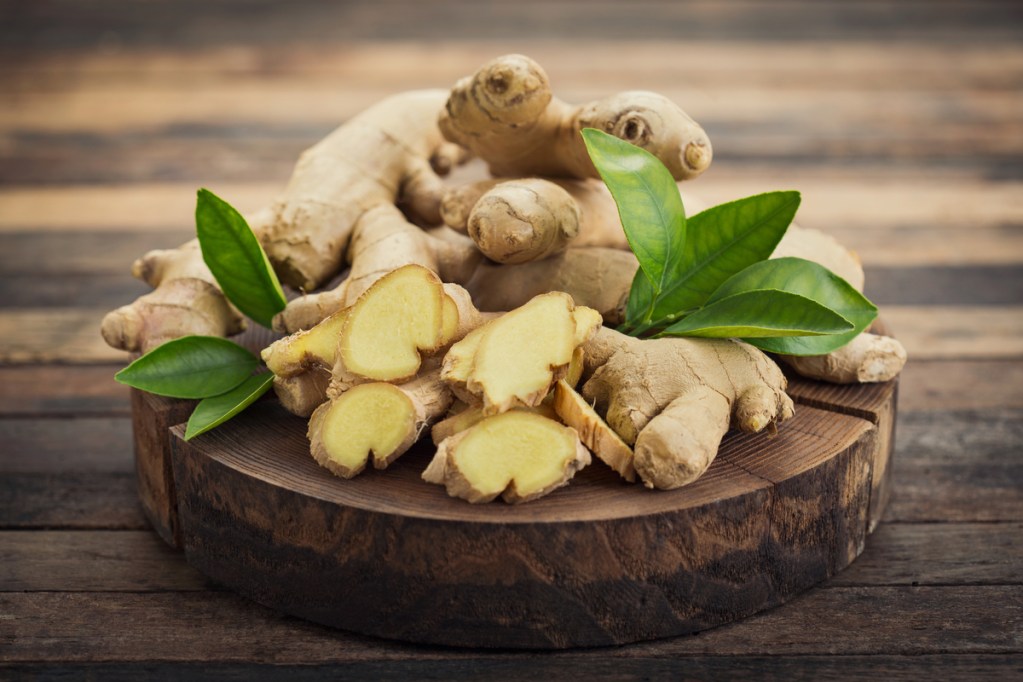
Ginger is an incredibly useful plant to have in your kitchen. You can grind or grate it and use it to season meats or meat substitutes for stir-fries and soups. Ginger tea and ginger ale are often used to soothe upset stomachs. You can even make your own ginger beer and ginger candy at home.
While ginger is easy to find in most grocery stores, it’s also easy to grow at home. You can grow ginger hydroponically or in a traditional garden, and can even plant grocery store ginger! This guide on how to grow ginger will walk you through everything you need to know to add this useful plant to your home or garden.
Can you grow ginger from a grocery store?

Ginger plants may or may not be easy to find in your area, but many grocery stores carry ginger rhizomes for cooking. So, in a pinch, can you grow a ginger plant from store-bought rhizomes? The answer is yes, sometimes. When ginger is harvested for commercial sale at grocery stores, it’s typically sprayed with a growth inhibitor. This spray keeps them from sprouting during transit or on grocery store shelves, but it also makes them difficult to use for regrowing.
If you want to try growing ginger from grocery store rhizomes, soak them in warm water overnight. This gets rid of some of the growth inhibitors and increases the likelihood of it rooting. Another option is to get ginger rhizomes from a local grower at a farmer’s market. At farmer’s markets, you can often interact directly with the farmer or gardener and ask if the ginger has been treated with a growth inhibitor. You can also look for organically grown ginger rhizomes.
Planting ginger

If you’re growing ginger from rhizomes, store-bought or otherwise, then you can break them apart into smaller pieces and plant each piece separately. Each piece should have a small circular growth point called an eye. If your rhizomes are older or look dried out, you can soak them overnight in warm water to liven them up a bit. Plant each piece shallowly, with the eye facing up. If you’re growing ginger in a container, use a wide, shallow pot rather than a tall, narrow one.
Ginger can grow outdoors in zones 8 through 12, but it can easily grow in containers just about anywhere. Plant your ginger in full or partial sun. In especially hot climates, ginger grows well with morning sun and afternoon shade. Ginger needs rich, well-draining soil in order to thrive. Adding compost or leaf mulch to your soil before planting can help significantly. If you’re growing your ginger in a container, make sure it has drainage holes. You may want to place a few rocks or sticks in the bottom of the container to help keep the soil from clogging the drainage holes as well.
Caring for ginger

Keep the soil evenly moist, but avoid soaking it completely. Ginger can develop soft rot if the soil is left soaking wet for too long or too often. Ginger naturally goes dormant when the weather turns cool, and it shouldn’t be watered during this time. Since it uses little to no water while dormant, watering it during winter can easily lead to root rot. If you’re growing your ginger outdoors, you can apply a layer of mulch to improve your soil’s water retention.
The part of the plant that we eat is the rhizome, so you don’t need to worry about flowers or pollination. Ginger can flower, and some varieties have very beautiful ones. However, the ginger varieties typically grown for their rhizomes don’t flower often, especially when grown in a container.
You should see growth within the first one to four weeks of planting. Ginger plants stay fairly small, typically growing to between 2 and 4 feet tall. Since they stay small, you don’t need to worry about pruning. However, occasionally deadheading or removing spent stems or flowers is helpful for the plant.
When and how to harvest ginger

There are two methods of harvesting ginger. You can harvest small amounts at a time or harvest the entire plant at once. Harvesting small amounts can be done sooner after planting, but it takes marginally more effort. Harvesting the entire plant at once takes more time, but is arguably easier.
Harvesting in pieces can be done after four or five months of growth. However, the exact length of time will depend on the plant’s size and how much ginger you want to take. Harvest from the edges of the plant, not the center, to avoid damaging the plant. Leave 2 to 4 inches of rhizome attached to the plant so it can continue to grow. Cut off the section you want with a sharp, clean knife.
The entire plant can be harvested after 8 to 10 months. You can harvest it sooner, but you’ll have a smaller harvest. Simply dig up the entire plant and cut the rhizomes away from the leaves. You can save sections of your ginger to replant.
Storing excess ginger for later

If the ginger isn’t cut, sliced, or peeled, then you can store it in any room-temperature or cool place. Keep the ginger away from any damp or humid places, and avoid placing it in direct sunlight or else it might dry out too much. Once the ginger has been cut or peeled, it will need to be stored more carefully.
An airtight container or wrap will help protect it, and store it in the refrigerator. Peeled or cut ginger won’t last as long, so it’s best to keep your ginger whole for as long as possible. For long-term storage, you can actually freeze ginger. Dehydrating and grinding ginger into a powder is also an option, but is tricky if you don’t have a food dehydrator.
Whether you prefer it in candy, tea, or meals, ginger is a versatile and interesting plant. As long as you take proper care of it, ginger is incredibly easy to grow. Start from just a few pieces and soon enough, you’ll have more ginger than you know what to do with! If you’d rather add it to your flower garden, then look for ornamental ginger.