Tired of pesky weeds ruining your garden? Plant living mulch instead!

Living mulch can help keep weeds out of your garden

Weeds are at best an annoying constant of gardening, and at worst, a potential plant killer. They provide shelter for pests like cutworms and slugs and steal precious nutrients away from your crops. You can pull them up by hand or with a hoe or spray chemicals all throughout your garden, but those methods have plenty of drawbacks of their own. Why not try a new method and plant living mulch? Not sure where to start? We have all the answers!
Difficulty

Easy

Duration

1 hour

What You Need

  • Seeds

  • Water

  • Pesticide

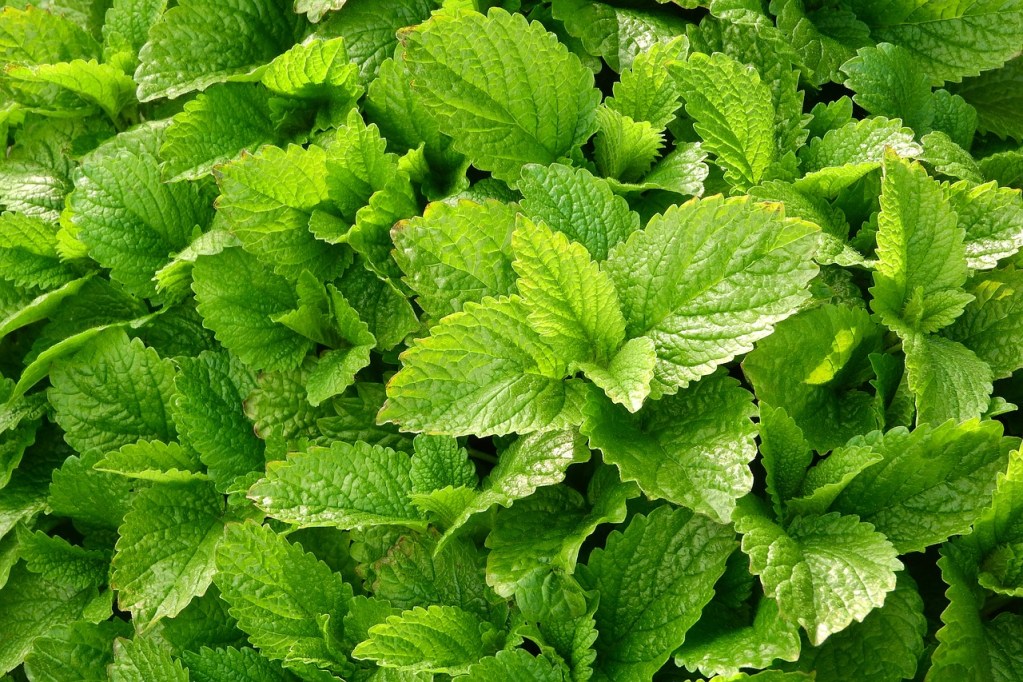
Lemon balm plants

What is living mulch?

Living mulch is a natural weed control method that uses small plants to block weeds from growing. Living mulch takes up the space that weeds need to grow and it shades the soil so light can’t reach the weeds' seeds.

Choosing the right plant is important, though. Your living mulch should be short and stay low to the ground to provide shelter to the soil. It also needs to be low maintenance, so it doesn’t take nutrients from your other plants. The most commonly used plants are herbs and cover crops.

Here’re some of the best plants to use:

  • Clover
  • Calendula
  • Lemon balm
  • Chamomile
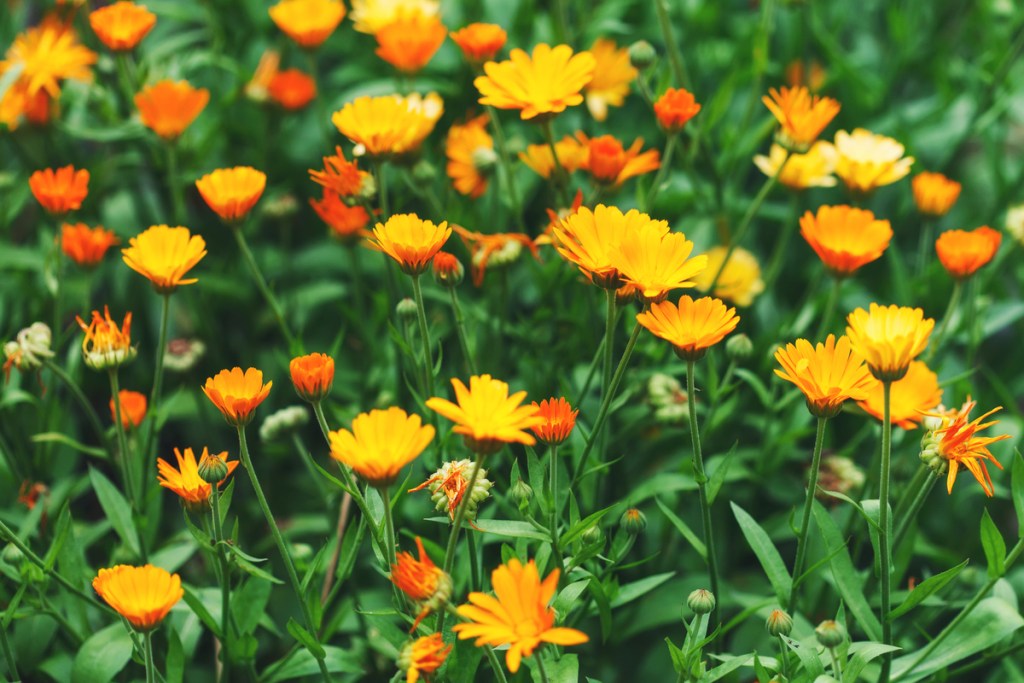
A patch of calendula flowers

What are the benefits and drawbacks of living mulch?

Living mulch has the same benefits as other mulch types, namely that it suppresses weeds and helps the soil retain water. However, you also get the benefits provided by the plants themselves! Many popular cover crops (such as clover, vetch, and alfalfa), add nitrogen to the soil. Other common living mulch plants can be harvested along with your fruits or vegetables, making this a great way to increase the number of plants you can grow in a limited space.

Keep in mind that no method is completely flawless. If the living mulch doesn’t entirely cover the ground or grows too tall, weeds can still pop up around or beneath it. Additionally, any extra greenery in your garden can provide shelter for pests, and that unfortunately includes living mulch. If you frequently have problems with cutworms, slugs, or other similar pests, you may want to use nonliving mulch.

Poor plant choice can cause other problems. Plants that grow slowly, use up resources, or spread uncontrollably aren’t suitable choices for living mulch. Plants that grow slowly leave the soil exposed for weeds to grow, while plants that spread and use too many resources can become weed-like themselves.

A field of crimson clover

How to grow living mulch

The plants used for living mulch are easy to grow. Here’s what to do:

Step 1: Choose a plant that's suitable for living mulch and for the season.

Along with the other requirements discussed earlier, it’s important to choose plants that are in season. Don’t pick a plant that hates the cold as your late fall living mulch.

Step 2: Plant your seeds.

You can plant living mulch at the same time as your other plants or after your other plants have already grown. For some of the commonly used living mulch plants, you can simply scatter the seeds over your soil, but others will need more careful planting and spacing.

Step 3: Water them in.

If you scatter the seeds instead of planting them, water the ground before laying the seeds for the best effect.

Step 4: Watch for weeds and pests.

Until your mulch is established, you’ll need to keep weeding and protect it from pests. Be careful not to pull up your mulch as it sprouts! If you've had issues with particular pests, you may want to take precautions. Whatever pesticide or pest control method you typically use should be fine.

Living mulch may not be the best method for every gardener, but it might be right for you! Why not give it a try and see for yourself? You can even use multiple different plants as living mulch at the same time, so feel free to mix and match plants to find the combination that works best for you.

Editors' Recommendations

Cayla Leonard
Cayla Leonard is a writer from North Carolina who is passionate about plants.  She enjoys reading and writing fiction and…
Blazing stars will fill your summer garden with color: A liatris care guide
Growing and caring for liatris
Tall purple liatris (blazing star) with butterflies

There are many wonderful plants you can add to your summer flower garden for stunning color, from tall and bright sunflowers to short and sweet zinnia. If you’re planning your garden now, you should definitely consider adding liatris, also called blazing star, to the mix! This tall, drought-tolerant, native perennial has stunning purple flowers. It’ll even attract butterflies. Here’s everything you need to know about planting and caring for liatris.
Planting liatris
You can plant liatris bulbs in the spring or fall, but you can transplant mature plants during any season. Choose a location with full sun and well-draining soil to plant your liatris in. Blazing stars can tolerate some light shade, but they won’t thrive unless they get at least 6 hours of sun each day. Spacing is important when planting liatris, as they can grow to 2 feet high and 1.5 feet wide. Plant your liatris bulbs 12 to 15 inches apart so they have plenty of space to grow.

In addition to having well-draining soil, it should also be average or poor. Many plants prefer soil that's rich with organic matter, but liatris has an unusual quirk! The flower stalks will sometimes bend or flop over if the soil is too rich.

Read more
Take advantage of hydrangeas’ color-changing quirk – how to get beautiful blue hydrangeas
Make your soil acidic to turn your hydrangeas a beautiful blue color
Hydrangeas with blue flowers

Hydrangeas are known for two things -- impressive, showy flowers and their tendency to change color based on the pH of the soil. This makes them highly appealing, but also unpredictable. If you don’t take the soil into account, your bright blue hydrangeas could turn out to be pink or purple instead. With careful planning, you can take advantage of this quirk to ensure your hydrangeas are the striking shade of blue you want them to be.
Getting started
First, check what variety of hydrangeas you have. Not all hydrangeas change color! Bigleaf hydrangeas, especially the mophead and lanceleaf cultivars, are the ones that change color. However, white hydrangeas of any variety will not change color.

Test the soil’s pH before you get started. This lets you know how much you’ll need to change it, or if you need to change it at all. If your soil pH is already between 5.5 and 4.5, it’s acidic enough to turn your hydrangeas blue.

Read more
Texas sage: This colorful shrub can withstand almost anything
Here are tips on caring for Texas sage
A black and blue butterfly on a Texas sage shrub

If you’re in need of a beautiful, hardy shrub that can withstand almost anything, then Texas sage is a great place to start. With silvery leaves and purple flowers that resemble true sage, this robust shrub looks amazing on its own or as part of a larger garden. If you want to add this lovely flowering shrub to your garden, then you’re in the right place. Here’s a simple care guide to help get you started.
Planting Texas sage
Texas sage is tolerant of poor soil, heat, and cold, so it’s typically not an issue to grow it outdoors. However, if you’re lacking in space or want to liven up your home, it can also grow in a container. In fact, its tolerance of poor soil makes it easier to grow in a container than many plants, as it doesn’t need fresh soil as often. A container that's around 12 inches in diameter is typically big enough for a Texas sage plant.

Whether indoors or out, you’ll need to make sure it has proper drainage. The most common problems with Texas sage come from overwatering or poor drainage, but you can avoid this by testing your soil’s drainage or choosing a container with drainage holes.

Read more