
When it comes to taking care of our houseplants, it’s easy to tunnel vision into bigger care requirements. Are their pots too small? Are they getting too much water? Not enough water? Do they need to be moved to a location with more or less sunlight? The main focus of keeping houseplants happy, especially when we’re stressed or overwhelmed, focuses largely on just keeping them alive. But there’s more beyond that. Caring and maintaining houseplants isn’t as simple as watering them regularly. Proper care helps ensure they live a long, happy life. Ahead, we’ll go over how to clean plant leaves to keep them lush and healthy.

Easy care can get overlooked
Although making sure your plants get enough light and water is important, there are other types of maintenance that need to be done in order to keep them living their healthiest and happiest lives. Keeping them clean and tidy helps ensure they grow strong (and look great). Unfortunately, these care steps can be overlooked—but they’re easy to do!
One of the best things you can do for your houseplant is give it a nice trim every now and then. You never want to trim off too much at once, as that can cause shock, but you should diligently remove dead, dying, or damaged foliage using sanitized shears or scissors. Never break off or pull leaves from the plant by hand. By trimming off unappealing growth, you not only help your plant look better but allow it to divert its energy to new and healthy growth.
You should also make sure to give the leaves a good dusting every couple of weeks. Like heaters and tables and the tops of fan blades, leaves on houseplants accumulate layers of dust over time. Cleaning them keeps them nice and spiffy, and actually improves the quality of the plant’s health.
Why you should dust your houseplants
Cleaning dust and build-up from the leaves of your houseplants may seem tedious (especially if your collection is large), but it’s an essential part of maintenance. Think of the leaves like windows. The more dirt and grime builds up on your window, the harder it is for sun to come through. When the dust on the leaves starts accumulating, it becomes increasingly difficult for your plants to absorb sunlight and photosynthesize. Without proper photosynthesis, the plant isn’t able to produce the food or energy needed to grow big and strong.
A well-dusted plant that can photosynthesize properly is healthier than a grime-covered one. And the healthier a plant is, the more resistant it is to diseases, pests, and other infections.

How often should the leaves be cleaned?
There’s no hard and fast rule for how frequently you should dust your houseplants, since it largely depends on how much is in the air. Dust accumulates faster in areas that have dirt roads or construction, for example. Those particles get blown in through vents or open windows or doors and can land on your plants; however, in areas with clean air and minimal amounts of wind, dust will build up at a more regular pace.
Checking on your plants regularly is a good way to determine when they need to be dusted (and you’ll be able to notice any changes in the leaves, pest infestations, or disease with weekly or daily examination). Gently rub your fingers on the leaves to look for dust or dirt. If you feel—or see!—a layer of dust, the leaves need cleaning.
Different methods for dusting
When it comes to dusting and cleaning your leaves, there’s no one right way to do it. Different plants can handle different cleaning methods, and you’re able to choose from ones that work best for you and your plants.
Misting with a spray bottle
Misting plants to clean them is best done with ones that are smaller or more delicate. (It would, frankly, take awhile to mist-clean leaves on a large monstera deliciosa.) Perfect candidates for misting include bonsai trees and small leafy plants. Just be careful not to mist too much, as leaves don’t like to be saturated with water. A proper misting appears as if there’s a light dew on the plants that will dry up easily.
Dunking in water
Plants that aren’t as delicate can be cleaned by dunking. For this method, you should hold the base of the plant where it meets the soil, turn it upside down into a bucket or tub of water, and gently swish the leaves around. Be sure to take proper precautions to keep the soil from falling out (no one likes to make a bigger mess while they’re trying to clean). You can water the plant beforehand so the soil sticks together more, or you can seal plastic wrap around the base of the plant to help contain it. Doing both at the same time will keep the process as clean as possible.
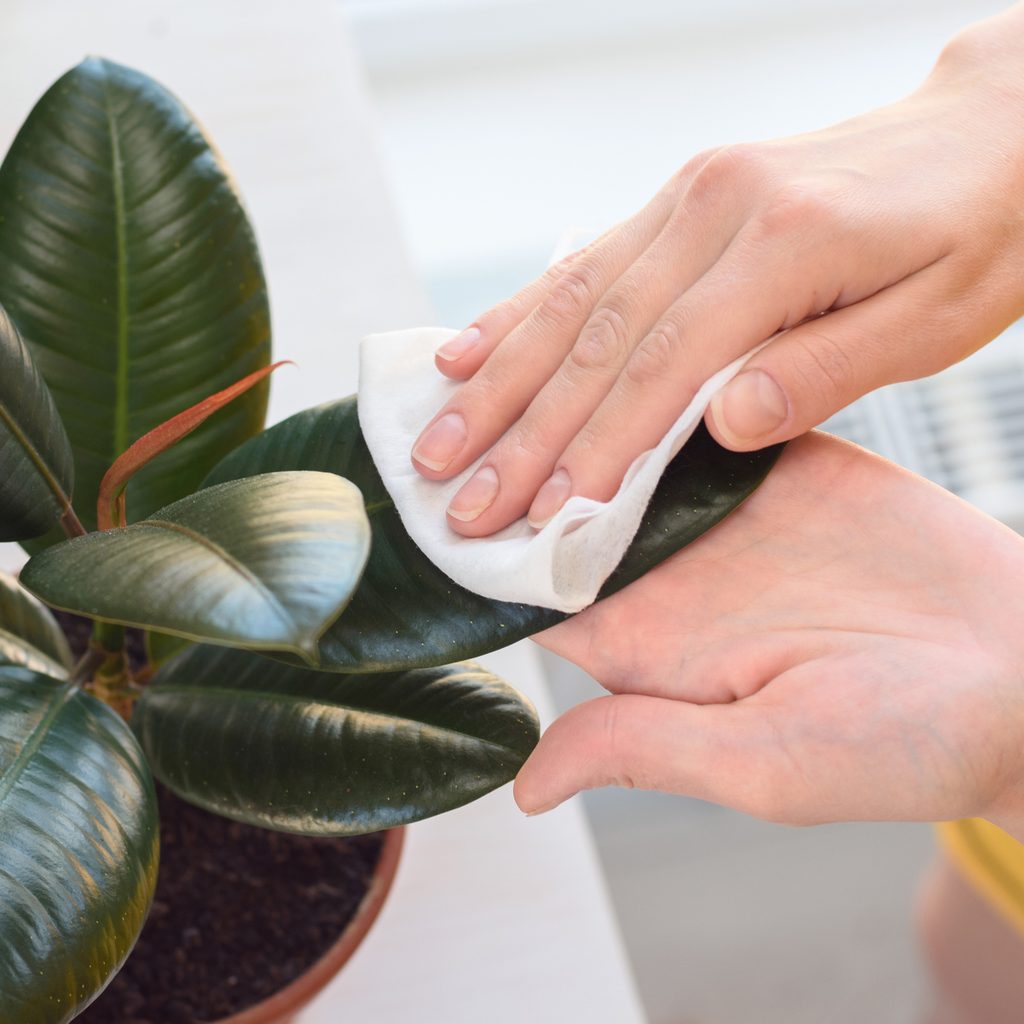
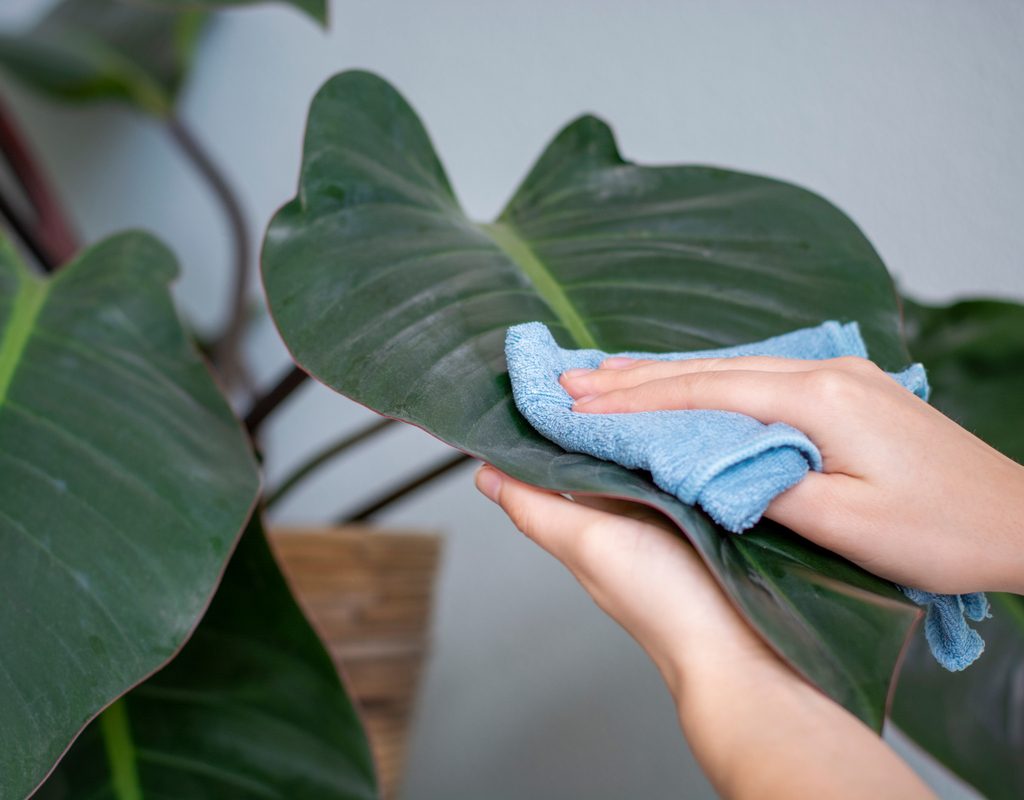
Wiping down with a cloth
The damp cloth method is best used on larger plants that can’t easily be moved (like that big monstera deliciosa we mentioned earlier) and plants that have a few big leaves. And it’s pretty straightforward: simply dampen a cloth and wipe down the leaves.
Softly brushing
Plants with sticky or fuzzy leaves (like the monkey tail cactus) can’t easily be cleaned with misting or dunking, and other plants (like African violets) can’t stand wet leaves at all. For these types of plants, you can use a mushroom brush or something similar to gently clean the dust from the leaves without having to expose them to water.
Once the dust build-up is gone, you can make cleaning the leaves a part of your weekly routine. For lighter layers of dust, you can gently clean them with a soft duster when you go to do your heaters, fan blades, and other surfaces. Not only will it keep your plants happy, but it will help maintain a clean environment for you, too!


