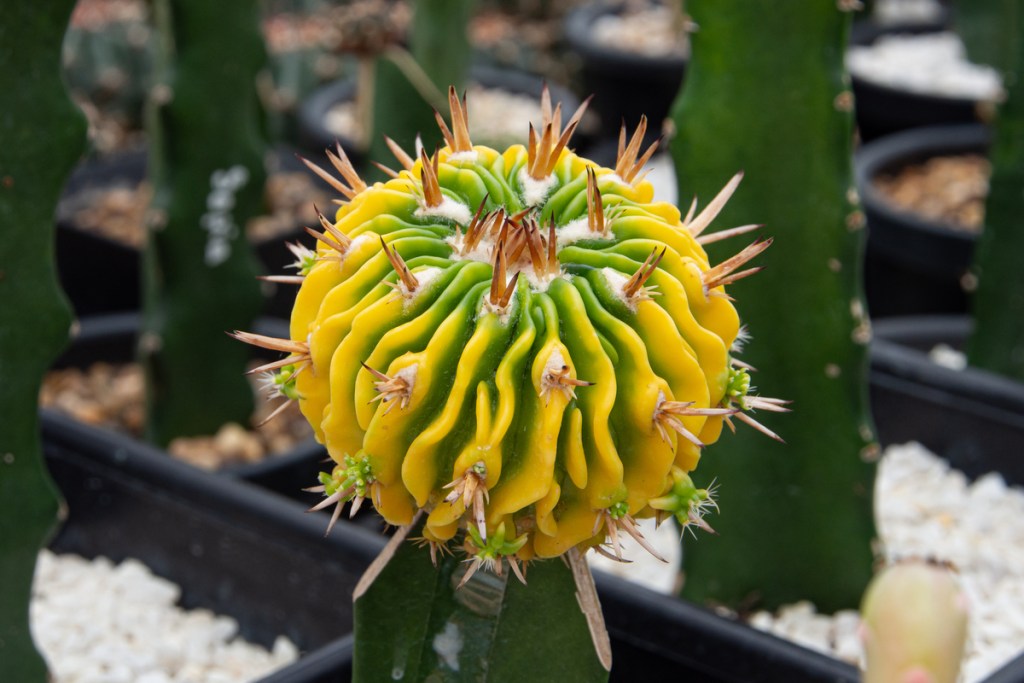
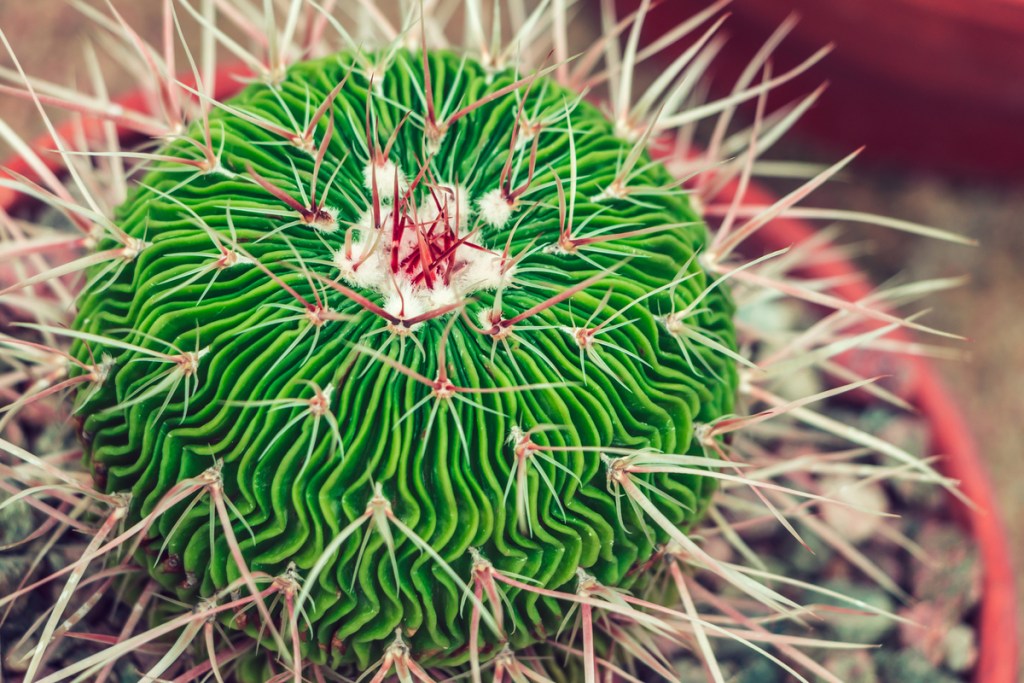
Whether or not you know the scientific name for the brain cactus (Stenocactus multicostatus), it’s probably already earned that nickname if you have it in your collection. The brain cactus has wavy ribbing that’s usually gray-green to dark green in color. Although the brain cacti are globular and small in size, each one can have a different pattern to the wavy ribbing, which makes every cactus unique. They’ve even got blooms that, at full size, can reach an inch in diameter. If you’re someone who doesn’t like having identical plants in their collection, this may be a good cactus to spring for! Plus, they aren’t all that difficult to care for, even for beginner gardeners.
Different varieties of brain cactus
Brain cacti are part of the Stenocactus genus, and although the multicostatus is a unique choice for your collection, there are few other Stenocactus species that also are colloquially referred to as “brain cactus”:
- Stenocactus coptonogonus. Has straight ribbing and white flowers with lavender stripes.
- Stenocactus crispatus. Has wavy ribbing, usually dark green in color, and pale purple flowers.
- Stenocactus phyllacanthus. Has wavy ribbing and small yellow flowers.
Caring for your brain cactus
Brain cactus care isn’t all that different from caring for other cacti varieties. They have similar water and light requirements and hate being overwatered just as much as any other cactus or succulent in your collection.
The Stenocactus multicostatus loves warm, dry environments (with low to moderate humidity) but is surprisingly cold-tolerant, able to survive in temperatures as low as 20 degrees Fahrenheit. Even so, unless you live in USDA hardiness zones 9 through 11, this plant shouldn’t be grown outside. If you accidentally leave it on an outdoor patio or balcony for a bit too long, it should be fine; however, too much exposure to cold temperatures — even the ones it can tolerate — will cause the brain cactus to die.
Light needs: At least six hours of full sun per day; can tolerate partial shade but won’t thrive as well or have many flowers
Water needs: Use the soak and dry method, allowing soil to dry out completely between watering; relatively drought-tolerant
Soil needs: Well-draining, sandy, rocky soil
Fertilizing your brain cactus
Brain cacti aren’t heavy feeders, but like all potted plants, it will need a bit of fertilization during the active growing season (spring through summer). Make sure to use a liquid fertilizer suited for cacti so that the brain cactus is getting exactly what it needs. Using a liquid fertilizer as opposed to a granular one will allow the plant quicker access to the nutrients. Once fall hits, your brain cactus will go dormant until next spring. Make sure to continue watering (on an adjusted schedule) but be sure not to fertilize.
Can they be propagated?
If you have a brain cactus in your collection and want more, you can propagate it! Because of their shape and structure, brain cacti can only be propagated by seed and not cuttings. Once the flower blooms and is spent, you should be able to harvest the seeds for planting. Plant them in a starter mix — typically in a shallow tray or in seed starts — and place them in a warm, sunny location. Keep the soil moist as they germinate. If the seeds are viable, you should start to see some growth in as little as two weeks.
How to successfully repot your brain cactus
When repotting any cactus, there are a few things you’ll need in your arsenal before starting: protective gloves, fresh soil, and the chosen container. If you have a gentle touch, you can also grab some tongs to help with the process.
Before starting, make sure you’re wearing your gloves. These should be nice and thick, ideally with a coating, so that the spines can’t easily get to your skin. For cacti with larger spines — or if you just want the added help — you can use the tongs for additional safety. As far as the container goes, you should choose one that at least has a drainage hole for excess water to go through. This is especially important because the best way to know when a cactus is ready for repotting is when the roots start to grow out the bottom.
To repot your brain cactus, first take it out of the current container, discard the old soil, and shake off as much excess dirt as you can. Fill a layer of fresh soil in the new pot, transplant the cactus into it, then fill the empty space with more of the new potting mix. If you have a container you love and it doesn’t have good drainage, you can always put in a small layer of pebbles or rocks in the bottom before the initial layer of soil.
The biggest problem to look out for? Root rot
Root rot will be your biggest enemy — but how do you identify it? If you suspect your brain cactus is suffering from root rot, you may notice that the soil is consistently soggy and not drying out as well as it used to, and maybe the cactus itself is becoming a bit squishy and having a hard time holding itself upright. You might even see spines start to fall off, too. If any of these physical symptoms show up, your cactus is — at the very least — being overwatered.
Not all excessive watering leads to root rot, but you should always inspect an overwatered cactus to know for sure. Take the cactus (safely) out of the container and discard the soggy soil. If you notice any of the roots are brown, black, or mushy, they’re rotting. Take a look and see if any of the root system is still white, which is an indicator that some are still healthy and able to be saved. If the entire system is brown and mushy, the plant is too far gone. Dispose of it properly to limit the risk of it becoming infested with pests or diseases that could spread to your other plants.
How to save a brain cactus with root rot
If you do happen to have some healthy roots left, not all is lost! Clean off the roots of the brain cactus under lightly running water, then take a pair of sterilized scissors or shears to remove all the mushy, damaged parts of the root system. If you’re cutting a root that’s partially healthy and partially rotting, make sure you do so right above the rotting part so that all of it is removed.
Once you’ve cleaned up the plant, you can repot it in a clean container using fresh potting mix. Hold off on watering for about a week to give your brain cactus time to settle, and be sure to re-sterilize the tool you used so that nothing spreads to your other plants.
All-in-all, caring for a brain cactus isn’t much different than any other cactus species. Just be mindful of how much you’re watering and feeding it, and you should be able to keep it happy with little to no trouble!
Editors' Recommendations
- How to care for philodendrons, a decorative indoor plant
- Jade plant care: A complete grower’s guide
- Elephant ear plant care guide: What you need to know
- Can you grow plants in water beads? Here’s what you need to know
- 5 easy indoor plants anyone can grow


