
Succulent arrangements can help add color and personality to your indoor or outdoor garden space with a little creativity. All it takes is a smidge of artistry to elevate your succulent display. Whether you're looking for a simple arrangement or something more elaborate, there's something for every gardener. Even if you don't have much experience with DIY projects, most of these projects are beginner friendly and easy to manage! So pick your favorite succulent plants and follow this guide on how to arrange succulents for a fun and simple project.
General tips for creating succulent arrangements
While each succulent project will look a little different, there are general preparation and maintenance tips for putting together a beautiful, healthy assortment.
- Getting started: The best succulent picks are rooted 2-inch mini succulents or cacti, which will likely fare better than cuttings. Along with your actual plants, you also want to use a vessel with a drainage hole and well-draining cactus soil to avoid drowning your plants.
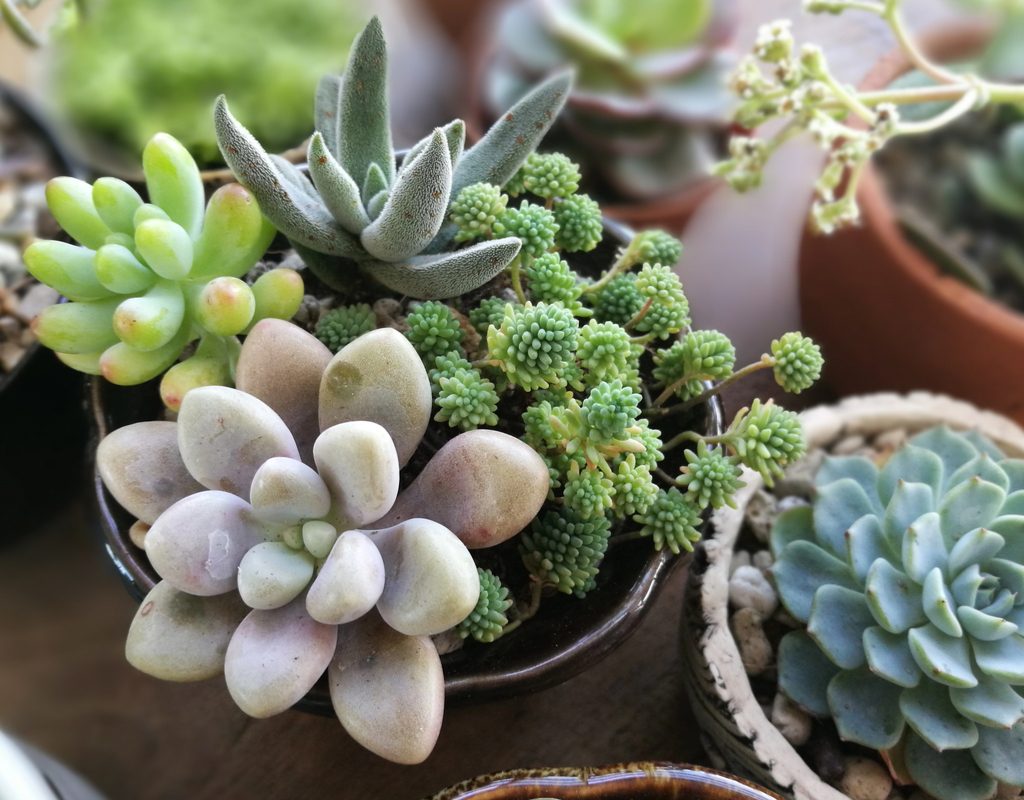
- Arranging your succulents: If you're wondering how to arrange succulents, having a variety of colors and sizes will come to your advantage. You want to keep bigger plants (think succulents and extra large echeverias) in the center while low-growing string succulents, sedums, and hens and chicks can go toward the outer part of your arrangement. Make sure to settle each plant in soil.
- Maintaining your succulent arrangement: Succulent arrangements are low maintenance, but this doesn’t mean zero maintenance. You want to keep up with watering your succulents — one of the best approaches is bottom watering for deep, even moisture. Fertilize monthly throughout the growing season. As your arrangement grows, prune back or remove plants as needed.

Tools you need for creating succulent arrangements
When it comes to helpful tools, there are items that may especially come in handy for compiling a succulent arrangement. If you’re working with sharp, spiky cacti, thick garden gloves are must-haves. To pack soil around your plants, a spoon is also helpful for adequately covering each root ball.
From time to time, your succulent arrangement will need maintenance. Brushes are great for removing unwanted soil on succulent leaves, and tweezers are perfect for plucking away desiccated leaves or debris in your soil. To control how much water each individual plant gets, you can also keep around a syringe for watering.

Arranging succulents in window boxes
Instead of flowers, why not fill window boxes with hardy succulents? This can be an attractive and tidy option if you have a big windowsill. Many window boxes come with drainage holes and attached saucers, which makes watering a breeze.
You can, of course, hang or display your window boxes underneath your windows outside as well. When it comes to material, wood and ceramic are common, but plastic is one of the easiest options to clean. For a cascading, tiered display, you can arrange multiple window boxes on stair risers.
Step 1: Fill a clean window box with succulent soil. Add extra gravel or pumice for circulation and drainage.
Step 2: Add your succulents, keeping large plants, such as aeoniums and echeverias, in the back, while layering trailing plants, such as burro's tails and string of pearls, in the front.
Step 3: Cover all roots with a succulent and cactus soil mix.
Step 4: Water your arrangement deeply.

Creating succulent bouquets
Succulent bouquets can be a fun addition to fancy events like weddings or galas, but you can compile them simply because you love beautifully arranged succulents. The most obvious choices for succulent bouquets are echeverias, greenovias, and aeoniums, which naturally have appealing floral forms.
Of course, you can also add a variety of other succulents to fill out spaces (think jelly bean succulents and jade plants in lieu of fern fronds and eucalyptus). To arrange your succulents, keep floral wire, garden tape, and ribbons handy.
Step 1: Pick out your floral succulents and cut back the stems.
Step 2: Insert floral wire in the remaining part of the stems and twist to secure the wire beneath the succulents. Repeat on as many succulents as you’d like to have in your bouquet.
Step 3: Gather the succulents attached to wires together and then wrap floral tape around all the wires.
Step 4: Cut off leftover wires and twist the ribbon around the taped-up stem.
Step 5: Place the bouquet in a vase if you desire.
Step 6: After your festivities, you can stick echeveria leaves in soil to repropagate them, if you wish.

Arranging succulents inside of shoes
Odd as it may sound, a succulent arrangement inside of a shoe can make for a charming fixture in your garden. Since succulents tend to have shallow roots, you won’t need to find a shoe that’s very deep.
With shoe planters, the most vital consideration is your shoe material. While the idea is to upcycle any old shoes you have lying around, nonporous, synthetic shoes work best — think rain boots, heels, and garden clogs. Even with a nonporous shoe, it’s still a good idea to use a plastic or coir liner. Use a well-draining cactus soil mix as well as gravel for good drainage.
Step 1: Pick out your favorite succulents.
Step 2: Clean your shoe of choice with soap and water.
Step 3: Paint, decorate, or seal your shoe as you see fit.
Step 4: Add a liner made of coir or plastic to the inside of your shoe.
Step 5: Fill the interior with cactus soil, adding gravel to the bottom of your mix, especially if you don’t have any drainage holes.
Step 6: Add your succulents, covering their root balls with soil.

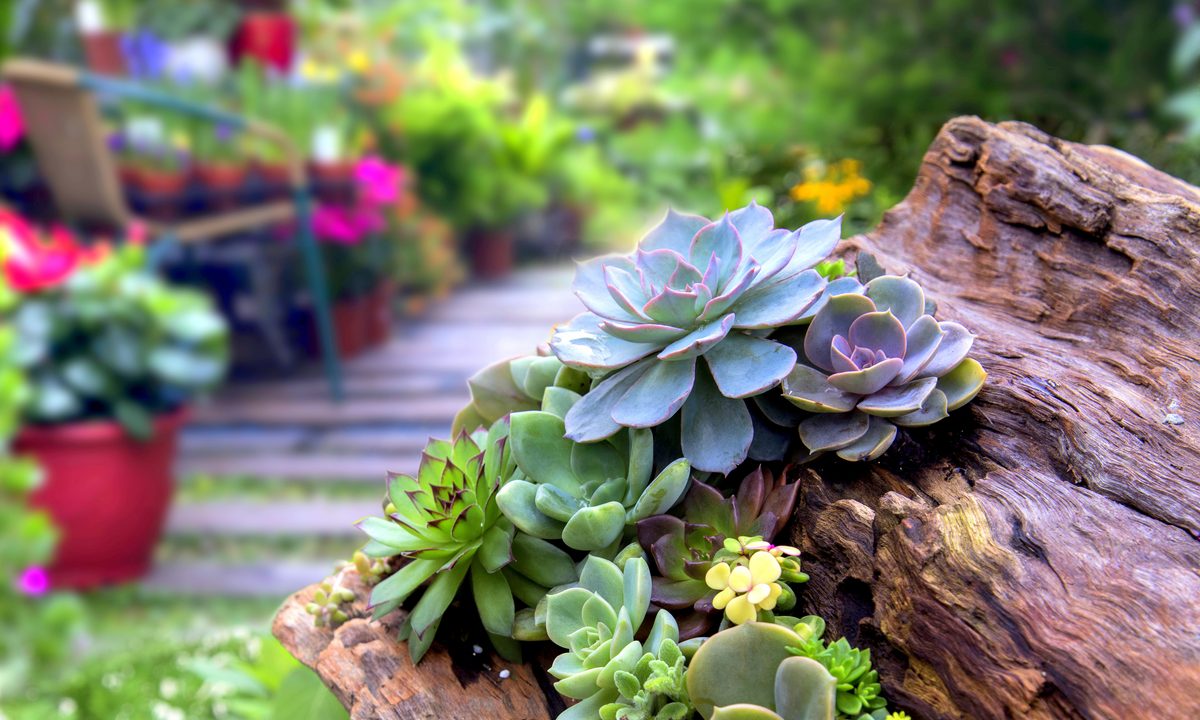
Furnishing logs with succulents
Log planters have become increasingly popular in the gardening community. While turning logs into succulent containers can be an involved process, it’s well worth the effort for the final result. With this piece, it’s best to keep your succulents outdoors for easy cleaning and maintenance.
Step 1: Pick out a log with an incurve or hollowed-out interior. If you can’t find a log or stump like this, you may need to saw out a hole yourself.
Step 2: Drill in small drainage holes throughout your log — if you don’t do this, make sure you add extra drainage to your soil (with gravel or terracotta bits) carefully.
Step 3: Add a layer of cactus soil inside your log.
Step 4: Situate your succulents as you desire.
Step 5: For a woodsy touch, fill in the spaces between your succulents with moss.
Step 6: Water enough to saturate your roots. Don’t water again until the soil dries out.

Repurposing old furniture
This project is a bit bigger, but it is manageable if you break it into stages and do a little at a time. Firstly, you'll need some old furniture to repurpose. While you can use new furniture if you want, it isn't exactly cost effective. Furniture that is worn down but still sturdy is ideal. Chairs that have lost cushions or tables that have strong legs but have some weather damage are great examples.
Next, decide where your plants will sit. In the example of a chair missing its cushion, positioning the plants where the cushion used to sit is a great idea. In some cases, you may be able to set or suspend a planter in the furniture, rather than planting the succulents directly into the furniture. If the plants need to be planted directly in the furniture, be sure to provide support for the plants and plenty of soil. Over time, the roots of the plants can break down weak furniture, so adding a protective layer between the furniture and the soil can be helpful. Just remember to leave holes for drainage!
With these succulent arrangement ideas in mind, go forth and create your own drought-tolerant garden masterpiece. With a few small tools, a bevy of succulents, and cactus soil, you'll be well on your way to a lovely succulent arrangement. And with patience and diligent upkeep, you'll be able to maintain your work of art for a long time.


