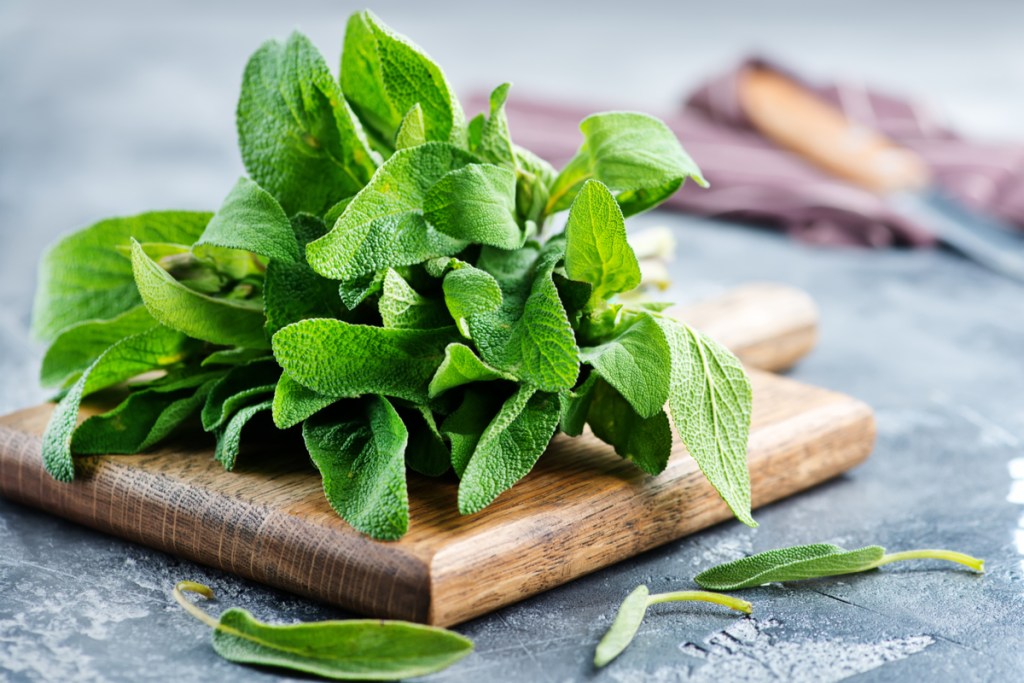
Sage is a fresh, dried, or ground herb that’s most often thought of for seasoning a roast turkey or chicken. But did you know that its earthy flavors work well with a large variety of dishes? It’s great for enhancing any autumn dish and when grown at home can bring a bit of freshness. Sage can be grown outdoors in USDA hardiness zones 5 through 9; however, if you’re growing in an indoor herb garden, you don’t need to worry about where you are! As long as your indoor environment can meet the needs of the sage plant, you’ll have an easy time growing a luscious, beautiful herb.

Why grow sage at home?
One of, if not the best, reason to grow sage right in your home is that you can have fresh sprigs of the herb whenever you want. If you find yourself using sage in a lot of recipes and hate how expensive herbs are at the store, growing some in an indoor herb garden is a cost-effective, convenient, and fun solution. Plus, the flavor of sage is stronger in newer leaves as opposed to older ones, so don’t be afraid to harvest!
“But what about the ground and dried sage at the store? What if I don’t always want fresh sage for a dish?” Well, that’s easy! Drying sage at home is simple to do, and you can ground up some of your own too. The only reason not to grow sage indoors is if your home can’t accommodate plants or if you don’t have the time to invest in the care.
What kinds of recipes can you use sage in?
Sage is a great herb for autumn and winter recipes where its pleasant earthy flavor can enhance and complement a hearty dish. Think things like stuffing, sausage, and roasted poultry (turkey especially!), along with comforting soups and creamy pastas. Here are two good recipes to get you started:
- Squash and sage pierogi. The sage adds a perfect earthy flavor to the sweetness of the butternut squash, and it’s fairly easy to make! Check out the full recipe.
- Sage and ham pumpkin soup. Because sage melds perfectly with other fall flavors, you can’t go wrong with topping off a comforting pumpkin soup with some sage grown right in your kitchen. Check out the full recipe.
Planting sage in your indoor herb garden
Because sage plants are one of the easiest herbs to grow, they’re great options for indoor herb gardens or even growing in their own container. Sage plants last for around three to four years before needing to be replaced with a fresh plant for maximum flavor. Regular harvesting and pruning can help your sage stay in tip-top shape.
Sage plants can be grown from seed, layering, or an established plant bought from a local nursery. If you don’t have much experience growing from seed or rooting cuttings, it may be best to purchase a plant that’s already done a bit of growing. That way you can simply bring it home, transplant it into its container, and not have to worry about whether or not the roots won’t form or the seeds won’t sprout. Buying a plant from a nursery is the quickest and easiest way to get an established plant.
If you decide to grow from seed, make sure to plant them immediately. Sage seeds don’t store well, and are in fact the least-reliable form of propagating and growing due to their slow germination. Layering (the process of propagating where the new plant is still partially attached to the parent plant) is perhaps an easier method, though you’ll need to have an existing plant or know someone with a sage plant who can do this method.

Growing your own sage plants
Although there are a few varieties of sage that have more interesting colors (like gold and purple), the easiest one to grow is common sage. Common sage is the one most often used in cooking and grown in gardens simply because it’s much hardier than its attractive counterparts.
No matter which variety you’re growing, sage plants prefer a warm location but will not thank you for subjecting them to extreme heat. Indoors, it’s best to grow them out of direct sunlight in a windowsill or on a plant stand that still gets bright lighting. You may find yourself needing to feed your sage once or twice during the growing season. Remember that indoor plants need more fertilization than outdoor plants due to the limited nutrients in the pot; however, too much fertilizer can have adverse effects on the roots and the plant.
Light needs: Bright, indirect lighting when grown indoors
Soil needs: Moist, well-draining soil; doesn’t like to have soggy roots
Water needs: Drought tolerant; water only when soil starts to dry out
How to harvest sage
Sage plants grown from seed or from layering should be left alone to grow for a year so that the root system can get established. Once the second year rolls around, you can start harvesting and pruning your sage as-needed. When bringing home an established plant from the nursery, you should only need to give it a week or two to get settled before you start harvesting so that you don’t over stress the plant. Although they’re at their best flavor-wise prior to flowering, you can harvest your sage leaves at any time.
You should also make sure to prune your sage plant once a year during the springtime. This helps it continue growing as strong and healthy as possible while promoting fuller growth. Pruning in the fall or winter can damage new growth, so take care to only remove any dead or dying growth.
To harvest sage for drying, make sure the stems are six to eight inches long and cut just above a growth node. If you’re going to use the plant fresh, simply take off the leaves.
With luck, growing your own sage plant will turn into a bountiful harvest! You can use the herb fresh in cooking or harvest leaves to dry out for preservation and later use. Herbs are one of the most fun things an indoor gardener can grow because of their versatility, beauty, and wondrous aromas.


