
Designing your poolside landscape? Avoid these plants

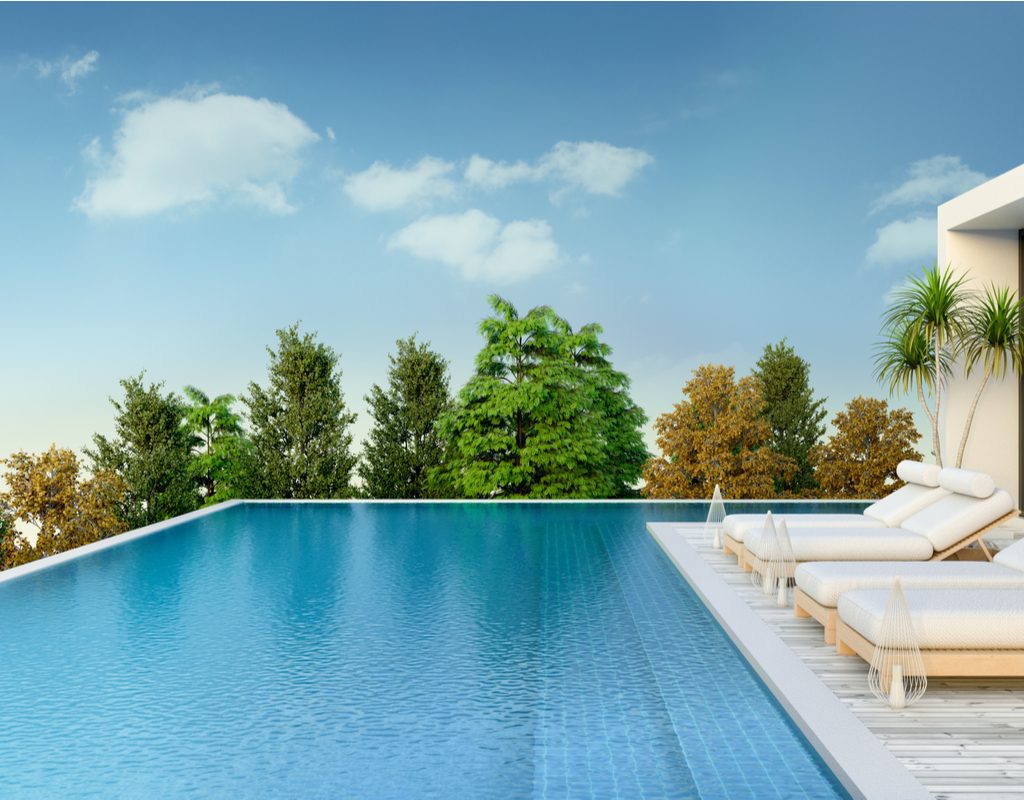
Pools are absolute amazing spaces to have during the warmer months, especially if you live in sunnier climates. Of course you’ll want a deck, and probably a privacy fence if you have close neighbors. But what about plants? As we know from growing indoors, plants have the ability to enhance and brighten a space—and the same applies for outdoor landscapes. However, not every plant is suited to being near a pool. Let’s go over how plants can elevate the landscape around your pool and which plants you should avoid.

A beautiful outdoor pool lounge area
Image used with permission by copyright holder

How landscape design enhances your pool

When planning out what kind of pool you want, you should consider how you want the landscape around it to look. This includes the deck, seating, plants, and more. If you don’t plan it out simultaneously, you may not end up having space for everything you want to include. Landscape design is essential to the atmosphere of the space and allows you to express your personal style while creating an area family and guests love to spend time in.

When it comes to plants, one of the best ways you can incorporate them is in containers. Potted plants can be moved as-needed and placed in areas (like on concrete or stone) where they wouldn’t otherwise grow; this way, too, they can be used as a perimeter. You can control how much they grow with trimming and pruning, and you won’t have to worry about them taking over. There are other ways you can include plants in your landscape design, but you should be wary of which ones you choose and where you put them.

The best way to incorporate plants

Potted plants add visual interest to your pool area and can easily complement the theme. If you want your pool to feel more beachy and you live in an appropriate climate, you can use tropical plants like palms to enhance the feeling of being oceanside. They add color and variation, and the containers they’re in keep the dirt and soil mess from making its way into the pool.

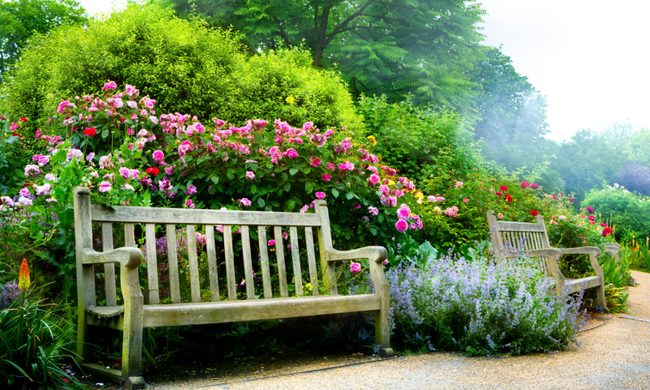
Other container plants, like florals, also work well to fill in a concrete area or to designate a perimeter for the pool. If you have a privacy fence, you can place potted plants on the inside so that, from the pool or deck area, you see beautiful greenery instead of drab fencing. Even something as simple as a small patch of grass the kids can play in (because pool rules say no running on the deck or concrete!) can make the outdoor area feel more dynamic.

An example of a pool with trees, which you should avoid
Image used with permission by copyright holder

Plants to shy away from

Not every plant is suited for a pool area, usually because of the debris that can fall onto the deck, into the water, and get caught in the filter or throw off the pH balance. Plants also invite a variety of pests and some, like cacti if you’re in an area where they can be grown outside, are unsafe for swimming areas. Here are some general plants you’ll want to avoid in your pool landscaping.

Most kinds of trees

Trees should be avoided for a few reasons, most notably the debris they produce. When the leaves or bark or sticks (or even branches) fall down, they could land in your pool or filter. A mature tree is especially more likely to wreak havoc on a pool, so you should consider that when you’re planning out where to install it in the first place.

Other issues that come with trees planted by pools include sap, animal feces, unwanted animal presence (birds and squirrels become at-risk of falling and drowning, and you’ll be left to clean them out), and shade. Some shade is nice to give a break from the sun, but if you’re interested in sunbathing or using a solar cover to heat your pool with sunlight, too many trees won’t help.

An alternative, pool-friendly option: That doesn’t mean you can’t have them at all. Smaller varieties of trees can be planted in containers and used around the perimeter, and you can even plant some in the ground on the outside of your fence to increase privacy and seclusion.

Azaleas

Azaleas and other flowering (or non-flowering) bushes and shrubs should unfortunately be avoided, too, unless they’re in containers. The biggest problems these plants pose are leaf and flower drop. The debris can be cleaned up if you get to it, but otherwise it has the potential to clog your filter and throw off the balance of your pool.

Deciduous azaleas drop their leaves in the fall, sometimes earlier in drier climates. If your pool is closed when the leaves start to shed, it may not be a big deal; however, you’ll have to manage spring clean-up, and it may be best to avoid these plants altogether unless you’re keeping them at the perimeter.

An alternative, pool-friendly option: If you’re set on having flowers poolside, you can either put these in containers or opt for flowers like black-eyed Susans, which often don’t start to have leaf or flower drop until the pool is closed for the season.

There are plenty of plants, such as ornamental grasses, that can beautify the area without posing problems to the overall balance of the water and safety of the space. Do some research to see what plants will survive outdoors in your climate, then decide whether they’re better suited for containers, perimeters, or shouldn’t be grown poolside at all.

Editors' Recommendations

Kiera Baron
Former Digital Trends Contributor
Kiera Baron is a freelance writer and editor, as well as a budding digital artist, based in Upstate NY. She is currently one…
The 5 best outdoor floodlights for your yard
Outdoor home security light

If you’re someone who thinks about safety and who wants your home lit up in the dark, you've probably considered investing in floodlights for the outside of your home. Not only do floodlights accentuate a building’s architectural design, but they can also help deter criminal activity and keep you safe while walking to your car or going in your yard at night.

However, as great as floodlights are, the market is saturated, and it can be difficult to whittle down which type of floodlight is right for you, especially since there's so much to consider when purchasing. That's where we come in.

Read more
A complete guide to cleaning your greenhouse for beginners
greenhouse

When you first installed your greenhouse, it probably looked like a glittery glass castle for your lovely plants to grow and live in. However, weather, soil spills, and birds have made their mark on your greenhouse over time and now it's probably looking cloudy and nasty. So how do you clean a greenhouse?
Why worry about a clean greenhouse?
You may be wondering if you even need to worry about cleaning your greenhouse. If you don't mind the dirty look, maybe you could leave it as it is? Unfortunately, it's much better for your greenhouse and your plants if you give the greenhouse a deep clean at least once a year. It'll make it easier to use when it is clean and organized, and the walls of the greenhouse need to be clear so they can let in as much light as possible. Additionally, a clean greenhouse is less likely to spread pests and diseases to your precious plants. And lastly, things last longer when you care for them and greenhouses aren't cheap.

When should you clean a greenhouse?
There's no right time to clean a greenhouse; whenever you can is better than not at all. However, we suggest cleaning it when there isn't so much to do in the garden and it isn't so hot out. Usually, the fall is when the garden chores slow down and it starts to cool out, making cleaning the greenhouse much easier on you.
What is the best way to clean a greenhouse?
You can use whatever cleaning method works for you, but here is our step-by-step process that we recommend.
Step one: Empty the space
Of course, we know you can only empty a greenhouse so much if you have tender plants that need to stay warm. But as much as you can, take out the tools, buckets, and bags of soil. It will be much easier on you if you don't have to fuss with items in your way as you clean the walls and floors. This also allows you to go through what you have and declutter if necessary.
Step two: Rough dusting
Over the season, spiders and bugs and maybe even some mice have tried to make homes in your greenhouse. This has probably led to a few cobwebs and dust piles around the corners. You'll want to remove these large areas of debris before you start the deep cleaning. Use a broom to knock down the cobwebs and sweep up the floor; you've probably spilled some soil during the summer!
Step three: Clean the walls
The panels of your greenhouse will now need to be deep cleaned. You can use a bucket of warm water and a sponge to wipe them down, but we also recommend bringing a long-handled brush to make life easier. This way, you can dip the brush into the bucket of soapy water and scrub down the walls with the long-handled brush. You'll be able to reach every inch of the walls without killing your back.

Read more
When and how to transplant tomato plants for the best results
baby tomato plants

There's a time in every gardener's life when they try to grow their own veggie plants from seed. This is a gratifying process, and there are many benefits to growing your own seed starts. One of those benefits is bigger and healthier plants. By growing your own baby tomato plants, you can ensure that the plants are well cared for, never given anything you don't want them to have, and transplanted in just the right way at just the right time for optimal plant health. So how do you transplant tomato plants to ensure they're happy and healthy and live to produce lots of yummy tomatoes for your home?

How do you transplant a grown tomato plant?
If you've never transplanted tomatoes before, the idea can be intimidating. You have all these tiny plants that you've cared for over the last several weeks, and now it's time to pluck them out of their nursery pots and plop them into the outside soil where they're exposed to sun, weather, and critters. Luckily, you've cared for them so well that they're healthy and robust plants that will be able to handle anything nature throws at them.
Step one: Harden the plants
Hardening the plants is a term gardeners use when talking about the process of acclimating a greenhouse-grown plant to outside conditions. Typically it refers to sunlight, but it could also refer to wind and other weather that could harm the plant. About a week before you're ready to transplant, you'll want to harden your baby tomato plants by exposing them to sunlight at increasing increments each day. For example, day one should be about 30 minutes, then 45, then 50, and so on until the day of transplanting. If you don't do this, you'll risk your plant being burnt and killed when you transplant it outside.
Step two: Don't water the plants
Before you start pulling little plants out of their pots, you mustn't water the plants a few days before transplanting. Wet soil can make the transplanting process much harder on you and the plant. Dry soil falls away easier and is less likely to break off roots as you move the plants to their new home.
Step three: Prepare the new soil
The new location for your tomato plants will need to be prepped before you get all those babies out of their homes. Whether you are planting into the ground, a raised bed, or a pot, you'll want to amend the soil to guarantee that the plant has many nutrients to soak up. It also is easier if you dampen the soil right before transplanting. Damp soil is much more manageable and more easily manipulated around the plant.
Step four: Plant deeply
As you gently pull out the baby tomato plants, you'll want to shake off the old soil to expose the roots. This will ensure the plant has access to the new soil and nutrients you're about to provide it with. 

Read more