
Gardeners are nearly always waging war on garden pests that eat plants and ruin gardens. There are a lot of different methods you can use to fight this battle, from sprays to insect netting. Sticky bug traps are a great way to keep pesky garden pests out of your garden, especially if the pests you’re dealing with are small and hard to catch with other methods. You can buy these traps, of course, but you can also make them at home. Here’s your simple, step-by-step guide to making these useful tools for yourself.
Supplies
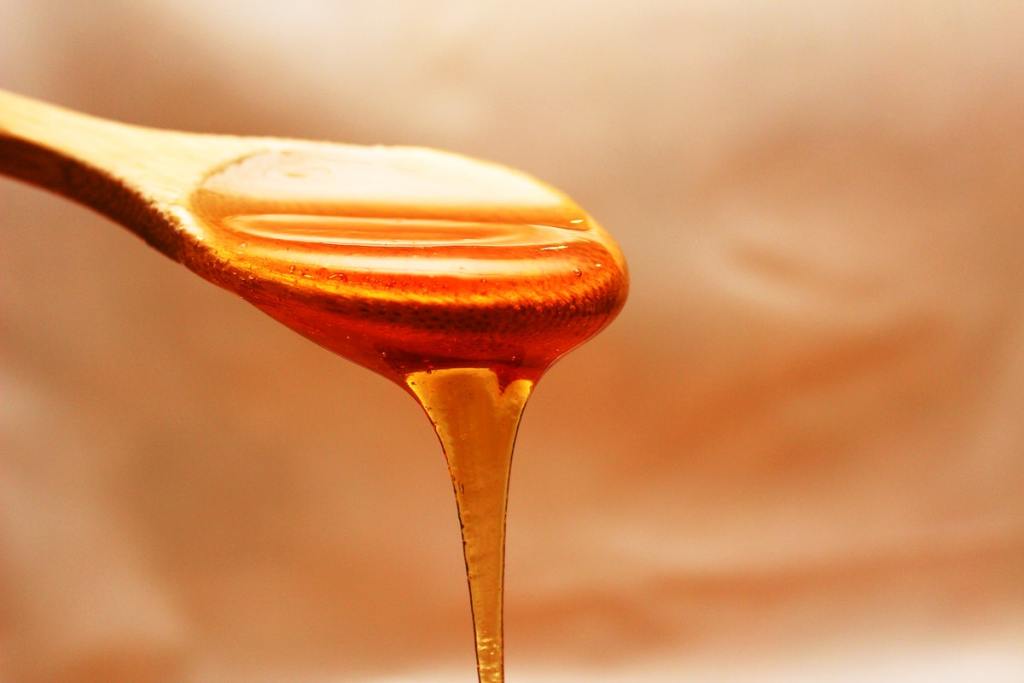
The first thing you need is something sticky. Anything will work, as long as it will stay sticky for some length of time. Honey works very well, but be warned that things other than the target pests may be attracted to it, too. There are also non-drying glues and Vaseline or similar gels, both of which will work fine.
The second item is something firm enough that your sticky substance of choice won’t soak into it. Flat or relatively flat objects work best to keep the sticky substance from sliding off. You could use an old phone case, plate, box, or flip flop — literally any firm, flat object will work.
An optional third item is gloves. Some people are just fine with getting their hands a little dirty, but if having sticky hands bothers you, then you will almost certainly want gloves. Additionally, you may want to have some old newspapers or a drop cloth handy to keep your sticky substance off the floor, porch, or ground where you’re working.
Building your trap
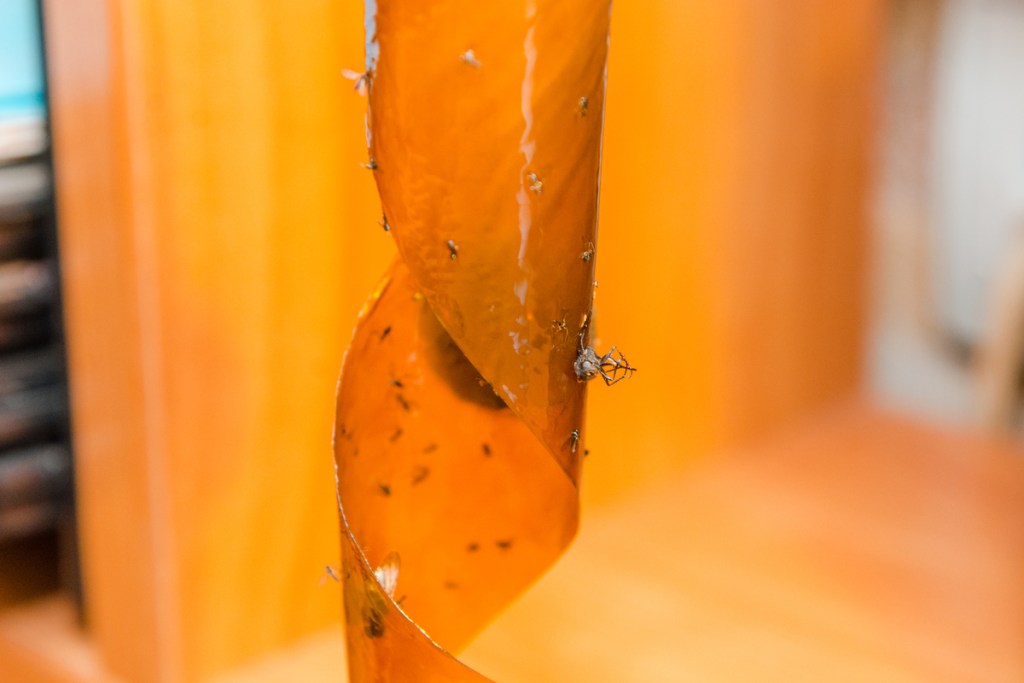
Put on your gloves and spread out your drop cloth, because it’s time to get crafting! There is only one real step to this process, but there are several ways you can go about it. Apply the sticky substance to the yellow object or objects. If the object has one side that’s yellow and one side that isn’t, be sure you’re applying the substance to the yellow side.
Depending on the substance and the object you’ve chosen, you have a few options. You can apply the substance using a butter knife or similar tool. This is the most generally effective, and it allows for the greatest control. You can also pour the substance onto the object, which is a great option if you’re using honey, which may be in a bottle that doesn’t have a wide enough opening for a butter knife. You can also dip the object into the substance, which is the fastest way to coat it but has the least amount of control.

The best places to set your traps
The best place to set your trap is under your plant. This allows the trap to catch pests as they approach, if they fall off the plant, or if they land on the trap, attracted by the color or scent. If you have multiple plants, be sure to place your traps between them. Spread your traps out slightly, if you can, so they cover more ground and have a higher likelihood of catching as many pests as possible. You can even hang them above or next to your plants to catch flying pests.
Can you reuse traps?
Most of the time, yes, you can reuse your traps! Simply collect them, wash them off, reapply the sticky substance, and set them back out. You may want to use an old rag or a sponge that won’t be used again to wipe them down, rather than washing them in the sink, in case any of the pests have survived the traps.
Depending on the object you used as the base of your trap, you may not be able to reuse them, or you may only be able to reuse them a limited number of times. For example, a paint sample card or other similar piece of yellow cardstock may not be able to withstand multiple uses. This is especially true if they’ve been exposed to harsh weather. In that case, your best option is to dispose of the trap and make a new one.
Sticky bug traps are a great way to reduce the number of pests in your garden, and they’re so easy to make! Now that you know this simple process, you can make as many traps as you need to keep your plants safe. As long as you have something yellow and something sticky, you can make a sticky bug trap of any size or shape for houseplants or outdoor gardens.
Editors' Recommendations
- Hardening off your seedlings as you bring them outside is crucial – here’s how to do it
- How to grow lavender from seed to keep your garden and your home smelling fresh
- How and when do bananas reproduce? We have answers to all your questions
- How to make plant food that’s better than store-bought
- How much sunlight should your succulents have?


