If you’ve ever dreamed of having a beautiful rose garden overflowing with flowers of every color, then you’ll need to know how to prune rose bushes. Aside from planting them in the right soil and making sure they have enough water, pruning is one of the most important steps in caring for roses. Many plants need pruning, but it can seem intimidating if you’ve never done it before. In this simple guide to pruning roses, we’ll walk you through the process and ease some of the pruning panic you may be feeling!
The tools you’ll need
There are only a couple of things you’ll need to get started. Since the vast majority of roses have thorns, you’ll need protection for your hands and arms. Gardening gloves are the best option for keeping your hands safe. For your arms, choose a shirt or jacket with long sleeves. Make sure the material is thick enough to keep thorns out or wear multiple layers. However, these may not be necessary for small rose bushes.
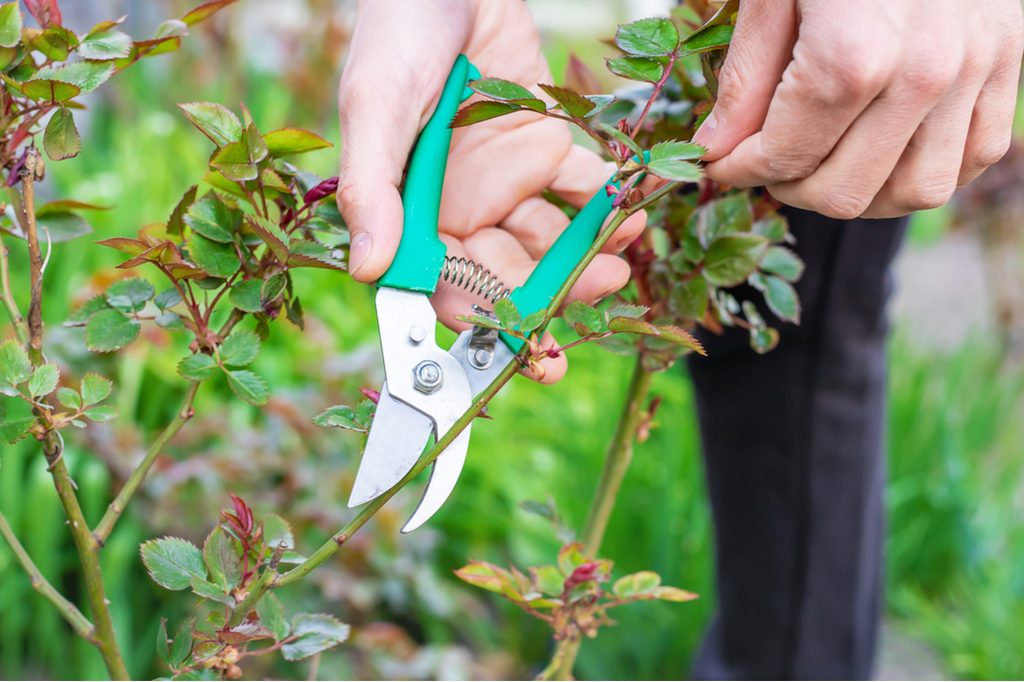
For the pruning itself, you’ll need a pair of bypass garden shears or scissors, depending on how thick the branches of your rose bush are. Make sure they’re sharp and clean. Dull blades are more likely to slip, increasing the risk of accidental injuries. They also tend to crush branches rather than cut them, which makes infections more likely. Dirty or rusty blades also carry a risk of infecting the branch.
Bypass shears are shears where the blades overlap and they’re often, although not always, curved. The other type of garden shears are called anvils, which have a blade on top and an anvil below. Bypass shears provide a clean cut, while anvil shears partially crush the branch.
When to prune your roses

Most roses can be pruned in early spring or late fall to winter. For fall or winter pruning, wait until after the first hard frost of the year to ensure that the plant is dormant. Pruning too early in the fall can cause the bush to send out new growth which likely won’t survive the winter, leading to a sickly or vulnerable plant. For spring pruning, you can wait until you begin to see leaf buds, which are a sign that it’s coming out of dormancy. Or you can prune after the last frost.
Some roses are a little different. Once-blooming rose varieties should be pruned after they bloom, rather than before. Once-blooming roses, also called once-flowering roses, are roses that only bloom once a year, as opposed to repeat bloomers or continuous bloomers. Once-blooming roses typically bloom in mid to late spring, but this can vary.
Selecting branches to prune

Branches that are diseased or damaged should always be pruned as soon as you notice them. This keeps any infection from spreading and speeds up recovery time. Additionally, check for branches that are touching or crossing, and prune one or both branches. When these branches shift in the wind, they rub against each other which causes abrasions. These abrasions can become infected, leading to larger problems.
In fall or winter, it’s best to keep pruning light. Look for branches that were killed by the first frost and branches that are long and thin. Pruning these branches keeps them from breaking and potentially damaging other branches during winter.
In spring, begin by pruning any dead branches. Start at the base of the bush, then work your way up to smaller limbs. Cut off any thin or scraggly branches, as these are weak and typically don’t produce many flowers. If it’s thicker than a pencil, then it can stay. Then prune new growth, so that the bush stays the size and shape you desire.
Making the cut
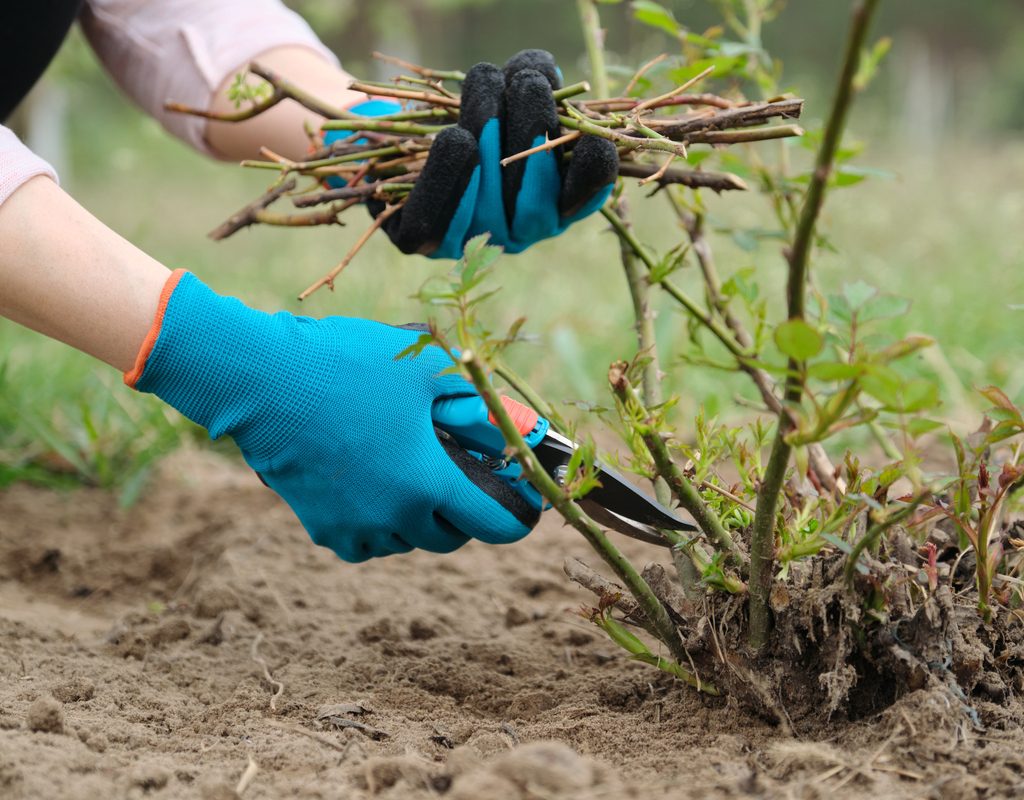
Once you’ve found the branch to prune, it’s time to cut. If the branch is thin, fully dead, or diseased, remove it entirely from your rose bush. Wash your shears after cutting diseased wood to prevent spreading the infection.
For partially dead, damaged, or new branches, find a leaf bud that is facing outward. Cut the branch roughly a quarter-inch to half an inch above the bud. The cut should be about 45 degrees, but it doesn’t need to be exact. It just needs to be a gentle slope. If it’s too steep or straight across, the branch will have trouble growing. Once you’re done, clear the fallen branches and leaves from around the bush.
Deadheading roses

Don’t forget to deadhead spend blooms, either. If you want steady flower growth throughout spring and summer, you should cut blooms from repeat bloomers once they start to fade. This encourages your rose bush to put more energy into producing new flowers rather than rose hips. Moreover, deadheading will keep your landscape looking as immaculate as it can be.
It’s really easy to deadhead: With clean, sharp shears, cut down to any part of a branch with five leaflets, or, if you’re feeling more conservative, just above the first set of healthy leaves. You’ll most likely be deadheading the most during summer, when roses flower prolifically.
Now you know everything you need to in order to properly prune your roses. Once you’ve gone through the process a couple of times you’ll get a feel for how your particular rose bush grows and it will become just another part of your routine care. Until then, this guide can help you determine which branches need to go and when.