The fiddle-leaf fig is a wildly popular houseplant, beloved for its glossy leaves. Keeping your fiddle-leaf fig in perfect condition can be tricky, and it can be devastating to see their glossy leaves damaged. However, with patience and the proper care instructions, even beginners can grow fiddle-leaf figs. Here is everything you need to know about fiddle-leaf fig care, including tips on how to troubleshoot common issues.
What is the fiddle-leaf fig?
Native to Western Africa, the fiddle-leaf fig starts its life in the branches of a host tree, then eventually sends its roots down to the soil and strangles the host tree to death. What a lovely plant!
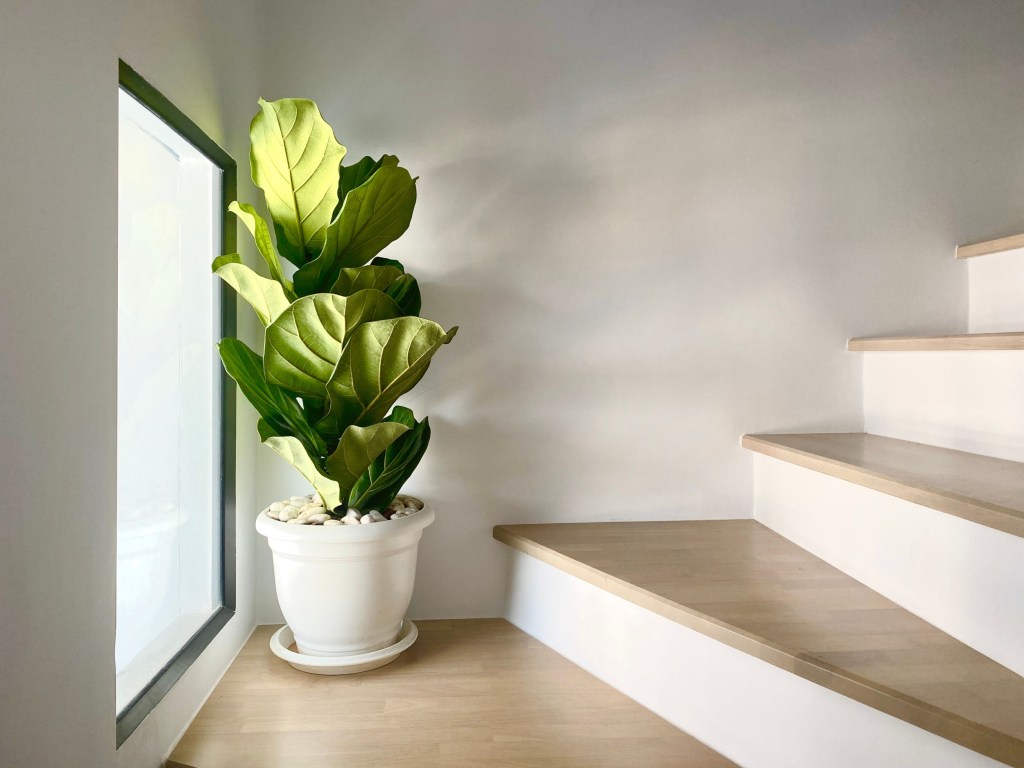
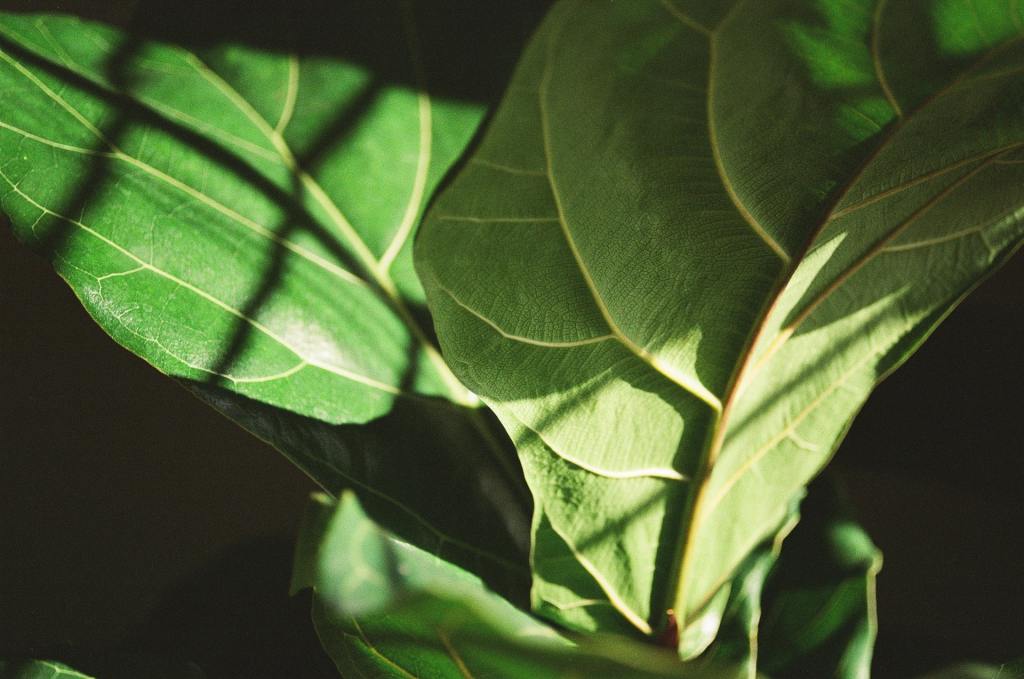
Putting aside their morbid beginnings, these plants are show-stopping beauties that you’ll love to have in your home. The leaves are often described as violin-shaped, and their dark green color stands out against the light-colored veins. These trees can grow up to 6 feet tall or more if cared for properly indoors.
Adjusting your fiddle-leaf fig to its new home environment
Here are the basics on how to ensure your fiddle-leaf fig thrives.
Step 1: Rotate your plant weekly, to ensure it grows straight. These plants tend to lean to find the light rather quickly, and within two weeks, they might lean far enough to topple out of their pot.
Step 2: Clean the leaves with a damp cloth. This helps keep the leaves from cracking due to dry air and can get rid of any pests or pest eggs.
Step 3: Give your plant time to adjust to its new surroundings. The transition from the store to your home might send your new fiddle leaf into shock, even if it was a short drive. However, you might not see the results of this shock for another month or two. If you see signs of stress during this time, make sure their needs are being met and wait it out.
Step 4: Avoid moving your fiddle-leaf fig as much as possible. Once they’re acclimated to a spot, moving them can cause irreversible damage. When we say this plant is a diva, we mean it!
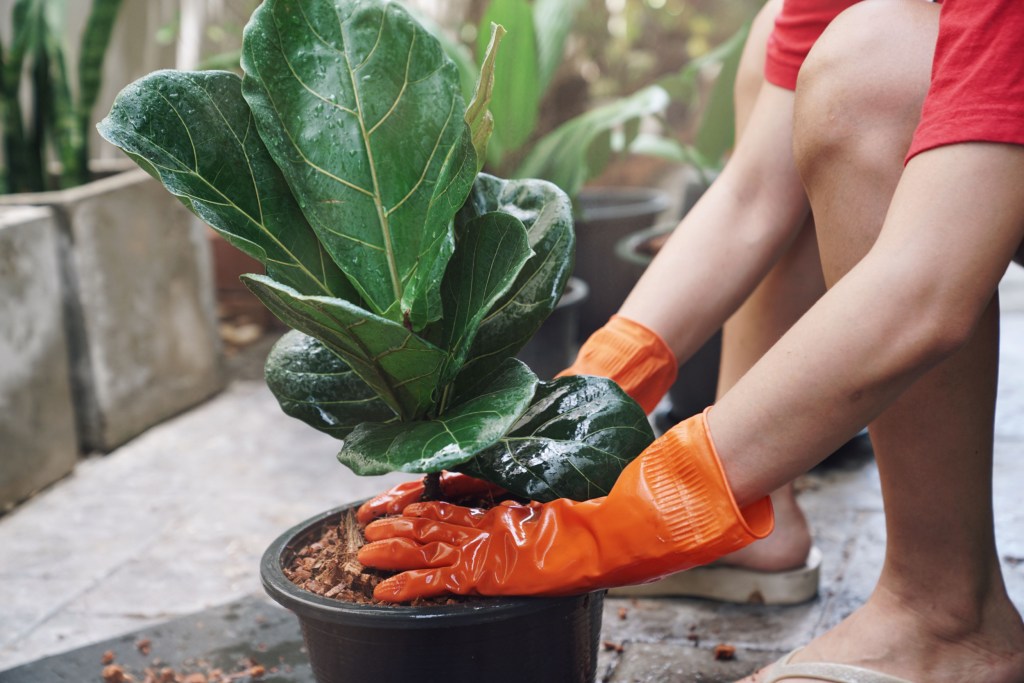
Step 5: Avoid repotting your fiddle-leaf fig when you bring it home. Repotting causes stress, which plants typically recover from quickly. However, these plants are sensitive to stress, and when added to the stress of being moved to a new home, the stress could cause lasting damage.
In general, these plants don’t mind being a bit root-bound and will likely be perfectly happy in the pot you bought it in for a year or two.
Step 6: Slip the nursery pot into a decorative one so you can still have an aesthetically pleasing plant experience.
How to care for a fiddle-leaf fig with dropping leaves
Fiddle-leaf figs may sometimes drop leaves due to a moisture issue. Chances are, your air or your soil is too dry. Troubleshooting this issue can be an involved processed, but it's not an incurable problem.
Step 1: Check your fiddle-leaf fig for signs of underwatering. Other than dropping leaves, the soil will feel dry to the touch.
Step 2: Water your plant deeply and evenly, flooding the top of the soil and making sure that water runs out of the drainage hole. Dump the excess water.
Step 3: Every week, go in with a moisture meter or your finger to see if the soil feels dry to the touch. Water again as needed.
Step 4: You can also check if your plant is getting adequate humidity with a hygrometer. The humidity level should be between 40% and 60%.
Step 5: If you notice the humidity is less than 40%, set up a humidifier or place your plant on a pebble tray with water. Misting may also work, but it's typically not as effective as a humidifier.
Step 6: Move your plant away from any drafty windows or drying vents.
Step 7: If your plant looks sparse, use shears or a knife to create a notch 1/8 of an inch into your stem above a node to encourage branching. Clean up any latex that bleeds out, as it is toxic. You can also chop green stem parts (no woody parts!) to promote branching.
Step 8: As an optional step, you can propagate chopped-off branches and stick rooted cuttings in the soil to create new plants.

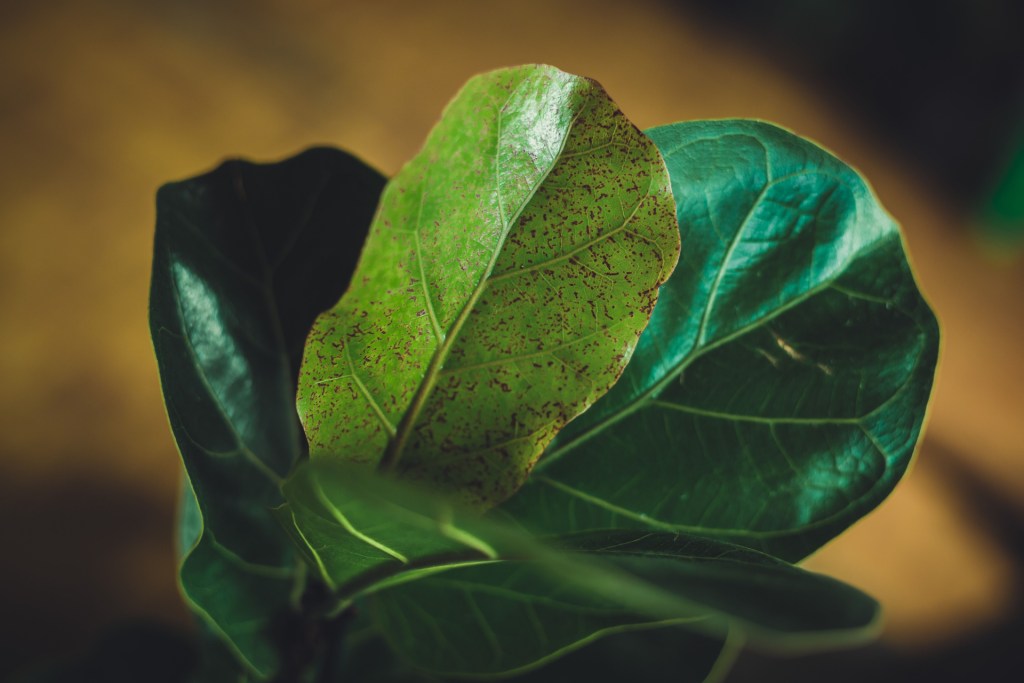
How to care for a fiddle-leaf fig with brown spots
Brown spots are common for fiddle-leaf figs, and they can be due to a host of issues. The most common ones are root rot, underwatering, and overexposure to light. To address why your plant is browning, you may need to be patient and go through a process of elimination.
Step 1: Check your fiddle-leaf fig for signs of root rot. You'll first notice browning leaves, especially from the interior of your leaves. Other telltale signs of rot include a pungent soil smell and mushy, brown roots.
Step 2: Remove damaged roots and repot your plant in fresh soil with lots of drainage.
Step 3: If overwatering isn't the issue, check your leaves for signs of underwatering. You'll typically notice crisping leaf edges, bone-dry soil, and exposed roots on the surface of your growing medium.
Step 4: If underwatering is the issue, water your plant deeply and alter your watering schedule. Every week, go in with a moisture meter or your finger to see if the top 2 inches of soil is dry. Evenly water the top of your soil and allow the water to drain out.
Step 5: If the browning edges aren't due to a watering issue, the likely culprit is direct sunlight on your leaves. The exposed leaf edges will feel crispy to the touch.
Step 6: Pull your fiddle-leaf fig away from the window. Draw down sheer curtains to give your plant dappled light instead of direct sunlight.
Step 7: You can cut around burn edges or remove brown leaves, but avoid removing too many leaves (about 5 to 10) at once.
How to care for a fiddle-leaf fig with red spots
If you notice red, freckly spots on your fiddle-leaf fig, you may be inconsistently watering your plant. These markings occur when your plant undergoes edema, which is when cells take up too much water and burst. This usually isn't a big deal, as the spots will likely fade over time. Still, here's how to make sure it doesn't keep happening.
Step 1: When red spots occur, check your plant for any signs of rot. Remove damaged roots as needed.
Step 2: Repot your plant into fresh soil if needed.
Step 3: Adjust your watering schedule so you don't stress your plant by letting it go between bone dry and damp. Every week, check if the top 2 inches of your growing medium feels dry to the touch, then water as needed.
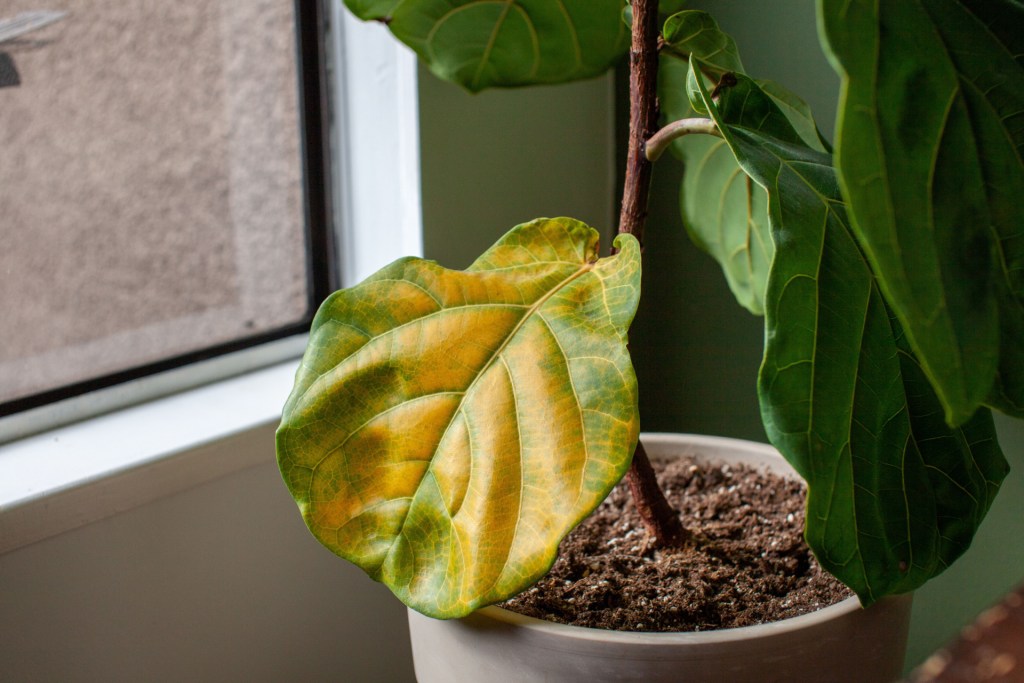
How to care for a fiddle-leaf fig with yellow leaves
Yellow leaves are a sign of your fiddle-leaf fig dying, but what exactly is it dying from? Again, pinpointing the issue is a process of elimination. However, your issue will likely be due to either overwatering or poor soil. Overwatering can lead to root rot, and soil deficiencies can make it so your plant isn't getting its nutrients to metabolize properly. Here's how to address yellowing leaves.
Step 1: Check your plant for root rot. Besides yellowing leaves, you will notice dropping foliage, a pungent soil smell, and mushy roots.
Step 2: Repot your plant into fresh, clean soil with lots of drainage.
Step 3: Adjust your watering schedule. Only water your plant when the soil is dry, and give it plenty of indirect light to make sure it's receiving light as you water it.
Step 4: If overwatering isn't the issue, check for any soil deficiencies. If it's been months since you last fertilized your plant, feed it the next time you water it. Stick to a consistent feeding schedule throughout the growing season — it's a good rule of thumb to feed your plant monthly with a 3-1-2 NPK fertilizer. That sounds intimidating, but you can purchase a fiddle-leaf fig-specific feeder here.
Step 5: Check your growing medium's acidity with a soil acidity meter. If your soil is too acidic, it may make it difficult for your plant to access its nutrients. Your soil should have a neutral pH of between 6.5 and 7.
Step 6: If your soil is too acidic, repot your plant in a fresh potting mix.
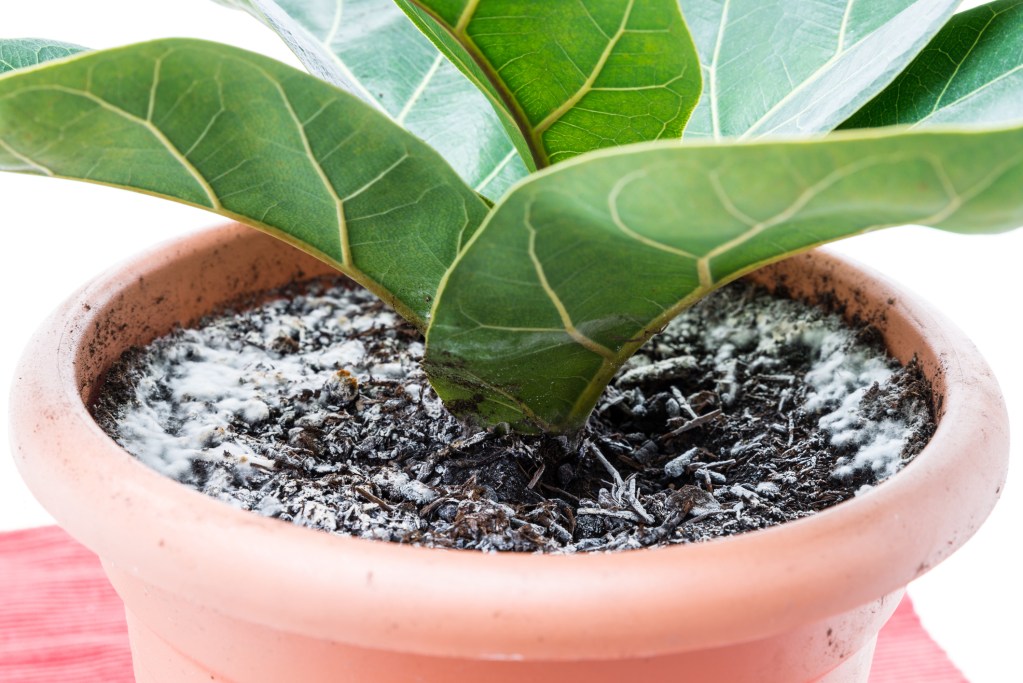
What to do about moldy soil
The first thing to do is to identify the mold. You don't need to pin down the exact fungus that's growing, but you should be sure it actually is mold. Examining the texture and color of the mold can let you know if it is mold or something else (like dust or pet fur) that has settled on the soil. Not all mold types are harmful to plants (and some can even be beneficial), but it can be tricky to tell one type of mold from another.
Additionally, mold is typically caused by overwatering, improper drainage, and a lack of airflow. These conditions can cause more problems than the mold itself! Repotting your plant in fresh, clean soil and a new pot gives it a fresh start and can help it recover more quickly from overwatering.

Troubleshooting pest problems
Fiddle-leaf figs are generally pretty hardy, but some common houseplant pests can bother them. The best general defense against pests is a healthy plant and proper plant care. Pests may bother healthy plants, but they can usually resist the pests and keep them at bay without major intervention.
Small, indoor pests aren't likely to leave larger holes like you might see from a slug or snail, so early signs can sometimes be missed. Early signs of indoor pest damage include small discolored spots or warped leaves. You may also be able to see the pests themselves moving around, although some are difficult to see due to their small size. Aphids, spider mites, scale, and mealybugs are the pests to look out for. An insecticidal soap or neem oil can keep these pests at bay and prevent them from becoming a larger problem.
There’s a lot to take in when learning to care for this stunning but finicky plant. If you're patient, however, you can troubleshoot issues with ease and enjoy fresh, consistent growth. Take our guide with you as you care for this plant, and we promise it will make life easier for you and your new plant baby.