The 3 best ways to use the pumpkin guts after carving

Pumpkin carving is definitely one of the most fun and signature autumn activities that you can partake in. But if you feel guilty about throwing away that gooey, seed-laden pulp, you’re not alone. Wondering what to do with the inside of a pumpkin plant? While you can always toss pumpkin guts into the compost bin or clean the seeds to plant gourds for next year, there are fun non-gardening ways that you can use your leftover pumpkin bits. Ahead, we’ve rounded up creative pumpkin gut ideas to minimize waste!

Pumpkin scrub
Image used with permission by copyright holder

Use the guts in your beauty routine

Pumpkin insides are rich in vitamins and antioxidants, so they can help nourish your skin. Specifically, they include Vitamins A, C, and E, which, respectively, help with protection from skin damage, collagen production, and reducing inflammation. There are a couple ways you can incorporate pumpkin into your beauty routine, though you’ll want to do small patch tests or consult your health care provider first if you have particularly sensitive skin.

  • Make a pumpkin face mask. No, we’re not talking about making a mask that looks like a jack-o-lantern for your face, but rather, a washable facial mask! Whipping up a pumpkin face mask can be as easy as creating a puree from your pumpkin guts, mixing that with honey, and leaving the mask on your face for 10 to 15 minutes before you wash it off.
  • Create a pumpkin body scrub. Get radiant skin with a DIY body scrub that will gently exfoliate dead skin and pollutants. You can start with the honey and pumpkin puree base from before and add baking soda or sugar for exfoliating action.
  • Make a pumpkin hair mask. Add some pizzazz to your haircare routine—pumpkin is great for hair because it’s full of potassium, which can help regrow hair, and vitamin A, which nourishes the scalp. Instead of pumpkin puree, use cooked pumpkin (this can come from the parts you carve out) and blend it with honey, coconut oil, and yogurt. Apply the mixture to your hair and leave it on for 15 minutes before washing it out. Here’s a recipe from Teen Vogue.
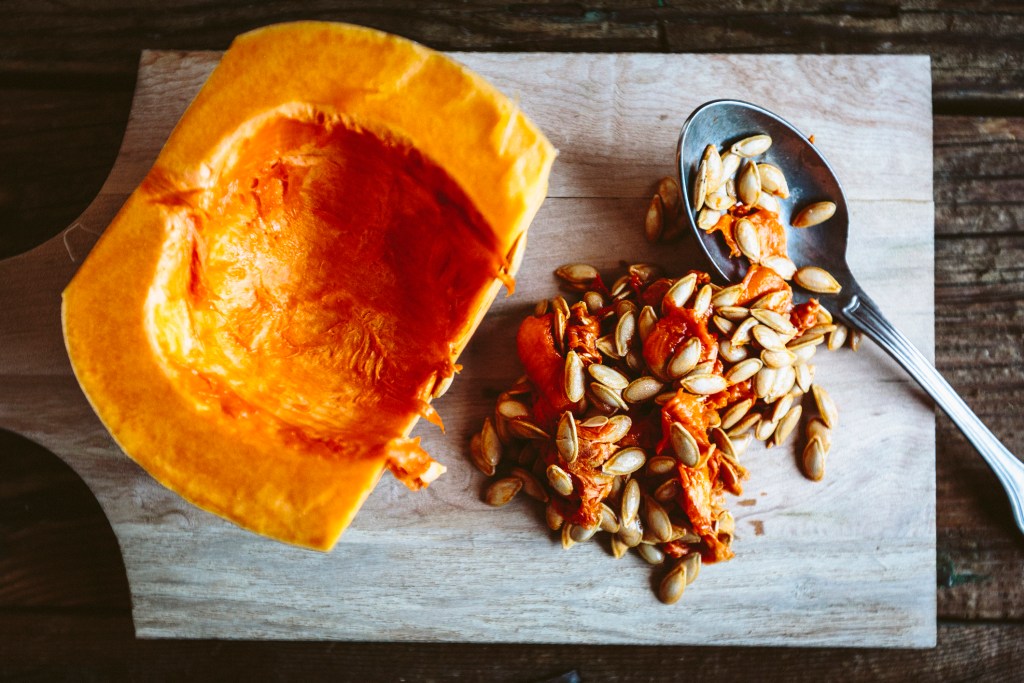
Pumpkin insides
Image used with permission by copyright holder

Create arts and crafts with kids

Pumpkins are good for more than just jack-o-lanterns! Sturdy pumpkin seeds and bright orange guts can be great supplies for arts and crafts projects.

  • Make pumpkin slime. Slime is a lot of fun for kids, and you can definitely give it a Halloween twist with leftover pumpkin guts! Grab your pumpkin’s insides and mix them with clear school glue and liquid starch to create the perfect gooey plaything. For more information, check out this guide from the Parenting Chaos blog.
  • Make a necklace or bracelet from pumpkin seeds. Embrace the autumn harvest with a wholesome pumpkin seed necklace or bracelet. After washing and drying your pumpkin seeds, color them with markers, create center holes with a needle, and string everything together.
  • Save pumpkin seeds to add texture on various craft projects. Pumpkin seeds can be versatile for paper craft projects—color them with markers and glue them onto paper crafts as leaves on a tree, eyes on an owl, bumps on a pumpkin, and more. Don’t be afraid to get creative!
Pumpkin pie
Image used with permission by copyright holder

Cook the guts up

The most obvious use for your leftover pumpkin guts is for cooking—the possibilities are endless. You can use the flesh, pulp, and seeds for giving your go-to recipes an autumn twist. Here are a few of our favorite simple ways to recycle the rest of the pumpkin after you carve your jack-o-lantern.

  • Roast the pumpkin seeds for snacking. Remove as much of the pulp as possible, then wash the seeds. After they dry, season them with your favorite spices, drizzle on some oil, and spread the seeds out onto a cookie sheet to pop into the oven for 12 to 15 minutes at 350 degrees Fahrenheit.
  • Make a pumpkin spice latte. After removing the seeds, make a puree from your pumpkin guts, adding nutmeg, cinnamon, and more for all those autumn flavors. Brew espresso, add a spoonful of your puree, mix everything, and top it off with steamed milk—and voila, you have your very own homemade PSL that will stave off those Starbucks cravings with, dare we say it, a tastier alternative.
  • Create a vegetable stock. All you have to do is toss your seeds, pulp, and bits into a pot of boiling water and strain everything out at the end. It’s that easy! You can even freeze the pumpkin guts until you’re ready to make your stock.
  • Add pumpkin to your meals and desserts. Incorporate pumpkin into your favorite recipes, whether you’re making ravioli, bread, pie, or soup.

After you’ve finished carving your jack-o-lantern, there’s no need to toss out the leftover pumpkin bits. With some imagination, you’ll find many ways to incorporate the gooey bits into your personal care routine, art projects, and food recipes! So go ahead—relax beneath that DIY pumpkin mask while sipping on your homemade PSL.

Editors' Recommendations

Stacey Nguyen
Stacey's work has appeared on sites such as POPSUGAR, HelloGiggles, Buzzfeed, The Balance, TripSavvy, and more. When she's…
3 different methods you can use to propagate roses from stem cuttings
Person cutting roses in garden

Roses in bloom are lovely, so how can you make more plants from the roses you already have? Growing roses from stem cuttings may appear to be quite the undertaking, but it can be as easy as rooting any other plant. If you’re curious about how to propagate roses from stem cuttings, here are three methods to try — including the infamous potato hack that's been making the rounds on the Internet.

How to grow roses from cuttings in soil
To grow roses from cuttings in soil, all you have to do is find semi-hardwood stems. That’s to say, find a plant with stems that are slightly hardened but still have flexibility. It’s best to source your stems from a live plant as opposed to a bouquet, but the latter could work if you have the ideal stem hardness available to you.

Read more
The best ways to arrange houseplants to maximize their impact
arranged houseplants

There's no denying that having a plant obsession can also improve the aesthetics of your home. Your spaces look more alive, have a better sense of calm, and the natural vibe that plants give off is welcoming. Still, how do we best arrange our plants to maximize on their style and impact within our space?
Cluster your plants
Not only will clustering your plants look better for aesthetic reasons, but it's also better for the health of the plants. While we might not know much about their social lives, plants are social, living things that grow better when in a group. This is especially true for humidity-loving plants. They love being grouped together because they raise the humidity level around them, creating a more suitable environment for their survival. This might best be done in a bedroom, where higher humidity levels will also help you get better sleep, but you could do this in any room to create a lovely display. Just be sure to use varying levels of stands and sizes of plants to create appealing layers.

Use plants instead of flowers
There's something special about someone bringing home a fresh bouquet of flowers; however, they never last as long as we'd like them to, and then your dinner table is bare once again. Instead, use a houseplant that'll grow all year round. You can use plants instead of fresh cut flowers as centerpieces on tables, buffet cabinets, or even nightstands.
Have a show-stopper plant
We know huge plants are expansive, but if you can invest in one or two large plants like a fiddle-leaf fig or a palm, you'll be able to use it as a show-stopper to anchor all the other plants in the space. This also makes it easier to cluster the plants and ensure there isn't too much greenery on one level. It can be hard to find height in your design with smaller plants, but tall plants can bring the height while your bushier plants fill in the lower space.
The rule of three
Speaking of clustering and grouping plants, there's a rule of three used by professional designers everywhere. Even numbers tend to look unnatural and too symmetrical, so when you are grouping your plants, try to always make it an odd number. Most of the time, the best number is three. You'll also want to avoid grouping plants of the same general shape and size.
Think about colors
Of course, most houseplants have green foliage, but you can find many plants with leaves in different colors like purple, red, or even a dark green that almost looks black! Adding these varying foliage colors will spice up the look of your houseplant collection and even be great conversation pieces. You can also add variegated plants to add interest and variety.

Read more
3 easy ways to propagate your snake plant so you can share the tropical love
A collection of potted snake plants

Snake plants are a hardy houseplant popular among beginner and experienced indoor gardeners! Nicknamed the mother-in-law’s tongue, the snake plant looks beautiful almost anywhere in the home. It fits seamlessly into a home office, a bedroom, or a living room. It even makes a great bathroom plant, if you're lucky enough to have one with a south-facing window. Snake plants are known to help filter harmful chemicals from the air, giving them an added bonus on top of their easy-to-care-for nature. Let’s take a look at how to propagate snake plants (in three easy ways) and what you can do with all the new plant babies.

Why would you want to propagate a snake plant?
The main reasons anyone would want to propagate a snake plant — or any other plant, for that matter — are to add more to your collection or give them away to friends and family who love plants just as much as you do. Propagation is an easy way to take a plant your mom admires every time she walks in your home and give her one to care for.

Read more