
What is the best outdoor countertop material?

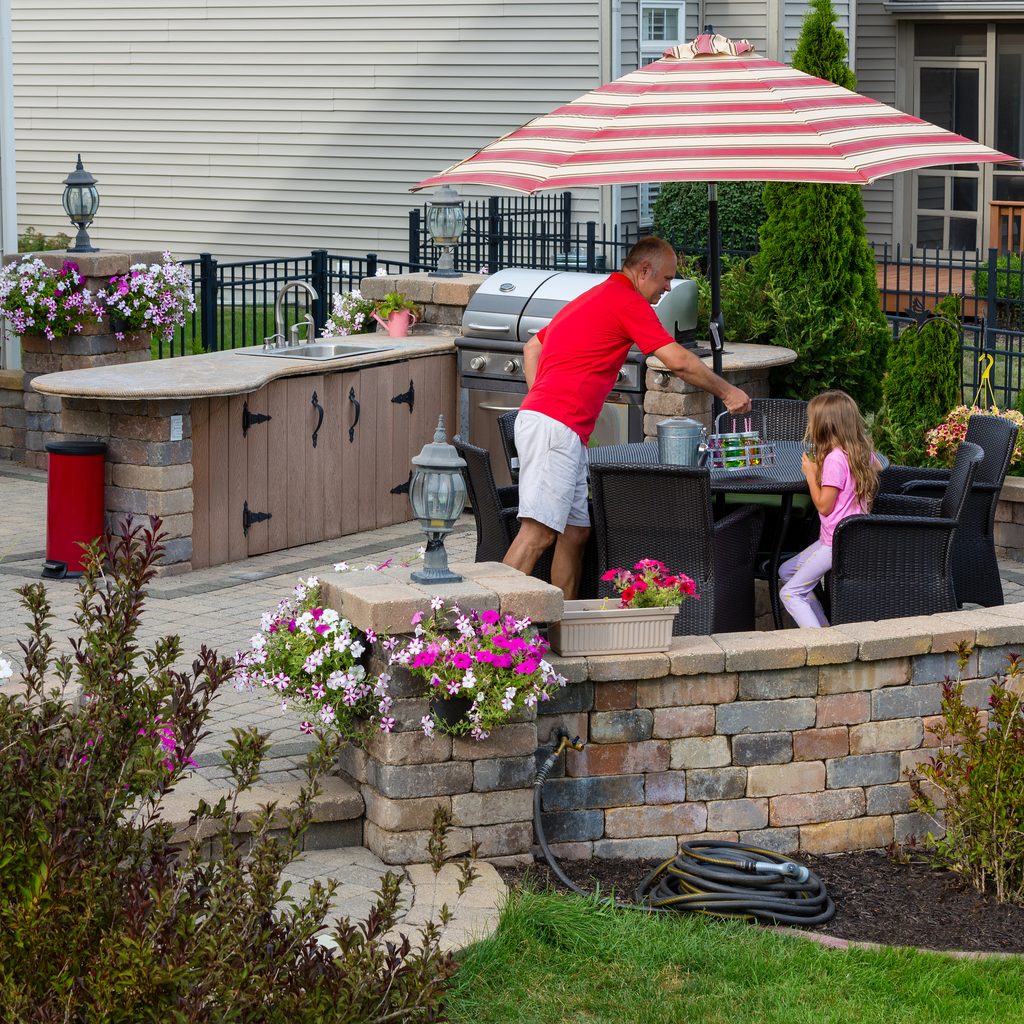
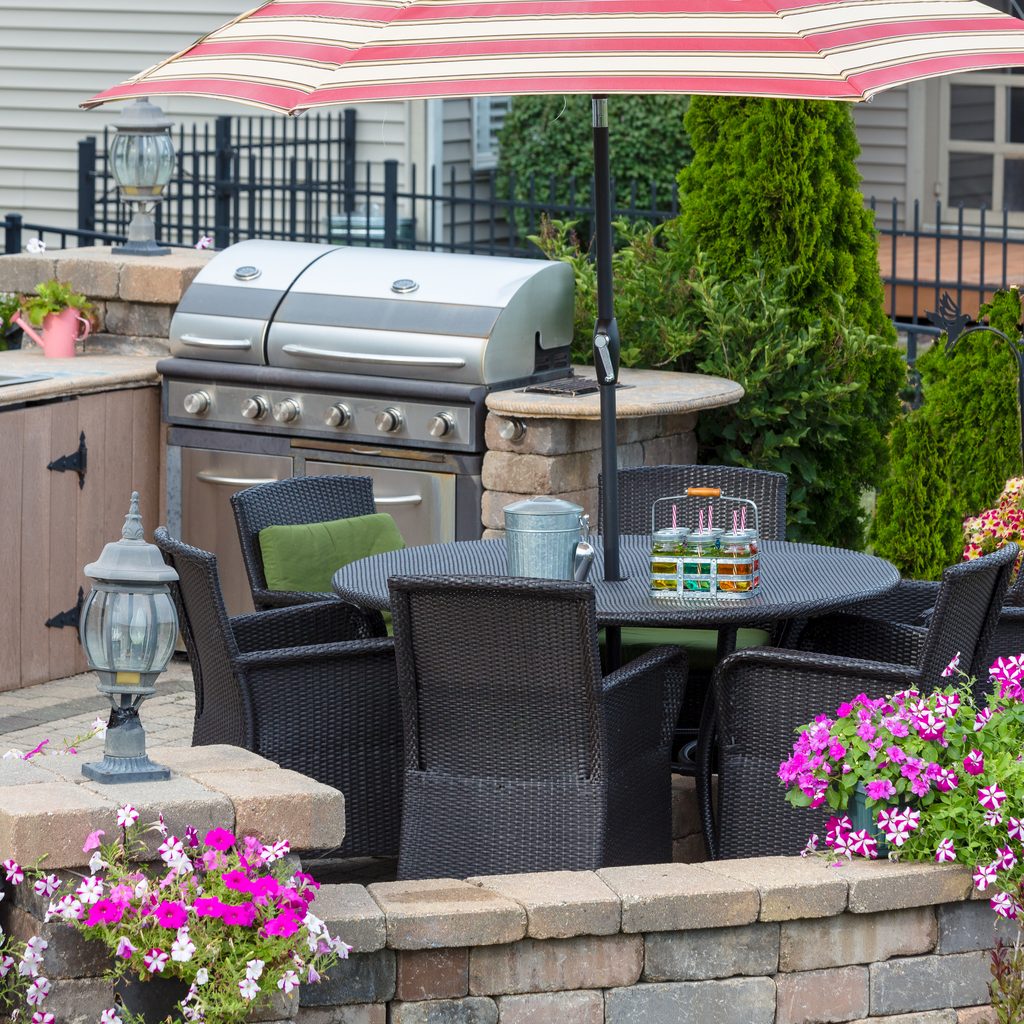
Whether you want a new outdoor countertop for an outdoor kitchen or maybe a little island for eating on your patio, choosing a suitable material is key. Sure, you want your countertop to look like a million bucks, but your primary concern is durability. Think of your countertop’s longevity first and looks second. You’ll lessen the risk of making a bad investment that way.

When planning your area, make sure you’ve got plenty of counter space and select materials that will complement your cooking style. You’ll also want to select colors and patterns that go with your home’s overall aesthetic. The best outdoor countertop material is going to be granite, concrete, or stone. You could also choose recycled glass or quartz, but be aware that these aren’t really designed to withstand the wear and tear of outdoor existence.

With the above in mind, here are some great outdoor kitchen countertop ideas.

Outdoor Patio Island With Granite Countertop
Photo By Ozgur Coskun/Shutterstock

Granite countertops

You just can’t go wrong by choosing a granite countertop. When it comes to maintenance, choice of color, and ease of use, granite’s one of the best materials out there. In addition, its durability outclasses every other type of countertop on this list.

In addition to the fact that granite won’t discolor, lose its shine, or etch, you also can’t damage it through natural wear and tear. That’s true even when it comes to your outdoor cooking adventures. As long as you seal your granite countertop after purchase, you can have all kinds of food disasters on it, and it won’t stain. Plus, there are a ton of different patterns and colors from which you can choose.

Quartzite countertops

Another great material for backyard kitchen countertops is quartzite. Be aware that we’re not talking about “quartz,” which is an engineered stone. Instead, we’re speaking of the natural stone quartzite. It has most of the same qualities as granite and is almost as long-lasting.

Concrete countertops

Another long-lasting material is concrete. Now, it’s possible to scratch concrete, and small bits can be broken off, or it could crack. However, in general, it’s a better option than some others on the market. If concrete is your choice, pay attention to any coloring you use because the sun can cause it to fade and turn yellow. It’s best to keep this countertop in the shade as much as possible.

Additionally, you’ll need to seal it after purchasing, and you’ll have to reseal it regularly as part of your overall maintenance. Unless you’re super experienced at installing countertops, you should hire a professional to handle the installation of a concrete countertop.

Soapstone countertops

Soapstone countertops are a great option because they are resistant to staining as well as to heat and bacteria. On the downside, though, you can scratch soapstone pretty easily. Of course, you could sand out the scratches, but that’s just more work added to your plate. Another downside is the ease with which the material darkens when exposed to natural skin oils, fingerprints, and other liquids.

At the same time, soapstone isn’t porous, so you don’t have to seal it regularly. Additionally, even though you might have problems with oils, you won’t have issues with acidic foods like tomatoes, vinegar, or citrus fruits.

Other stone countertops

If you have your heart set on stone for your outdoor countertop, there are several options.  (We mentioned granite previously.)

Other types you could choose are bluestone, marble, or limestone. They each look nice in the beginning; however, foods such as wine or animal grease can stain them, and they are hard to remove.

Outdoor Kitchen With Granite Countertop
Ozgur Coskun/Shutterstock

Final thoughts

Selecting the right outdoor countertop can be tough, especially considering there are so many different options. However, we think granite is your best bet. It’s durable and won’t stain with proper care. While there are some good alternatives on the market, keep in mind that some of these are better for indoor use.

To ensure you make the decision that’s best for you, consider your climate, how much shade you have available, and how much time you’re willing to invest when it comes to maintenance.

Editors' Recommendations

Will Blesch
Former Digital Trends Contributor
Will Blesch is a copywriter, content writer, and someone passionate about anything that lets him discover more about this…
The 5 best outdoor floodlights for your yard
Outdoor home security light

If you’re someone who thinks about safety and who wants your home lit up in the dark, you've probably considered investing in floodlights for the outside of your home. Not only do floodlights accentuate a building’s architectural design, but they can also help deter criminal activity and keep you safe while walking to your car or going in your yard at night.

However, as great as floodlights are, the market is saturated, and it can be difficult to whittle down which type of floodlight is right for you, especially since there's so much to consider when purchasing. That's where we come in.

Read more
3 of the best solar garden lights for a bright and eco-friendly yard
outdoor sitting with lights

It's important to decorate your garden with stunning flowers and veggies, but it's also vital that your garden be well lit. Whether for parties, late-night harvesting, or quiet nights reading in the warm summer air, solar lights make a fantastic addition to any garden. They can transform a backyard into a cozy after-dinner area, light up a walkway for safe navigation, or bring attention to a favorite tree. Here we'll be going over the essential considerations to keep in mind while shopping for solar garden lights. We'll also include a few of our favorites you might want to add to your landscaping.

What to consider when buying a solar garden light
Not all solar garden lights are created equal; there are a few things you'll want to keep in mind.
Cost
The cost is one of the most important aspects of purchasing a new item for almost everyone. Although solar garden lights are very similar in price, it's still crucial to consider how much you're willing to spend on lights before you go looking. Having a better idea of your budget will help you find the ideal solution.
Ease of install
If you need something easy to put up for a party this weekend, you won't want to buy a setup that'll take hours to put together. Instead, finding a solar light that's easy to install will make life easier and allow you to get back to doing other things like gardening!
Lifespan
Outdoor products never last as long as their indoor cousins, so it's not surprising to find that solar garden lights have a shorter shelf life than other indoor lights. However, this doesn't mean you should have to replace your garden lights every year or bring them in during the winter. Instead, look for a light that can withstand the types of weather you often see and be sure to care for the light properly so it can last a long time.
Aesthetic
Of course, you should like the way your new lights look! If they don't suit the aesthetic of your garden, you'll likely be disappointed and tempted to go looking for other options. So be sure you're looking for a light that's going to suit the rest of your garden, or at least blend in and not take away from your garden ornaments.
MAGGIFT Solar Pathway Lights
These pathway lights by MAGGIFT are ideal for lighting the way during the darker hours of the day. Whether it's the path from the driveway to the house or the deck to the flower garden, these lights will soak up sun rays and provide you with plenty of light to see your way.

Read more
When and how to transplant tomato plants for the best results
baby tomato plants

There's a time in every gardener's life when they try to grow their own veggie plants from seed. This is a gratifying process, and there are many benefits to growing your own seed starts. One of those benefits is bigger and healthier plants. By growing your own baby tomato plants, you can ensure that the plants are well cared for, never given anything you don't want them to have, and transplanted in just the right way at just the right time for optimal plant health. So how do you transplant tomato plants to ensure they're happy and healthy and live to produce lots of yummy tomatoes for your home?

How do you transplant a grown tomato plant?
If you've never transplanted tomatoes before, the idea can be intimidating. You have all these tiny plants that you've cared for over the last several weeks, and now it's time to pluck them out of their nursery pots and plop them into the outside soil where they're exposed to sun, weather, and critters. Luckily, you've cared for them so well that they're healthy and robust plants that will be able to handle anything nature throws at them.
Step one: Harden the plants
Hardening the plants is a term gardeners use when talking about the process of acclimating a greenhouse-grown plant to outside conditions. Typically it refers to sunlight, but it could also refer to wind and other weather that could harm the plant. About a week before you're ready to transplant, you'll want to harden your baby tomato plants by exposing them to sunlight at increasing increments each day. For example, day one should be about 30 minutes, then 45, then 50, and so on until the day of transplanting. If you don't do this, you'll risk your plant being burnt and killed when you transplant it outside.
Step two: Don't water the plants
Before you start pulling little plants out of their pots, you mustn't water the plants a few days before transplanting. Wet soil can make the transplanting process much harder on you and the plant. Dry soil falls away easier and is less likely to break off roots as you move the plants to their new home.
Step three: Prepare the new soil
The new location for your tomato plants will need to be prepped before you get all those babies out of their homes. Whether you are planting into the ground, a raised bed, or a pot, you'll want to amend the soil to guarantee that the plant has many nutrients to soak up. It also is easier if you dampen the soil right before transplanting. Damp soil is much more manageable and more easily manipulated around the plant.
Step four: Plant deeply
As you gently pull out the baby tomato plants, you'll want to shake off the old soil to expose the roots. This will ensure the plant has access to the new soil and nutrients you're about to provide it with. 

Read more