
Polytunnel vs greenhouse: Which is right for you?

Gardening is an excellent pastime: It can be as straightforward or as intricate as you want it to be. If you’re a more aspirational gardener, you may want to grow vegetables year round, or even grow exotic plants. You’ll have an easier time doing that with either a polytunnel or a greenhouse. You’ve probably heard of a greenhouse, but polytunnels may not have been on your radar before. Not sure which one to choose? We’ll help you decide.

What is a polytunnel, and what is a greenhouse?

Polytunnels and greenhouses are both structures used to grow plants that require more heat than is available outdoors. Both are designed to capture and keep heat, but in different ways, and each has its own advantages and disadvantages.

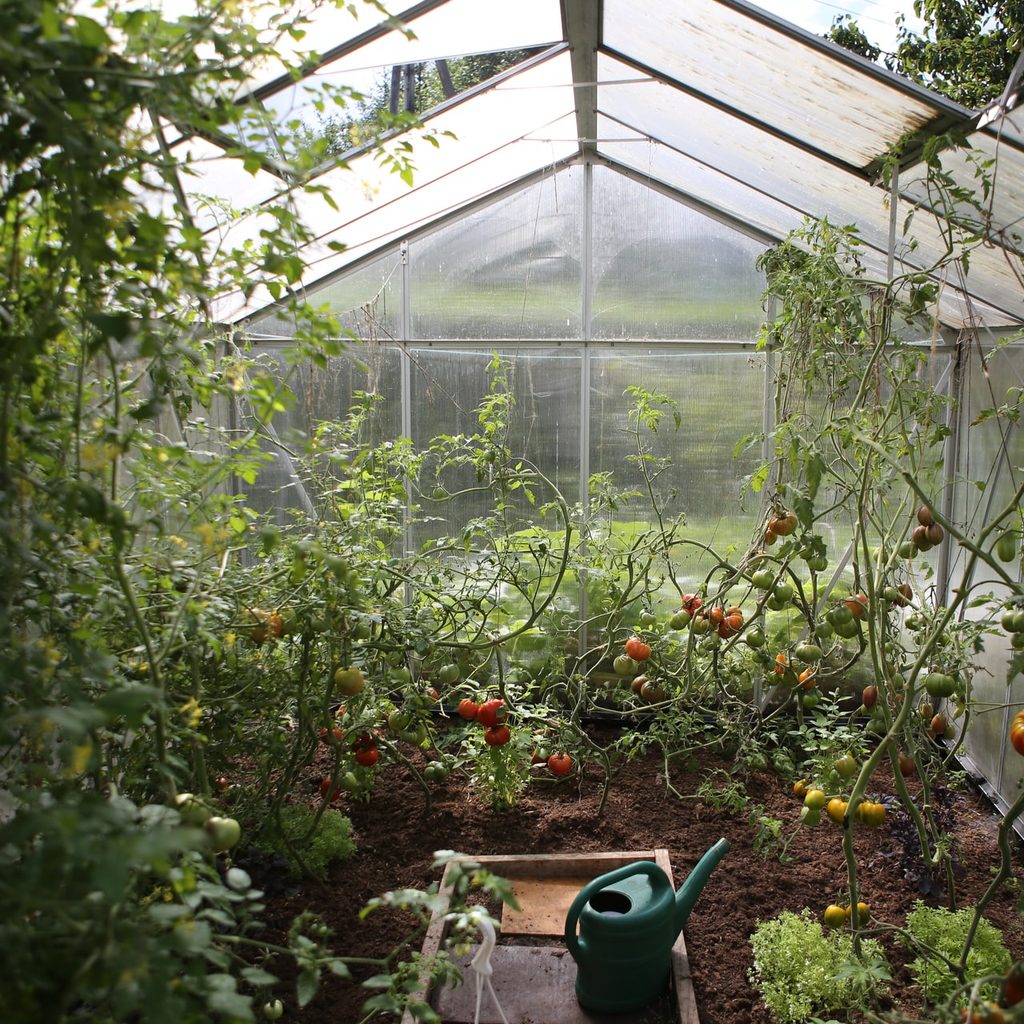
Greenhouses use glass or polycarbonate plastic panels set in a metal frame to focus sunlight. They can be any size or shape, but the most traditional ones resemble small houses. The glass is typically clear, but can also be opaque.

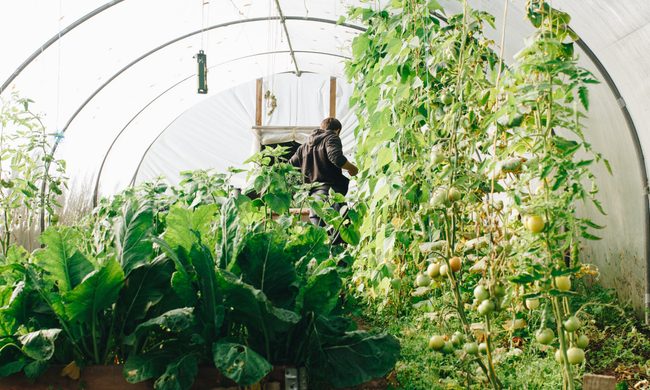
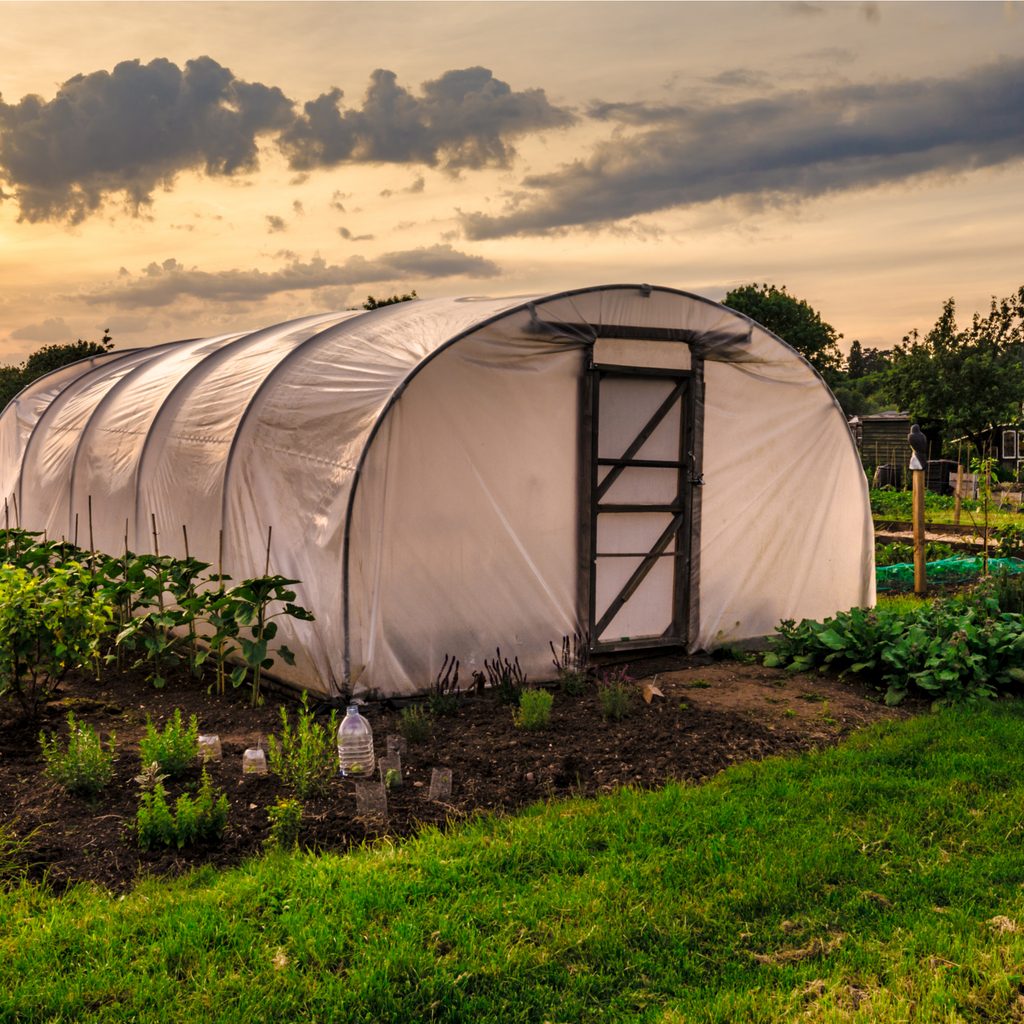
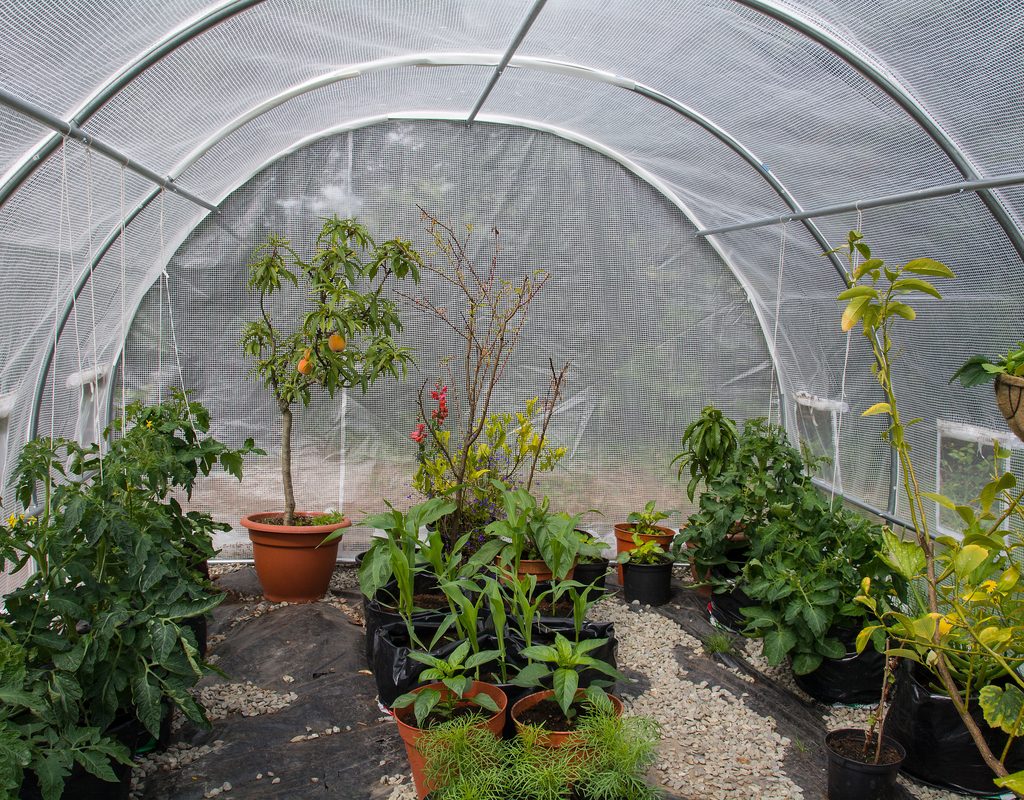
Polytunnels consist of a plastic sheet, which is typically either clear, opaque, or green, stretched over a series of aluminum arches. Polytunnels are usually shaped, as the name implies, like a tunnel. However, there’s still some amount of variety in shapes; they can also be shaped like domes or tents.

Exterior of polytunnel in a planted field
Image used with permission by copyright holder

Which is easier to construct and maintain?

Polytunnels are much easier to put up, without a doubt. Greenhouses require a flat, hard surface to serve as the foundation, which means either flattening and compacting the soil or placing pavement or stone slabs in your yard. Polytunnels don’t need this, and can be set up just about anywhere.

The glass or polycarbonate panels and tougher frame makes constructing greenhouses a time-consuming process, as well. Many greenhouses need to be installed by professionals, while polytunnels can be set up and maintained by anyone.

The differences in construction mean that polytunnels can be moved with relative ease, while greenhouses are a much more permanent fixture. Additionally, polytunnels are easier to expand after initial setup. Greenhouses, on the other hand, are much more difficult to expand or change once they’re constructed.

Maintenance for both is fairly simple: Keep the outside clean and check regularly for damages. Polytunnels are more likely to be damaged, as the roof and walls are only a thin sheet of plastic. Greenhouses, having thicker walls made of glass or polycarbonate, are harder to damage. However, polytunnels are also easier to repair by replacing the sheet, which can be done at home on your own. It’s more difficult and costly to repair greenhouses when damages occur, since repairs often involve replacing one or more panes of glass or polycarbonate.

Plants growing in a greenhouse
Image used with permission by copyright holder

Which one handles the elements better?

In most cases, greenhouses handle the elements better, however it does depend on which elements you’re talking about. Storms can blow a polytunnel’s cover off, but only damage greenhouses in extreme circumstances. Greenhouses are also generally better at keeping pests out. Polytunnels can be damaged by pests, especially birds.

However, the glass panes in greenhouses can focus sunlight too well sometimes, which can lead to sunburnt or scorched plants. Additionally, while a fire in a garden is never good, the overall structure of a greenhouse will, in most cases, survive a fire, while a polytunnel is less likely to.

Plants growing in a polytunnel
Image used with permission by copyright holder

What plants can be grown in each?

You can grow a range of plants in each, depending on how exactly your polytunnel or greenhouse is arranged. There are a few things to keep in mind, though. Greenhouses typically let in more light than polytunnels, especially polytunnels with opaque or green coverings. This means that greenhouses are suited for plants that enjoy bright or direct sunlight, while shade loving plants will fare better in a polytunnel.

When the covering is affixed properly, polytunnels have better ventilation and air flow, owing to the tunnel shape of the structure. This makes polytunnels an excellent choice for plants that need air flow, while greenhouses are better suited for plants that enjoy humidity, such as orchids. However, if the cover is loose, then the air flow is disrupted, and your polytunnel can develop condensation that encourages molds and fungi, or leaf rot if it falls onto the plants.

Ultimately, only you can decide which one is right for you. If you love the aesthetic and don’t mind the price, then a greenhouse might be a good choice. If you need something a little easier to set up, then you might be happier with a polytunnel. Both are wonderful ways to grow plants out of season, overwinter sensitive plants, and cultivate exotic, tropical flowers and fruits.

Editors' Recommendations

Cayla Leonard
Cayla Leonard is a writer from North Carolina who is passionate about plants.  She enjoys reading and writing fiction and…
A complete guide to cleaning your greenhouse for beginners
greenhouse

When you first installed your greenhouse, it probably looked like a glittery glass castle for your lovely plants to grow and live in. However, weather, soil spills, and birds have made their mark on your greenhouse over time and now it's probably looking cloudy and nasty. So how do you clean a greenhouse?
Why worry about a clean greenhouse?
You may be wondering if you even need to worry about cleaning your greenhouse. If you don't mind the dirty look, maybe you could leave it as it is? Unfortunately, it's much better for your greenhouse and your plants if you give the greenhouse a deep clean at least once a year. It'll make it easier to use when it is clean and organized, and the walls of the greenhouse need to be clear so they can let in as much light as possible. Additionally, a clean greenhouse is less likely to spread pests and diseases to your precious plants. And lastly, things last longer when you care for them and greenhouses aren't cheap.

When should you clean a greenhouse?
There's no right time to clean a greenhouse; whenever you can is better than not at all. However, we suggest cleaning it when there isn't so much to do in the garden and it isn't so hot out. Usually, the fall is when the garden chores slow down and it starts to cool out, making cleaning the greenhouse much easier on you.
What is the best way to clean a greenhouse?
You can use whatever cleaning method works for you, but here is our step-by-step process that we recommend.
Step one: Empty the space
Of course, we know you can only empty a greenhouse so much if you have tender plants that need to stay warm. But as much as you can, take out the tools, buckets, and bags of soil. It will be much easier on you if you don't have to fuss with items in your way as you clean the walls and floors. This also allows you to go through what you have and declutter if necessary.
Step two: Rough dusting
Over the season, spiders and bugs and maybe even some mice have tried to make homes in your greenhouse. This has probably led to a few cobwebs and dust piles around the corners. You'll want to remove these large areas of debris before you start the deep cleaning. Use a broom to knock down the cobwebs and sweep up the floor; you've probably spilled some soil during the summer!
Step three: Clean the walls
The panels of your greenhouse will now need to be deep cleaned. You can use a bucket of warm water and a sponge to wipe them down, but we also recommend bringing a long-handled brush to make life easier. This way, you can dip the brush into the bucket of soapy water and scrub down the walls with the long-handled brush. You'll be able to reach every inch of the walls without killing your back.

Read more
When and how to transplant tomato plants for the best results
baby tomato plants

There's a time in every gardener's life when they try to grow their own veggie plants from seed. This is a gratifying process, and there are many benefits to growing your own seed starts. One of those benefits is bigger and healthier plants. By growing your own baby tomato plants, you can ensure that the plants are well cared for, never given anything you don't want them to have, and transplanted in just the right way at just the right time for optimal plant health. So how do you transplant tomato plants to ensure they're happy and healthy and live to produce lots of yummy tomatoes for your home?

How do you transplant a grown tomato plant?
If you've never transplanted tomatoes before, the idea can be intimidating. You have all these tiny plants that you've cared for over the last several weeks, and now it's time to pluck them out of their nursery pots and plop them into the outside soil where they're exposed to sun, weather, and critters. Luckily, you've cared for them so well that they're healthy and robust plants that will be able to handle anything nature throws at them.
Step one: Harden the plants
Hardening the plants is a term gardeners use when talking about the process of acclimating a greenhouse-grown plant to outside conditions. Typically it refers to sunlight, but it could also refer to wind and other weather that could harm the plant. About a week before you're ready to transplant, you'll want to harden your baby tomato plants by exposing them to sunlight at increasing increments each day. For example, day one should be about 30 minutes, then 45, then 50, and so on until the day of transplanting. If you don't do this, you'll risk your plant being burnt and killed when you transplant it outside.
Step two: Don't water the plants
Before you start pulling little plants out of their pots, you mustn't water the plants a few days before transplanting. Wet soil can make the transplanting process much harder on you and the plant. Dry soil falls away easier and is less likely to break off roots as you move the plants to their new home.
Step three: Prepare the new soil
The new location for your tomato plants will need to be prepped before you get all those babies out of their homes. Whether you are planting into the ground, a raised bed, or a pot, you'll want to amend the soil to guarantee that the plant has many nutrients to soak up. It also is easier if you dampen the soil right before transplanting. Damp soil is much more manageable and more easily manipulated around the plant.
Step four: Plant deeply
As you gently pull out the baby tomato plants, you'll want to shake off the old soil to expose the roots. This will ensure the plant has access to the new soil and nutrients you're about to provide it with. 

Read more
What you need to know about successfully growing summer squash in containers
container summer squash man cutting

You can roast it, you can sauté it, you can slice it, and you better believe you can dice it. Summer squash is chock full of important vitamins and minerals, so it’s delicious and nutritious. But if your garden is running out of real estate, have no fear. There’s no reason you can’t grow squash in a container. Although summer squash requires a not-insignificant amount of TLC, it’s more than worth it for lovers of this agreeable fruit (and yes, it is technically a fruit). Here’s a complete guide to everything you need to know.

Picking the right squash for the job
As many gardeners know, summer squash does not describe a specific species but rather the timing of the harvest. Yellow squash are harvested earlier in their life cycle, when the outer rind is still edible. No need to peel!

Read more