
Quaking aspens are tall, beautiful, and easier to care for than you might expect

Read here and learn how to grow quaking aspens

Yellow quaking aspen leaves
Steppinstars / Pixabay

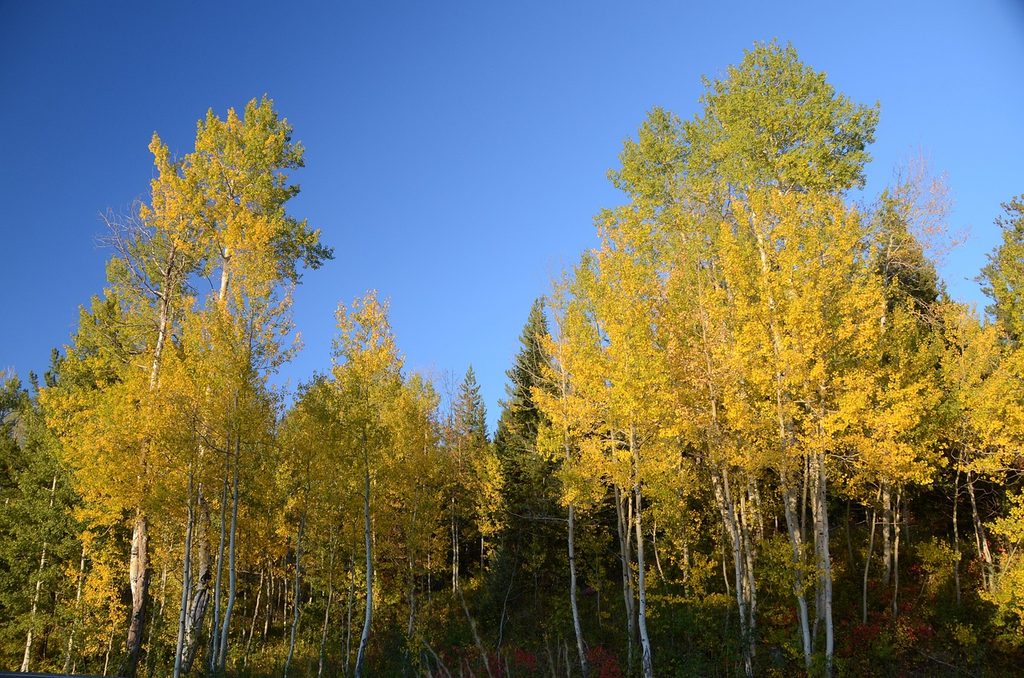
Quaking aspens are native deciduous trees with striking and easily recognizable silhouettes. They have tall, thin trunks wrapped in white or silver bark. Although they are stunning all year long, with small white flowers in the spring and round green leaves in the summer, quaking aspens are perhaps most famous for their brilliant gold color of fall foliage. In addition to their beauty, quaking aspens are also extremely good for the environment. If you’re thinking about planting a quaking aspen tree in your yard, this is the care guide for you.

How to plant a quaking aspen

When choosing your planting site, there are a few key things to look for. First, your planting site should be well away from power lines, buildings, or other structures that tree growth could damage. Quaking aspens typically grow to between 30 and 50 feet tall (although some can grow much taller) and their longest branches can grow up to 30 feet long, so make sure your tree has plenty of room.

Your location should also be in full sun with rich, moist soil. Quaking aspens need at least 4 to 6 hours of sun each day in order to grow properly. In addition to the sun, a quaking aspen needs plenty of water and nutrients. Adding compost to your soil before you begin planting can help improve poor soil. Although it needs moist soil, avoid planting your quaking aspen in wetlands or dips where water pools, as too much standing water can lead to fungal infections.

Quaking aspens in the fall
Steppinstars / Pixabay

Caring for and maintaining your quaking aspen

Keep the soil moist but not soggy while your quaking aspen is growing, especially during the summer when it is hot and dry. However, take care not to overwater it. If it has rained recently or the soil is still wet, then wait to water it until the soil dries. This is primarily to prevent fungal infections which thrive in wet soil. The most common fungal infections quaking aspens suffer from affect the leaves, causing them to discolor and drop early.

Regular pruning and trimming can keep your quaking aspen healthy and keep its size in check. Remove any diseased or damaged branches, as well as those that are growing too close to any structures or hazards. As your aspen grows, you may need a ladder or heavier equipment to prune it properly. Be careful, and have someone close by to help if there is an emergency.

Feed your quaking aspen in early spring with a high-nitrogen fertilizer. Fertilizers that contain a lot of organic material, such as compost or leaf mulch, are particularly good for quaking aspens. Avoid fertilizing quaking aspens more than twice a year, though, as they’re sensitive to overfertilization.

These amazing trees will be right at home in your yard or garden, especially now that you know how to care for them. Give your quaking aspen plenty of sunshine, room to grow, and rich, wet soil, and watch it thrive!

Editors' Recommendations

Cayla Leonard
Cayla Leonard is a writer from North Carolina who is passionate about plants.  She enjoys reading and writing fiction and…
When should you fertilize your azaleas? What you need to know
A complete guide to fertilizing azaleas
An azalea bush with pink flowers

Azaleas are a popular flowering shrub, and for good reason! This native flowering shrub is known for its stunning flowers and ability to thrive in acidic soil that many other plants won't grow in. As far as shrubs grow, azaleas have a low-maintenance care routine, but some gardeners struggle with fertilizing them.

If you're wondering when do you fertilize azaleas, then this guide is for you! Figuring out when the best time to fertilize your azaleas is and what kind of fertilizer to get can be a chore. So let us do it for you! In this handy guide, we’ll lay out the factors that go into determining the best time to fertilize your azaleas and include a few tips for picking out a good fertilizer.

Read more
If you’re in need of a durable flowering shrub, then consider growing pittosporum! Here’s your care guide
How to plant and take care of pittosporum
Pittosporum shrub with variegated leaves and white flowers

Shrubs can offer many benefits to your garden. Whether you’re growing them as an ornamental addition for their beautiful flowers or looking to grow a privacy hedge, shrubs provide a wide array of options. If your garden is in need of a durable shrub with beautiful flowers, then pittosporum, also called cheesewood, is a great place to start.

Commonly found throughout Asia, Australia, and some parts of Africa, pittosporum is becoming more popular in American gardens. This simple care guide can help you successfully add it to your garden as well!
Planting pittosporum
If you’re planting your pittosporum from seed, you should plant it in the fall. However, older plants see better success when transplanted in the spring. Regardless of when you’re planting it, you should plant pittosporum in full sun to partial shade. Some varieties of cheesewood can even tolerate full shade, so don’t despair if you have a heavily shaded garden.

Read more
How to care for crocosmia – get stunning red and orange flowers all summer long
Caring for your own crocosmia flowers
Orange crocosmia flowers

A summer garden full of bright, vibrant flowers is a delight to behold, and there are so many colors to choose from. From sunny yellows to cheerful pinks, there are flowers in practically any color you could want. If you’re looking for orange and red flowers that really stand out, then crocosmia might be just what you need! Also called coppertips, these flowers are easy to grow and lovely to look at. Just follow these tips to grow your own.
Planting crocosmia
Begin planting your crocosmia in mid-spring, after the last chance of frost has passed. If you want to get a head start you can plant them in starter pots indoors or in a greenhouse. Then, transplant the crocosmia into your garden once the weather is warm.

Choose a planting site that's in full sun or light shade. Crocosmia does best in rich and well-draining soil. You can improve your soil before planting by adding compost or leaf mulch. The organic matter breaks down, leaving gaps in the soil for water to flow through as well as adding nutrients to the soil for your plants to use.

Read more