
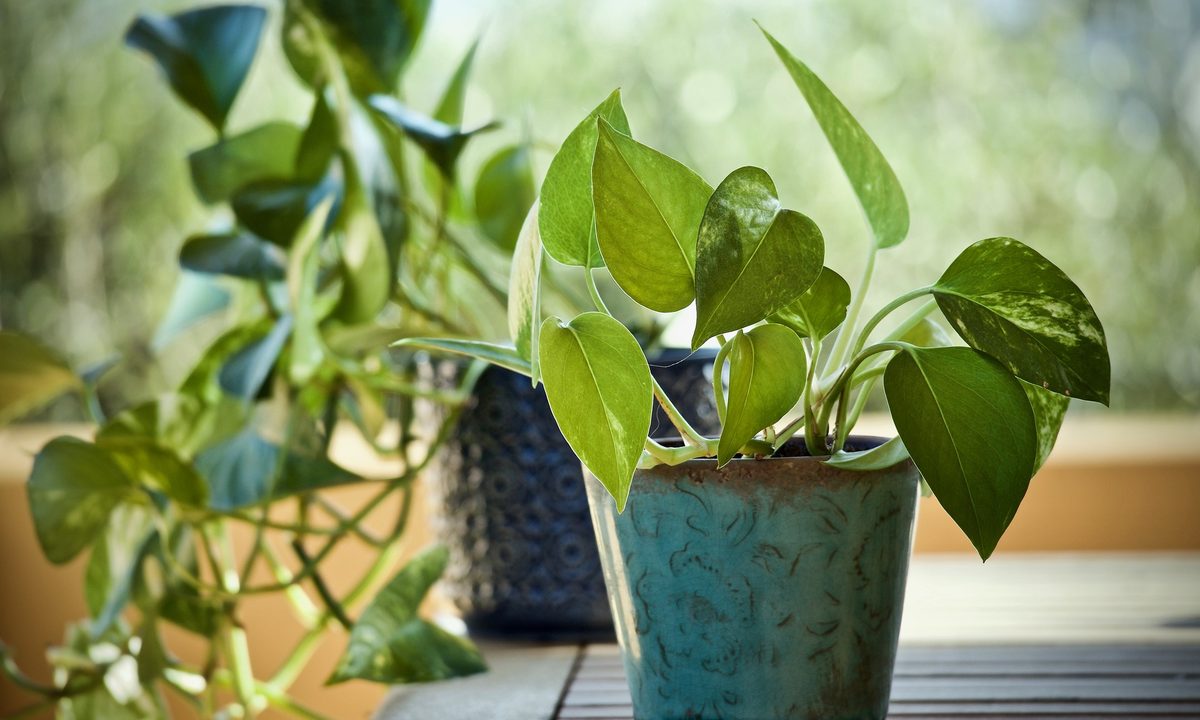
Native to tropical climates, the golden pothos grows rapidly throughout its habitat. Although it can be grown outdoors in the warmest USDA hardiness zones, pothos plants are much more popular are houseplants. There are many fantastic types of pothos plants, but perhaps the most popular is the golden pothos. With their heart-shaped green leaves with yellow variegation, they’re beautiful in hanging baskets and as desk plants. Let’s dive in and find out how to grow a golden pothos to achieve that iconic cascading appearance in this guide to how to care for golden pothos plants.
Why choose a golden pothos?

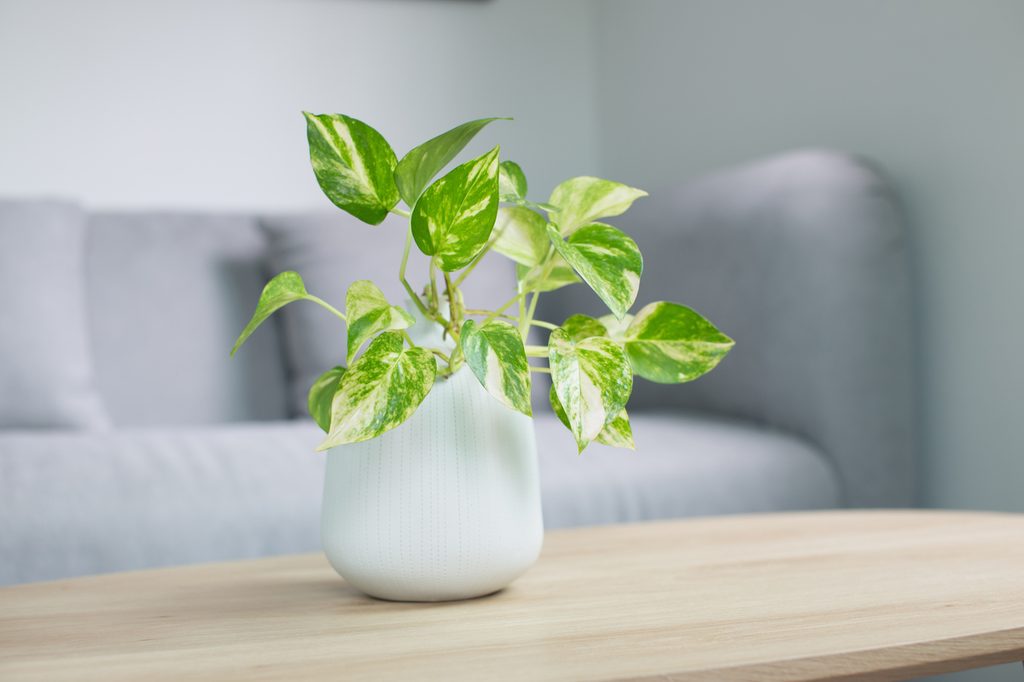
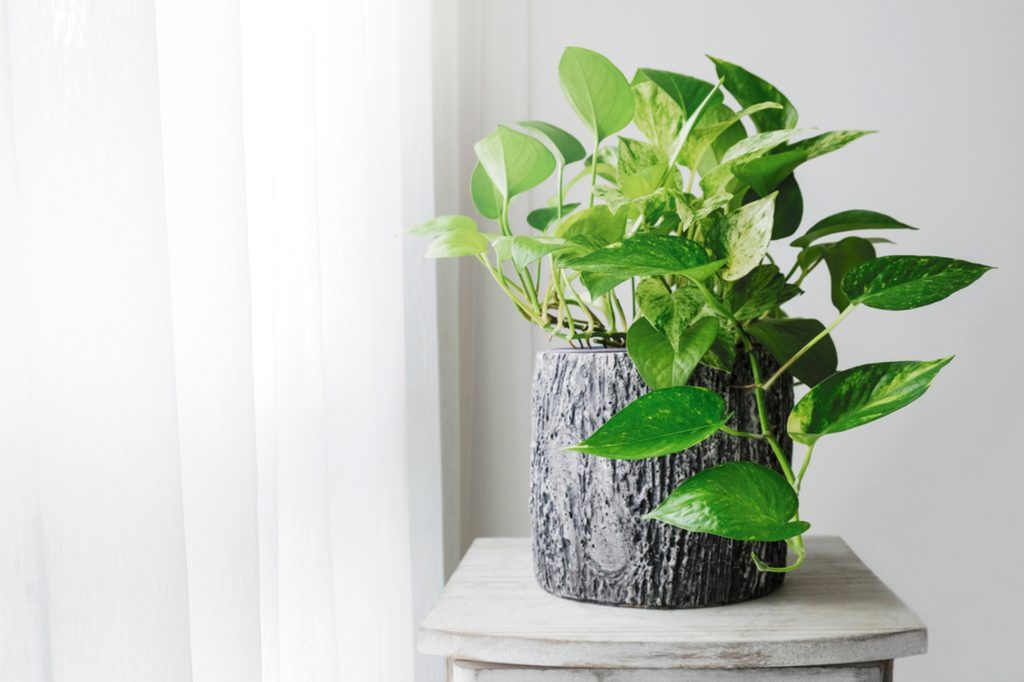
Golden pothos are easy-to-grow plants that are often found in hanging baskets or in pots on shelves that allow the vines to flow. They won’t naturally vine along nails or trellises; however, if you’re looking for an indoor vine plant to spruce up your wall, a golden pothos can easily be trained to grow where you want it! You can train it around hooks, over window frames, throughout a gallery wall. The ease of care and tolerance that the golden pothos offers makes it to be a very versatile indoor plant.
Something to keep in mind, though, is that pothos plants are toxic to pets and should be kept out of reach of children. If you have a pet that’s particularly fond of your indoor greenery, you may want to steer clear of the golden pothos unless you have a good out-of-reach location where it can safely thrive.
How to grow and care for a golden pothos
Learning how to care for a golden pothos is pretty easy! They aren’t high maintenance houseplants and are fairly tolerant of imperfect growing conditions. The most difficult thing about them may be that they require a bit more humidity than other houseplants due to their tropical nature. If you notice that the air in your house is particularly dry, you can either lay out shallow trays of water filled with pebbles near the plant or lightly mist the leaves every few days. A bathroom that gets light is often a great place for a pothos because of the high humidity and steam!
Watering and soil requirements
Golden pothos plants like to have the soil dry out between waterings, which means that if you forget to water it for a week, don’t sweat it! It has a much easier time tolerating being under-watered than over-watered. A pothos left in soggy soil is susceptible to root rot, black spots developing on the leaves, discolored or yellow leaves, and a sudden collapse of the plant. If you’re unsure of when to water, let the plant be your guide! When it’s thirsty, the leaves will start to droop. If they start to shrivel, that means you’ve let it go too long without water.
To help combat the risk of soggy soil and root rot, you should use a well-draining potting mix in a container that either has a drainage hole and train or a planter liner that helps absorb excess water. Giving the water a place to go when there’s too much for the soil to hold will help prevent damage to your plant.
Lighting and temperature requirements
Golden pothos thrive in bright, indirect sun and can grow well in medium to low indirect sun, which is part of what makes them a great plant for spaces like a bathroom. They don’t tolerate direct sunlight very well, so if the only window you have gets direct sun, you may want to find a spot for your pothos a few feet away from it so that the light has time to spread into the room before reaching the plant.
This variety of pothos prefers a temperature between 65 and 75 degrees Fahrenheit, but can survive in temperatures as low as 50 (meaning if your home gets drafty, find somewhere away from the window during the winter where they won’t feel any below-freezing air). It’s important to remember when choosing a location for your pothos that they’re native to tropical regions. When you know a houseplant’s natural habitat, you’ll find it’s a lot easier to pick a spot for them where they’ll thrive.
Keep your pothos looking healthy and clean
Maintenance is key when it comes to learning how to grow a golden pothos. As the plant gets bigger, you’ll notice that it becomes more and more rootbound. When the roots start to take up the pot, the plant won’t have any space to grow, thrive, or live its best life. Repotting becomes essential. Simply pick a container that’s one size larger than the one it’s in, use fresh potting soil, and plop it right back where you had it!
One of the best things you can do for the golden pothos, and really any houseplant, is to trim off any yellowing, dry, or dead foliage. Dead foliage can potentially attract unwanted pests to your plant, and weakened leaves steal energy from healthy and new growth. By giving it a good trim every now and then, you’ll help the plant direct its time and energy to the parts that need it the most.
Although golden pothos grown in the wild can get a bit unruly, helping keep your indoor (or outdoor!) one trim and tidy will help promote new growth and better health. In certain conditions, pothos can get leggy — meaning it grew unevenly, looks a bit unkempt, and has sparse growth along the vines. But it’s a solvable issue! Simply prune off the parts of your houseplant that aren’t as tidy as the rest, making sure to use a clean, sanitized pair of shears. You can even go ahead and use those cuttings for propagation!
Propagating your golden pothos
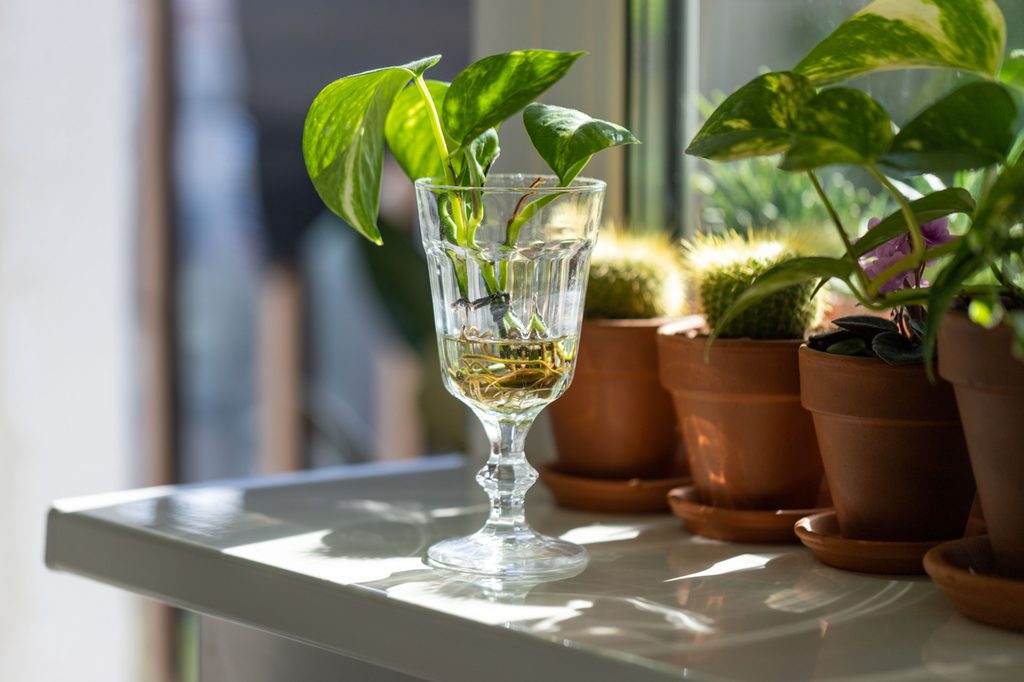
If you’ve got those trimmed-off pieces and you’re wondering how to propagate a golden pothos from them, it might not be as difficult as you think. As long as the cutting is healthy and between four and six inches with four or more leaves spanning that section of the vine, it’s viable for propagation.
A golden pothos can be propagated with cuttings in two different ways. The first, more commonly seen method is by placing the cut ends of stems in water. You can use a glass, a jar, a bottle, anything that has a bit of room to allow roots to grow! Once in the container of water, the cuttings should be placed in an area that receives lots of indirect lighting. Roots should begin to show after about a month, if not sooner, if propagation is successful, and then they’re ready to be planted in soil (or grown in the water).
The other method is by taking the cuttings, dipping the cut ends in a rooting hormone up to the first set of root nodes, and setting them on a mixture that’s half peat moss and half perlite. The soil should be kept moist, and like the above method, the cuttings should be kept in indirect sunlight. You should see roots form from successful cuttings after about a month.
Do golden pothos grow better in water or soil?
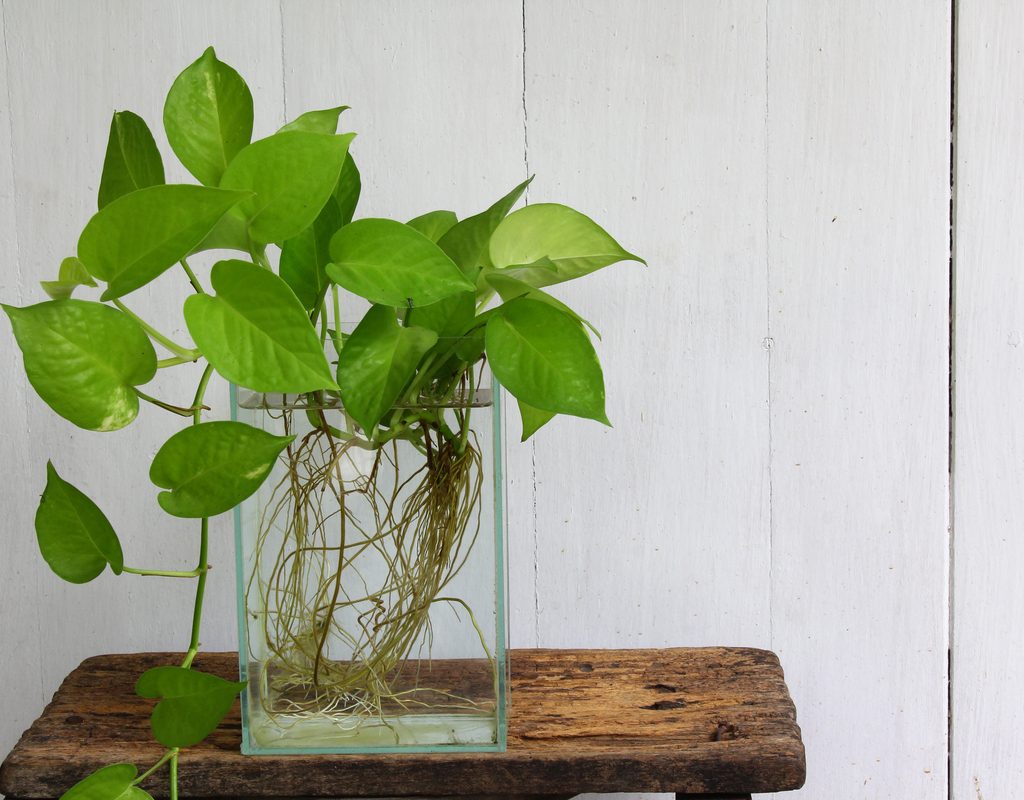
Golden pothos plants can be propagated and grown in either soil or water, but do they grow better in one than the other? Golden pothos tend to grow equally well in both soil and water, so it’s really up to your personal preference. Transplanting a golden pothos grown in water into soil can be tricky, as plants may have a difficult time adjusting, so it’s best to pick one and stick with it.
Caring for your golden pothos in water is not too different from caring for one in soil, and many things, such as light, temperature, and pruning, are the same. However, you’ll need to refill or replace the water every couple of months and clean the container it’s in. Keep in mind that you’ll need a liquid fertilizer as well, since granular fertilizers don’t always dissolve well in water.
Growing a golden pothos isn’t too difficult, and often they’re regarded as one of the best beginner plants because of their high tolerance and hardiness to some neglect. If you’re looking for a beautiful cascading houseplant for your bathroom or that one spot on the shelf you don’t know what to do with, this may be the plant for you.


