HappySprout may earn a commission when you buy through links on our site.

How to set up a saltwater pool in your backyard

Most pools that people enjoy during the summer exclusively use chlorine to disinfect the water. However, there is another, less-used option that may be better: saltwater pools. When people hear that phrase, they may think of the ocean. In reality, the salt in saltwater pools is difficult to smell or taste because only a small amount of salt is used in the pool. Installing a saltwater pool may seem daunting, but they aren’t any more difficult to build than chlorine pools and may provide more benefits.

square inground pool surrounded by greenery
Dimitri Houtteman/Unsplash

The benefits of saltwater pools

Saltwater pools have numerous benefits over chlorine pools. Here are just a few:

  • Less chlorine. Saltwater pools still use chlorine to disinfect the water, but saltwater pools use a natural, salt-based form of chlorine instead of the chemical variety. The salt sanitizes the pool through a process called electrolysis, and is a gentler, more effective form of chlorine.
  • Hypoallergenic. Some people are allergic to chemical chlorine, but have no issues with saltwater pools. If you have an itchy throat, irritated eyes, and sniffles when jumping into a pool, it may be time to start thinking about switching to salt.
  • Simple maintenance. Saltwater pools still require maintenance, but less so than chemical chlorine setups. A saltwater generator has a salt cell built-in, automatically adding salt to the pool at set intervals. Missing a week or two of pool maintenance is not the end of the world, compared to a chemical chlorine process.
  • More cost effective. When you have a saltwater pool, you only need to refill the salt cell once every 2 to 5 years, compared to replacing the chemical chlorine every few months.
Man Jumping Into Swimming Pool
Photo by Sebastian Voortman/Pexels

How to start a salt-water pool

You’ve decided to make the leap to a saltwater pool. Congratulations! It isn’t a difficult transition. Follow these steps and soon you’ll have a salt-water pool that’s gentler on your eyes, skin, and pool equipment.

Determine your pool’s gallon capacity

Before you do anything, you need to figure out how many gallons of water your pool holds. This doesn’t need to be exact, but it should be a fairly precise estimate. Thankfully, you don’t need to have a bachelor’s degree in math to figure this out. Use handy online calculators, like this one from Royal Swimming Pools, to figure out your gallon capacity.

Test your pool’s chemical levels

The reason you need to know your pool’s gallon capacity is because it determines how much of each chemical you will add after testing your pool so the water is balanced. You can find water testing kits everywhere that pool supplies are sold, including Walmart and Amazon. These are the chemicals you’ll be testing for and the ideal ranges:

  • Alkalinity (80-120ppm)
  • pH (7.2-7.6)
  • Chlorine (1-3 ppm)
  • Cyanuric Acid (50-80 ppm)
  • Calcium Hardness (200-400 ppm)
  • Metals (0)
  • Salt (follow your chlorinator’s manual. Typically around 3200 ppm)

Your water needs to be balanced with these ideal chemical ranges before turning your salt chlorinator on.

Add the salt

You have finally arrived at the most important step: It’s time to add the salt! Check the manual your salt chlorinator came with to determine the best dose for your pool. The average salt level is ~3200 ppm. Also, make sure you’re using the correct salt; table salt won’t work here. Specifically, look for Sodium Chloride that is at least 99% pure, preferably higher. That 1% may not seem like a lot, but, after dumping bags of salt, that 1% adds up.

Before you start adding the salt, you need to know how many pounds to add. Again, there are online calculators that help, such as this one from Pool Research. You will need to know how many gallons of water your pool holds, the current salt PPM, and the desired salt PPM. For example, let’s say your pool holds 6,000 gallons of water, the current salt PPM level is 1000, and your desired salt PPM level is 3200; that means, according to the calculator, you will need to add 110 lbs of salt, or almost three average-sized bags

Optional: Add pepper

First salt and now pepper? Don’t worry, we are not talking about the table pepper you have with dinner. This step is optional, but we recommend investing the money. Regular use of pool pepper has many benefits, including:

  • Improves sanitizer effectiveness.
  • Enhances water clarity.
  • Helps curb pH fluctuations.
  • Increases the life and performance of your salt chlorinator.

If this sounds like a worthwhile investment then add the pool pepper directly in front of the jet or sprinkle it over the pool surface. Add 1 container of pool pepper for every 10,000 gallons of water.
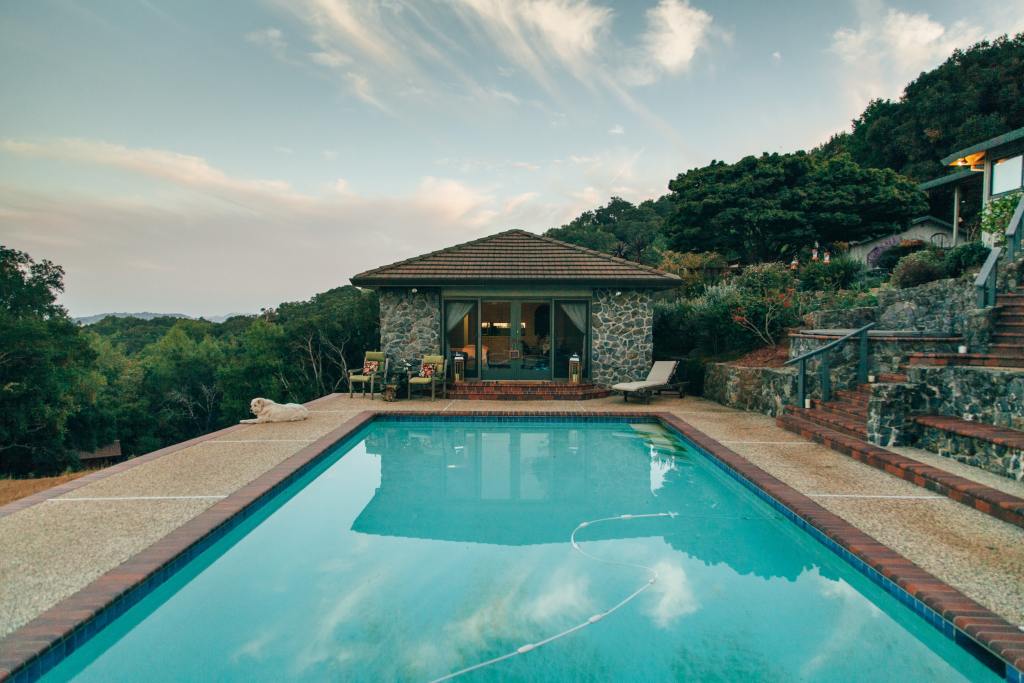
Pool in Los Gatos, United States
Photo by Jesse Gardner on Unsplash

Final thoughts

Saltwater pools are becoming incredibly popular for their sensibility, cost, and health benefits. Chemical chlorine can be rough on the eyes and skin, and swimmers might be allergic to the chemical. Saltwater pools remove almost all of the negatives of fully chlorine pools and are even easier to setup. If you follow these steps, you’ll be diving into summer in no time.
Editors' Recommendations

Niko Vercelletto
Former Digital Trends Contributor
Niko Vercelletto lives in Lansing, Michigan. He is passionate about going into depressive spirals thanks to the Detroit Lions…
Everything you should consider before painting your pool
painting a pool

Some tasks can be quickly taken on in an afternoon, while others weigh on your shoulders. Sometimes this weight is because of the size of the project, while other times, it's because you're not sure what to do. Today we're going to help you tackle a project you might be putting off. We'll talk about why you might want to paint your pool, what you should consider before starting, and how to get started.
Why you might need to paint your pool
One of the main reasons pool owners want to paint their pool is that the original paint is no longer viable. It might be chipping, or the color has faded to an ugly sunburnt shade. Another reason might be simply because of aesthetics. Perhaps your style has changed, or it's a new home and you don't like the style the last homeowners chose. Either way, it's time to repaint the pool. Lastly, you might need to repaint your pool because the integrity of the pool requires repair, so you'll need to patch the paint anyway.

What to consider before painting your pool
Before jumping right in, there are a few things you should consider before repainting your pool. This is a big project, and to set yourself up for success, you'll want to have everything planned out to ensure it runs as smoothly as it can.
Time of year
If you want to repaint your pool, but you're about to head into the rainy season, you might want to reconsider. A pool will need to stay dry and clear of debris for a long while during the painting process, and if there's a chance you might get rain, you'll want to reschedule.
What color to paint
This might seem elementary, but choosing your color way ahead of time can alleviate any anxiety you have about choosing the right color. If you wait until the day before to decide which shade of blue you're going with, you might not have time to think about it and end up regretting it. The last thing you want to do after painting your pool is to have to repaint it.
Gathering supplies
Nothing slows a project down like a run to the hardware store. Check and recheck your list of supplies and be extra sure that you have everything you need. You might even want to buy double of some things to ensure you have what you need when you need it. If you save the receipts, you'll likely be able to return it if you don't use it. Better to be safe than sorry.
Clean, clean, clean
For the best results, you'll want that pool as clean as you can get it. So while it might be tempting to rush through the cleaning steps, we strongly urge you to resist and deep clean your pool before painting it.
Protective gear
Luckily, painting a pool often means you'll be outside, so the fumes of the paint won't be as big of an issue as they are when inside. However, getting pool paint all over your clothes and skin and possibly your eyes isn't ideal. Be sure to wear protective clothing and maybe even safety glasses to protect your eyes. There are many chemicals in paint, and it's best to avoid them as much as possible.

Read more
How to choose the best outdoor sink for your entertaining area
Outdoor sink

Setting up an outdoor kitchen can be quite an undertaking, but it's well worth your time, energy, and money if you want to prepare food for your guests outside. Naturally, an outdoor kitchen and an outdoor sink go hand-in-hand. The process of selecting and installing an outdoor sink, however, can be a confusing one. Deciding on the material alone can put you down a rabbit hole, so what are the main factors to consider when setting up a sink for your outdoor kitchen? Keep reading to find out!

Benefits of having an outdoor sink
Before we get into the details, let’s consider the general benefits of having an outdoor sink. Though you could always dash indoors to access your bathroom or kitchen sink, keeping one outside can be very convenient. If you prepare meals during a barbecue or cookout, an outdoor sink makes it easy to wash food and dishes outside instead of lugging things in and out of the house. If you have a double-basin sink, you can even chill your drinks on one side. Even when you're not hosting guests, having an outside sink during the warm-weather season can be helpful. You can use it to clean your harvests before bringing them into the house, for example. You can also use an outdoor sink to water your potted plants and wash your hands and other materials while working on outdoor or garage projects.
What to consider when you install an outdoor sink
Components
Some sinks at big-box and hardware stores come with everything—faucets, fittings, the whole shebang! However, you may want to source your own components for easy customization and the best prices possible. There are three essential components for an outdoor sink: the basin, faucet, and plumbing.

Read more
How to protect your outdoor furniture as the weather begins to cool
Outdoor patio furniture

When it comes to outdoor furniture, you should consider it an investment. The truth is that regardless of your yard or patio’s size, the furniture you place in those spaces can enhance their function and visual appeal. Would you want to hang out on your patio with family and friends if you didn’t have a comfortable place to sit or have drinks? Probably not.

Socializing, playing, and working are all more enjoyable when you have nice outdoor furniture. With that in mind, you obviously want to extend that furniture’s overall lifespan. Keeping it maintained and functioning properly is therefore in your best interest. To ensure that you can, we’ve listed some things you should keep in mind.

Read more