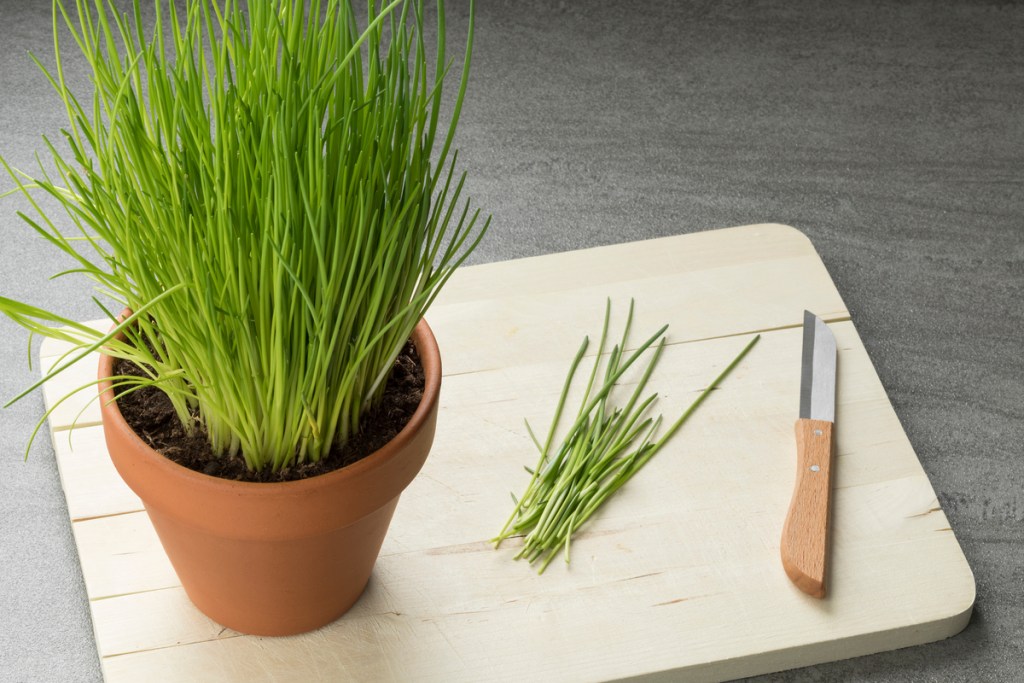
Chives, often confused for green onions, are fresh herbs used as garnishes and ingredients in dishes like dips and soups. They can be used interchangeably for green onions (and are part of the onion family), though it isn’t a one-to-one switch when cooking. Growing chives, however, is very similar to onions and just as satisfying. Chives thrive in USDA hardiness zones 3 through 9 and are a cold-tolerant herb. This herb reaches a harvestable size in just two months, making for a very quick turnaround during the growing season.

Why you should grow chives at home
Growing chives at home is a cost-effective, rewarding way to have fresh herbs for garnishing your dishes and putting in salads. When you grow any herb at home as opposed to buying it in the store, you have the option to harvest only as much as you need, leaving the rest to continue growing and thriving. It minimizes the risk that your ingredients will go bad, and you won’t have to worry about wasting money on a bag of fresh chives when you only need a sprinkling.
Herbs can even be dried out and saved for later! If you notice some of your chives need to be cut but you don’t have an immediate use for them, you can harvest however much you need to, dry them out, and store them in an herb or mason jar to use later. Nothing has to go to waste when you grow herbs fresh at home.
A complete care guide to growing chives
Because chives are part of the onion family, they actually enjoy many of the same environmental conditions that onions themselves do. If you’re used to growing those, you should have no trouble adding chives to the mix!
Chives grow well in regions with cool temperatures, offering up their greatest harvest in late spring and fall. Similar to how trees go dormant during extreme cold, the intense heat of the summer occasionally causes dormancy in chives until temperatures cool down again. They will die off completely in the winter, though, and will return in the spring (vigorously, if you let them go to seed). You can also transplant them into containers and overwinter the plants indoors if you have the space.
Light needs: Prefer full sun but can grow in light shade
Water needs: Drought tolerant; should be kept consistently moist (not soggy) for best growing results
Soil needs: Enjoys rich, well-draining soil
Is growing chives indoors different than outdoors?
Although the care is relatively similar — perhaps with slightly more frequent fertilization since potted plants have access to less nutrients naturally — the location and management of your chives will be a bit different.
Planting chives outdoors
Growing chives outdoors is best done in a garden bed if you plan to eat them; however, they also make great ornamental herbs that can be planted along fences and garden borders. Outside, chives love full sun and a good amount of moisture. They can tolerate light shade, but you’ll get more from your harvests if they have access to light all day long.
Chives grown outdoors tend to develop clumping habits, which cause the plants to get overcrowded. You may find that you’ll have to separate them at least once per growing season in order to keep the individual plants as healthy and strong as possible.
Growing chives in an indoor herb garden
In an indoor herb garden, your chives will still enjoy a decent amount of sunlight; however, you’ll want to keep them in an area that receives bright, indirect light as opposed to direct to help prevent the plant from burning.
You’ll also want to be a bit more mindful of watering. There won’t be as much space for the water to go, so a pot with good drainage and well-draining soil is especially important. Chives don’t like to sit in soggy soil and are prone to root rot. When watering potted chives indoors (or even deck box or patio containers), make sure you only do so when the top of the soil starts to dry out.
The best way to harvest your chives
When growing from seed, chives are ready to be harvested within a couple months. If you’re starting with an already-established plant bought from a local nursery, time to first harvest is almost immediate. You’ll want to let them get established for a couple weeks, but it won’t be nearly as long before you’ll be adding fresh chives to your dips.
In the first year, chives should be harvested four or five times during the growing season. After that, you can harvest monthly. When growing a chive plant indoors, the same guidelines apply; however, if you need to snip one leaf off here or there, it won’t hurt the plant.
The best way to harvest chives is to take a sterilized pair of shears or scissors and cut the leaf one to two inches up from the base of the plant. It’s best to choose larger leaves first, that way the smaller, newer leaves have time to continue growing to reach their maximum flavor.
Should chives be pruned?
Only if you don’t want them growing all over your garden! Once the chives flower and the blooms are spent, they’ll go to seed. If you don’t deadhead the flowers, you may find yourself with more chive plants next season than you know what to do with. Although the species isn’t invasive, if you want a bit more control of your garden, trim off the blooms as soon as they start to fade.
That said, if you have no issue with a natural increase in the amount of chive plants you’re growing, then there’s no reason to prune your plant. Regular harvesting will do just fine for keeping it healthy and strong. Plus, the more you harvest, the more of your hard work you’ll get to enjoy in your favorite meals.