
When people think of a garden bursting with color, they usually imagine that color coming from flowers. That’s not always the case, though! There are plenty of options to add colorful foliage to your home and garden. Polka dot plants are one such plant, with spotted leaves that come in many shades of green, white, and pink. Not only are they lovely to look at, but they're also easy to grow. If you want to grow your own polka dot plant, here's what you need to know.

What is a polka dot plant?
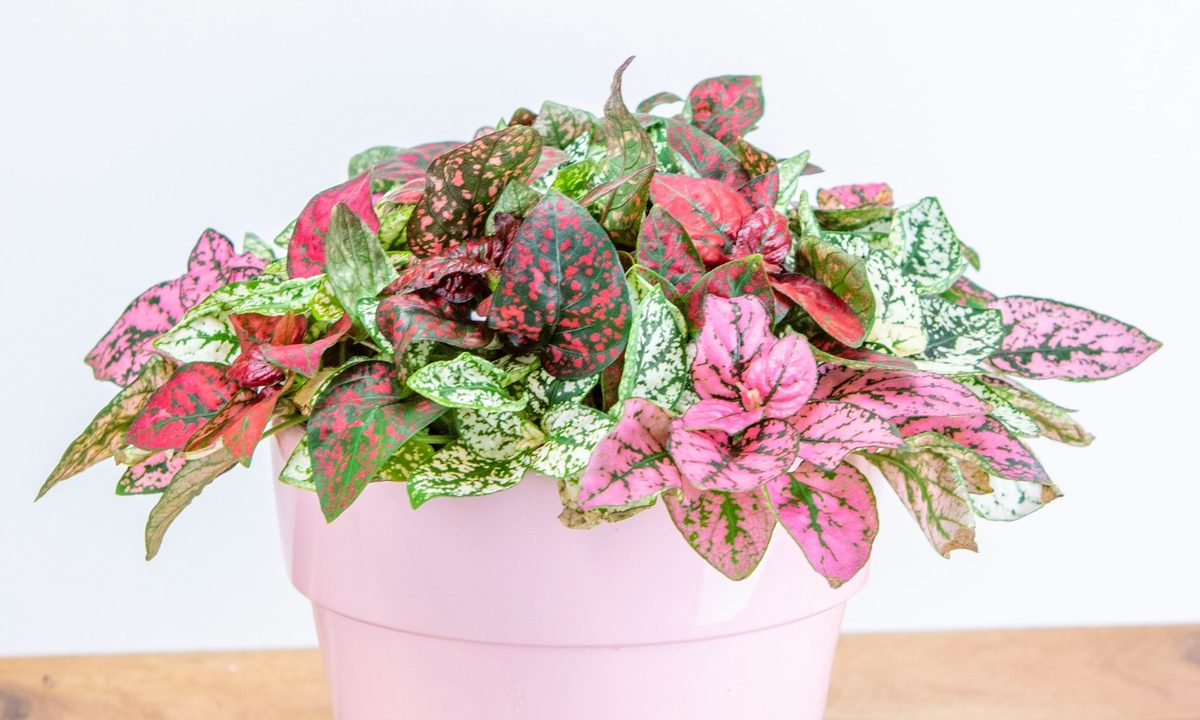
A polka dot plant, or Hypoestes phyllostachya, is a small herbaceous perennial with spotted leaves. Its leaves can come in practically any combination of pink, green, red, and white. The spots can be tiny dots, but are often larger, sometimes merging into patches of color.
Polka dot plants also bloom, but their flowers are generally less impressive. Most gardeners grow these plants for their leaves and prefer to lip the flower spikes off to prevent the plant from going to seed.
Native of Madagascar, polka dot plants can spread and become a weed in hot, humid climates. They're considered invasive in some parts of Australia, so it’s a good idea to keep them indoors. If you do keep yours indoors, you can rest easy knowing polka dot plants are nontoxic to pets and people.

Planting your polka dot plant
When polka dot plants first sprout, their leaves won’t have any dots or spots. Don’t panic! This is normal, and you’ll begin seeing spots appear on the leaves by late spring. Here's how to plant them properly:
Step 1: Use well-draining soil with added compost and perlite.
Step 2: Keep your polka dot plants in bright, indirect light.
Too much light can burn their leaves, but too much shade leads to leggy plants. They look lovely in slightly shady garden borders, nestled under a tree, or on the corner of a desk in a well-lit office.
Step 3: Start polka dot plant seeds indoors 8 to 10 weeks before the last frost date, or at any time if you plan to keep them as houseplants.
The seeds will germinate quickly if they stay kept warm, typically in under a week.
Step 4: Transplant polka dot plants into your garden after the last frost of the year.
If you aren't transplanting them into your garden, then simply keep your plants above 60 degrees Fahrenheit. Polka dot plants are sensitive to the cold.

Caring for your polka dot plants
Step 1: Let the soil dry slightly, but not completely, between waterings.
A sure sign that your polka dot plants need to be watered is drooping leaves. The leaves should perk back up after watering the plants.
Step 2: Avoid overwatering your polka dot plants.
The soil should be damp, but not soggy. An overwatered polka dot plant is vulnerable to mildew and pests.
Step 3: Fertilize your polka dot plants every couple of months to encourage vigorous growth.
If your plants are outdoors in the ground, then you can use any plant fertilizer. Indoor plants have an easier time with liquid fertilizer, which is diluted in water. Carefully read the instructions that come with the fertilizer you choose to avoid overuse.
Step 4: Prune polka dot plants that are becoming too tall.
Cut off the top portion of the polka dot plants using scissors or shears. This encourages the plants to grow horizontally, and the cut portions can be propagated to grow other plants.

Common problems to watch out for
The most common problems with polka dot plants are powdery mildew, root rot, pests, and mistaken identity. Here's how to avoid them:
Step 1: Use a pot with proper drainage holes.
Step 2: Let the soil dry slightly between waterings.
Step 3: Apply neem oil to the plant leaves.
Polka dot plants don’t often have serious issues with pests, but they can be affected by small insects, especially if they’re already weakened by a fungal infection. Mites, whiteflies, and aphids can all cause problems for your plants.
Step 4: Make sure you're caring for the correct plant.
Although there isn’t a true look-alike plant for polka dot plants, there is a plant with a very similar name: the polka dot begonia. It has different care requirements and growth habits, so read carefully to make sure you’re getting advice on caring for the right plant!

Polka dot plant propagation
If you love your polka dot plant and want to grow more, or want to share that love with your friends and family, then you'll be happy to know that polka dot plants are fairly easy to propagate. You can propagate them by taking a stem cutting and rooting it in soil or water. You can use the stem cuttings left over from pruning your polka dot plant for this. Simply place the cut end of the stem in fresh, clean soil or water.
You can add a dab of rooting hormone to help speed up the process, or leave it off if you don't mind the wait. Care for the cuttings like you would a young polka dot plant, and soon roots will begin to grow. Cuttings rooted in water can be transplanted into soil when the roots are a few inches long and thicker than the tip of a pencil.
Polka dot plants are delightful little plants that will brighten up any shady garden or room. Their fun colors, small size, and easy care requirements make them great gifts, too. They make ideal companion plants for impatiens and bromeliads, but they’re just as beautiful in a container of their own.


