Gardening can be a relaxing activity, but sometimes it can be a little too easy to lose track of time. If winter’s cold weather has snuck up on you, or if the weather has taken a sudden, unexpected turn and you need to get your garden ready quickly, then you’re in the right place! We’ll explain everything you need to do to prepare your garden for the cold weather in only 3 days. If you have a little more time on your hands, then you can spread the tasks out a little more. However, everything described in each section can be easily accomplished in a single day, so there’s nothing to worry about if you’re tight on time.
Day 1: Clearing your garden
Start by digging up any dead or dying plants. Plants that won’t survive winter even with protection should also be removed, although you may be able to transplant them into pots and bring them indoors for the winter. You can also remove any plants that may survive winter but that you don’t want in your garden during spring. Inspect your plants for signs of disease or damage, as this is a good time to remove such plants before they die or before the disease spreads. Don’t worry too much about removing all of the roots, you can cut the roots into smaller pieces and they will break down over time.
Once these plants have been cleared away, it should be easier to see any weeds that may have been hidden before. Give your garden a very thorough weeding. The cold may kill some weeds, but most only go dormant and will return in spring if left in your garden. This is especially important if you plan on leaving your garden empty over winter, since there will be fewer things keeping the weeds from spreading.

Day 2: Preparing and planting
Once your garden is cleared out, you can prepare your soil for the next round of plants. When plants grow, they take most of the nutrients they need from the soil. After a few seasons of growing plants, your garden may be running low on key nutrients. If your garden has been empty for some of that time, you might have also lost nutrients and soil to the rain. Adding soil amendments can help replace some of those minerals and elements that have been lost over time. Soil amendments can include compost and fertilizers, but also things like peat moss and vermiculite. If you’re using a chemical fertilizer, then follow any instructions on the packaging. In general, though, you can just mix your soil amendments into the top few inches of your soil.
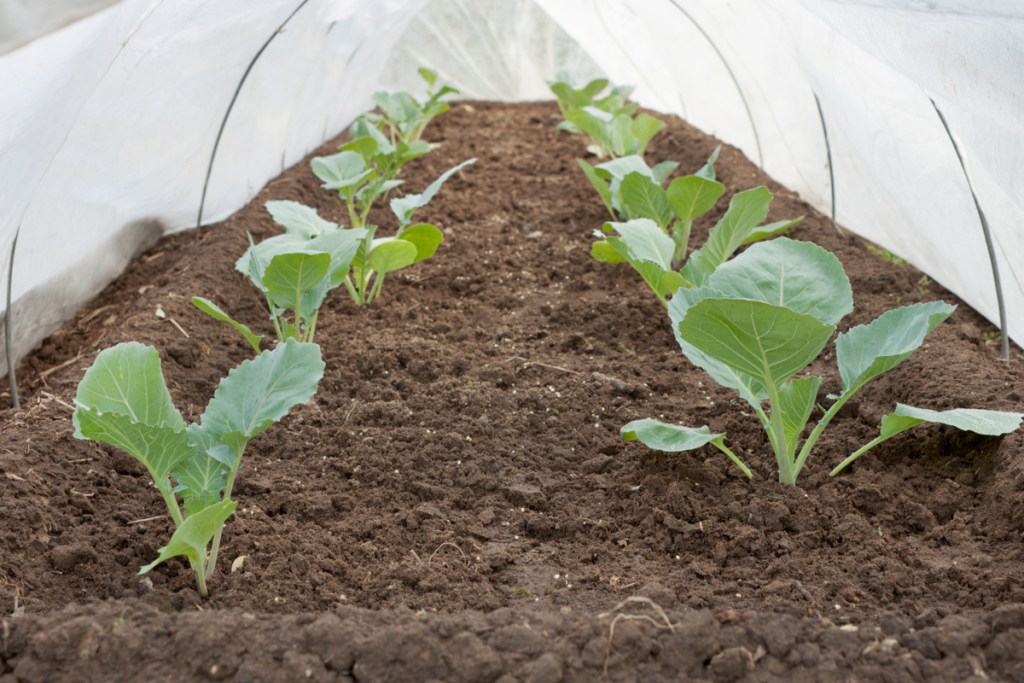
If you’re going to plant any winter crops or early spring-blooming flowers, then now is the time to do it. Depending on your climate and preferences you might consider snowdrops, daffodils, kale, and Brussels sprouts. If you don’t plan on growing any winter crops, you might want to consider planting a cover crop to reduce soil loss. Winter rye is a particularly good choice for the winter, but clover will work well if you live in a more mild climate.
Day 3: Protecting your garden from the cold
Any plants you have left in your garden or that you’ve planted to grow in spring will need to be protected from the cold. In mild climates, cold-hardy plants may not need this protection, but it can still be quite helpful. The easiest way to protect your plants is to add a layer of mulch around them. Mulch helps the soil stay warm and retain water, which can be very helpful during winter. Row covers will also keep the soil warm, as well as provide some shelter from wind and snow. Both mulch and row covers come in different materials, but any of them will help, so pick the option that best works for your preferences.
If you have any potted plants, now is a good time to move them indoors, unless you have a greenhouse that you can put them in. Even cold-hardy plants can be damaged by frost if they’re potted. This is because potted plants have less material surrounding their roots to keep them warm. Finally, any water features you have in your garden should be drained or covered. Some water features can be damaged when the water freezes.
Whether you have three days or 30, this list will be sure to help you prepare your garden for winter. Every garden is a little bit different, so you might not need to do everything on this list, or you may need to add a task or two, such as pruning. However, we’ve covered the essentials for you, so you can be sure your garden is cozy and safe just in time for winter.