
How to design a peaceful outdoor garden room

Gardens are lovely and have so much room for personal taste and aesthetics. There are plenty of interesting things you can do to make it stand out, from vertical gardens to pollinator gardens. A fun and creative idea to incorporate into this space is the creation of an outdoor garden room. Here are some simple ways you can build your own garden room. Watch your garden evolve from okay to excellent by considering this addition.

What is an outdoor garden room?

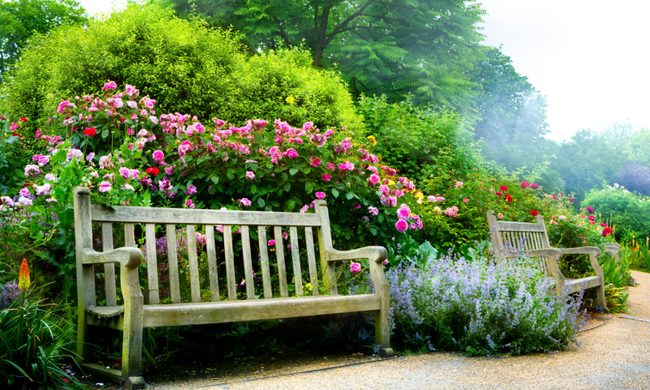
An outdoor garden room is a section of your garden that is separated from the rest of the garden, usually including some type of furniture. What makes it a room instead of just a seating area in a garden is that there is some type of barrier between it and the rest of the garden. This can be a solid wall; a line of trees, bushes, or shrubs; or a fence. It doesn’t need to be entirely enclosed, but there does need to be some visual separation between your garden room and your garden.

How to design an outdoor garden room

The first thing you need to do is decide where and how big your garden room will be. You may want to do a basic sketch or plan on some graph paper before you actually begin constructing and planting. Take note of what type of sun your garden room will be getting, so you can be sure you’re getting the right plants.

Determining what purpose your garden room serves also helps when it comes to choosing plants and furniture. Is your garden room for entertaining guests, or is it a quiet escape for just you? Is it a place for a nice outdoor dinner or maybe a playroom for kids? What sort of energy are you looking for? Do you have a particular color scheme, theme, or aesthetic you’re going for? If you aren’t sure where to start the planning process, start with these questions.

Next, decide on what type of barrier or partition you want around your garden. Solid walls provide security and shade, while trellises with climbing vines let in a little more light. Trees can make you feel like you’re walking through a peaceful forest, but they also require more room, while bushes, shrubs, and fences provide a visual separation without creating a real barrier. Do you want a roof for your garden room? If so, do you want a solid one to protect you from the elements, or do you want something lighter, like a fabric canopy or trellis? If you use trees for your barrier, they may provide a natural ceiling. 

What plants are best for an outdoor garden room?

It’s time to select your plants! This depends on the climate you live in and the amount of sun your garden room will be getting, but it also depends heavily on your personal taste and the atmosphere you want to cultivate. Ultimately, this is your garden room, so the most important thing is whether or not you like it. If you have a favorite flower, plant it in your garden room! Design your entire garden room around your favorite flower, color, or theme.

If you want a room that is bright and colorful, look for plants like Gerbera daisies, heuchera, or tulips. For something classy and elegant, there are plants like roses, ferns, and hydrangea. A more whimsical room might include cockscomb celosia, morning glories, and love-in-a-mist. The potential is endless. Your garden room might include a rock garden or perhaps a water feature.

Putting on the finishing touches

Make sure you’re selecting outdoor furniture so that it holds up well in your garden. There are a lot of options, so don’t settle. Pick something you really like, both aesthetically and to sit in. Metal furniture looks refined and holds up well, but it can be uncomfortable and cold in the winter. 

Couch, lounger, and table on outdoor patio

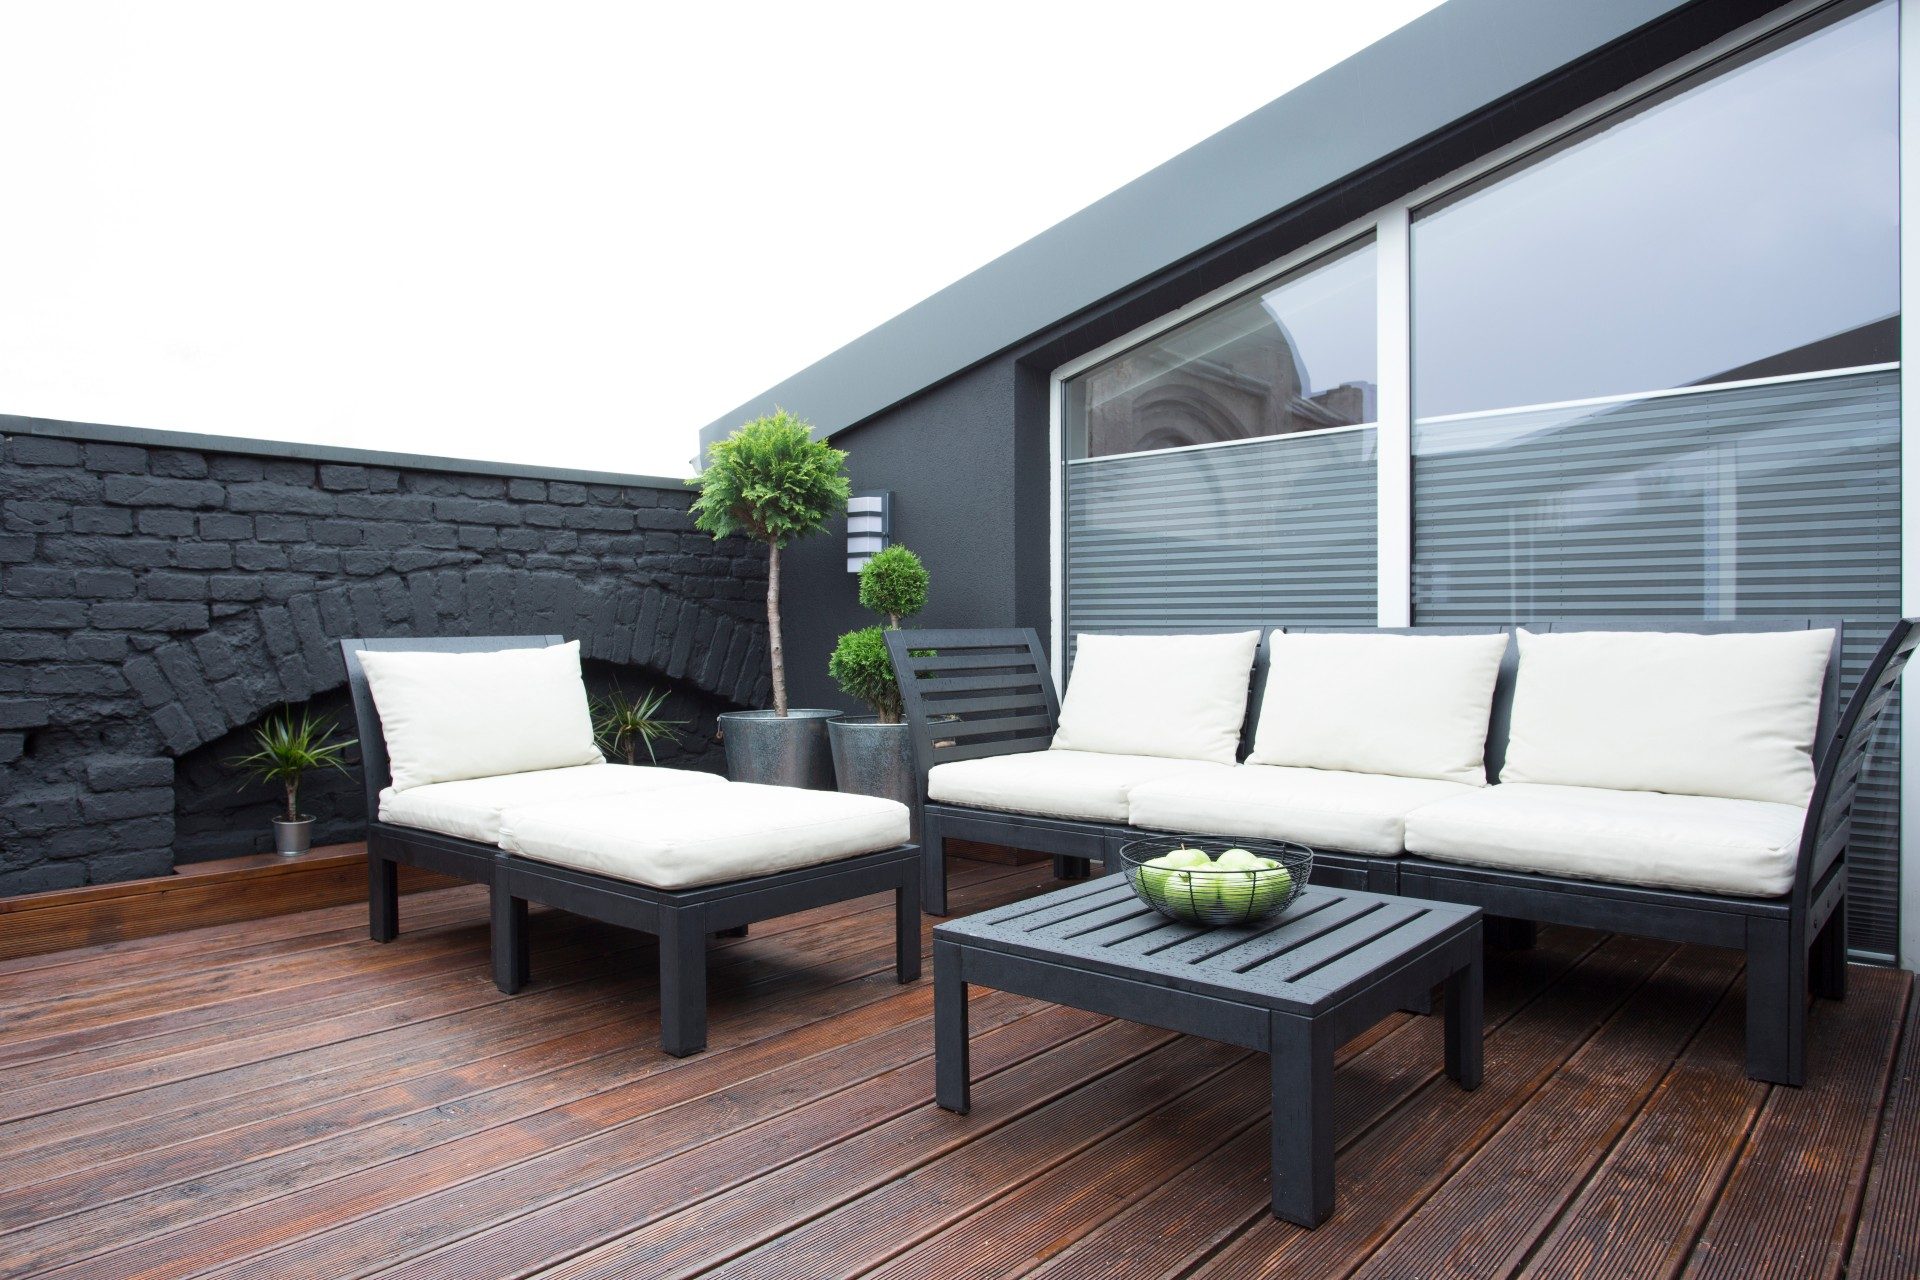
Wooden furniture is beautiful and fits in well with the natural surroundings, but it doesn’t hold up quite as well as metal and can be hit or miss with comfort, depending on how well it was made. Fabric chairs, like folding lawn chairs, are comfortable and easy to coordinate with your garden’s color scheme but are more easily damaged and can become mildewed if left out in the rain. Hammocks are a lot of fun but not always practical. There are chairs, benches, tables, and more to consider. Don’t be afraid to look around multiple stores and try everything out!

Once you’ve designed your room, it’s time to put it all together. As you’re planting your garden room, you might rethink some of the planning you did. Maybe you had initially planned to put the marigolds on the right side, but now that you’re looking at it, you’re thinking they might look better on the left. Take your time and think it through. Rushed decisions lead to regret, so step back and look at all your options. Remember, even when it’s set in the ground, it’s not set in stone. If later on, you decide to move things around, plant different flowers, or even redesign the entire room, that’s completely doable. You can always change things around, and you can always have more than one garden room!

Editors' Recommendations

Cayla Leonard
Cayla Leonard is a writer from North Carolina who is passionate about plants.  She enjoys reading and writing fiction and…
The 5 best outdoor floodlights for your yard
Outdoor home security light

If you’re someone who thinks about safety and who wants your home lit up in the dark, you've probably considered investing in floodlights for the outside of your home. Not only do floodlights accentuate a building’s architectural design, but they can also help deter criminal activity and keep you safe while walking to your car or going in your yard at night.

However, as great as floodlights are, the market is saturated, and it can be difficult to whittle down which type of floodlight is right for you, especially since there's so much to consider when purchasing. That's where we come in.

Read more
3 of the best solar garden lights for a bright and eco-friendly yard
outdoor sitting with lights

It's important to decorate your garden with stunning flowers and veggies, but it's also vital that your garden be well lit. Whether for parties, late-night harvesting, or quiet nights reading in the warm summer air, solar lights make a fantastic addition to any garden. They can transform a backyard into a cozy after-dinner area, light up a walkway for safe navigation, or bring attention to a favorite tree. Here we'll be going over the essential considerations to keep in mind while shopping for solar garden lights. We'll also include a few of our favorites you might want to add to your landscaping.

What to consider when buying a solar garden light
Not all solar garden lights are created equal; there are a few things you'll want to keep in mind.
Cost
The cost is one of the most important aspects of purchasing a new item for almost everyone. Although solar garden lights are very similar in price, it's still crucial to consider how much you're willing to spend on lights before you go looking. Having a better idea of your budget will help you find the ideal solution.
Ease of install
If you need something easy to put up for a party this weekend, you won't want to buy a setup that'll take hours to put together. Instead, finding a solar light that's easy to install will make life easier and allow you to get back to doing other things like gardening!
Lifespan
Outdoor products never last as long as their indoor cousins, so it's not surprising to find that solar garden lights have a shorter shelf life than other indoor lights. However, this doesn't mean you should have to replace your garden lights every year or bring them in during the winter. Instead, look for a light that can withstand the types of weather you often see and be sure to care for the light properly so it can last a long time.
Aesthetic
Of course, you should like the way your new lights look! If they don't suit the aesthetic of your garden, you'll likely be disappointed and tempted to go looking for other options. So be sure you're looking for a light that's going to suit the rest of your garden, or at least blend in and not take away from your garden ornaments.
MAGGIFT Solar Pathway Lights
These pathway lights by MAGGIFT are ideal for lighting the way during the darker hours of the day. Whether it's the path from the driveway to the house or the deck to the flower garden, these lights will soak up sun rays and provide you with plenty of light to see your way.

Read more
When and how to transplant tomato plants for the best results
baby tomato plants

There's a time in every gardener's life when they try to grow their own veggie plants from seed. This is a gratifying process, and there are many benefits to growing your own seed starts. One of those benefits is bigger and healthier plants. By growing your own baby tomato plants, you can ensure that the plants are well cared for, never given anything you don't want them to have, and transplanted in just the right way at just the right time for optimal plant health. So how do you transplant tomato plants to ensure they're happy and healthy and live to produce lots of yummy tomatoes for your home?

How do you transplant a grown tomato plant?
If you've never transplanted tomatoes before, the idea can be intimidating. You have all these tiny plants that you've cared for over the last several weeks, and now it's time to pluck them out of their nursery pots and plop them into the outside soil where they're exposed to sun, weather, and critters. Luckily, you've cared for them so well that they're healthy and robust plants that will be able to handle anything nature throws at them.
Step one: Harden the plants
Hardening the plants is a term gardeners use when talking about the process of acclimating a greenhouse-grown plant to outside conditions. Typically it refers to sunlight, but it could also refer to wind and other weather that could harm the plant. About a week before you're ready to transplant, you'll want to harden your baby tomato plants by exposing them to sunlight at increasing increments each day. For example, day one should be about 30 minutes, then 45, then 50, and so on until the day of transplanting. If you don't do this, you'll risk your plant being burnt and killed when you transplant it outside.
Step two: Don't water the plants
Before you start pulling little plants out of their pots, you mustn't water the plants a few days before transplanting. Wet soil can make the transplanting process much harder on you and the plant. Dry soil falls away easier and is less likely to break off roots as you move the plants to their new home.
Step three: Prepare the new soil
The new location for your tomato plants will need to be prepped before you get all those babies out of their homes. Whether you are planting into the ground, a raised bed, or a pot, you'll want to amend the soil to guarantee that the plant has many nutrients to soak up. It also is easier if you dampen the soil right before transplanting. Damp soil is much more manageable and more easily manipulated around the plant.
Step four: Plant deeply
As you gently pull out the baby tomato plants, you'll want to shake off the old soil to expose the roots. This will ensure the plant has access to the new soil and nutrients you're about to provide it with. 

Read more