
How to grow pomegranates in a container at home

Plenty of gardeners know how rewarding it is to grow their own crops — cucumbers, tomatoes, melons, herbs, just to name a few — and be able to use fresh produce in their meals. However, unless you live in certain climates, it isn’t as likely that you’ll be able to grow your favorite fruits on trees outdoors. Like many fruit trees, though, growing pomegranates in containers isn’t particularly difficult as long as you do your research and have the time and patience to provide the best care you can.

Two small pomegranates
xermark/Shutterstock

The best variety to grow

Most crops have dwarf varieties that are better suited for container growing than regular ones. The average pomegranate tree can grow up to 30 feet tall, which wouldn’t be ideal for growing inside your dining room or on a back patio! The dwarf varieties, however, tend to resemble shrubs more than trees and can grow to a modest size. The fruit they bear will be smaller, but you can prune the pomegranate tree to your preferred shape and won’t have to worry about transplanting it outside.

One of the most popular ones at your local nursery is the Wonderful variety. Be aware that some dwarf varieties of pomegranate trees are actually ornamental and won’t produce fruit, so you should research closely before purchasing. Unfortunately, unless you have seed from a dwarf variety pomegranate, you’ll have to start with an existing tree before attempting to grow new ones from the seed.

Preferred growing conditions

Pomegranate trees are hardy in USDA zones 7 through 10. Outside of that, you may find yourself needing supplemental products like grow lights and humidifiers to increase your tree’s happiness. They enjoy a lot of lighting but can tolerate some shade — just be sure the ratio is in favor of more light than shade.

The frequency of your watering will vary depending on things like the time of year, the temperature, the amount of light the plant gets, the size of the plant, and the size of the pot. Generally, though, pomegranate trees don’t like to be overwatered. They’re somewhat drought tolerant, preferring damp soil over soaked soil. You should let a couple of inches of the soil dry out between watering, and make sure that the pot you use has good drainage (and well-draining soil!) so the excess water has a place to go.

As your pomegranate tree grows, you’ll want to pay attention to the pot and be mindful of the roots. Even though this is a dwarf variety, the first container you use may not be the last. Your pomegranate tree will need to be repotted once you notice the plant looking a bit large for the space or see roots protruding from the bottom of the pot.

What you’ll need for successful growth

The most important thing to successfully grow a pomegranate tree is the environment. Make sure the location has enough light and airflow, as well as enough space for your tree to grow big and strong. You should also have a good pair of pruning shears on hand so you can trim branches and promote strong, healthy growth.

If you need to supplement the environment — like grow lights, fans, humidifiers, etc. — you should set them up in the space before you bring your pomegranate tree home. That way, you don’t have to worry about your tree slowly deteriorating while you wait for that last light to arrive in the mail.

A group of pomegranates and pomegranate seeds
GoncharukMaks/Shutterstock

Do you still need to prune your container-grown tree?

Of course! This goes for any indoor plant, too. Regular pruning is very important to not only remove any dead or dying tissue, but to also promote healthy growth. Pruning will give the tree a chance to direct its energy to the strongest foliage.

Younger pomegranate trees will produce shoots toward the base of the plant. It’s ideal to allow only a few of them to grow so you don’t crowd your plant, and prune the rest. Aside from general shaping, any dead branches should be pruned in the spring. This is when the tree will be coming out of its winter dormancy period, and you’ll be able to see what’s no longer viable. Getting rid of the dead branches allows your tree to focus on strengthening the live ones.

Harvesting and maintaining your new tree

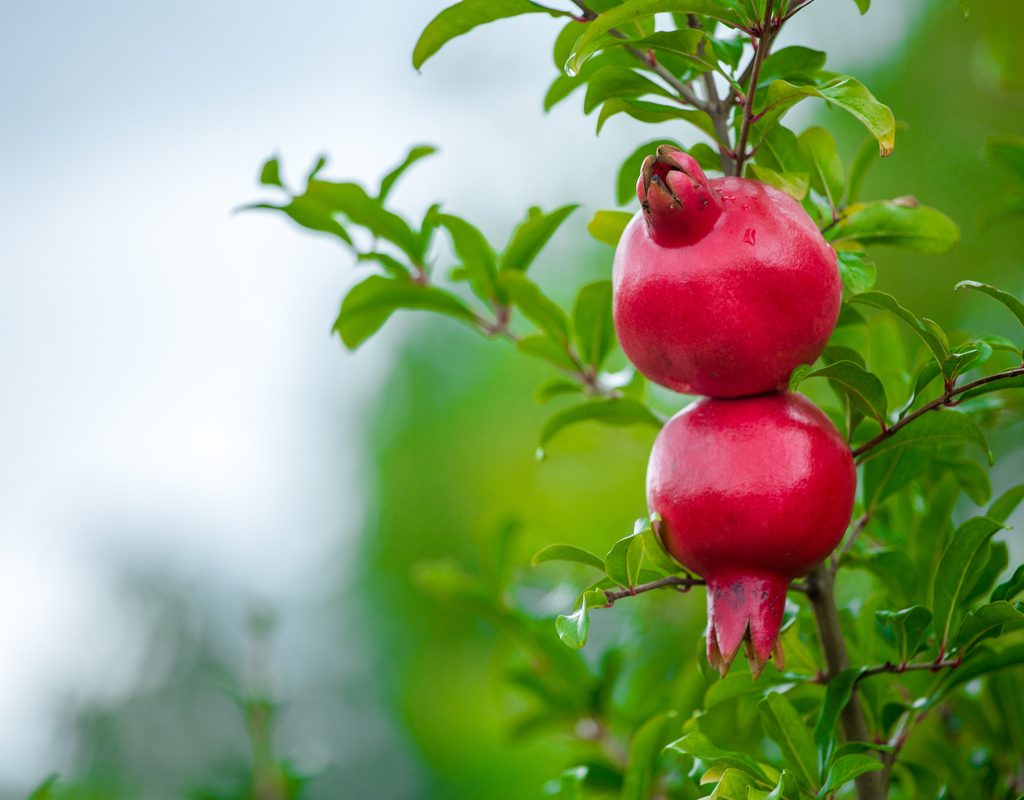
If after two years your tree hasn’t started bearing fruit yet, don’t worry! Your pomegranate tree won’t begin to produce until at least five years old, so, be patient. Once it does, though, you should wait until the fruit is deep red in color to harvest with sterilized cutters. This will allow the fruit to mature and be as tasty as possible! From there, simply follow all the steps discussed here, and your pomegranate tree will continue rewarding you with fruit year after year.

Growing any tree in a container can seem a bit crazy, but something as exotic and delicious as a pomegranate growing on your counter? It’s almost too good to be true. By following these steps — and embracing a bit of trial and error — we’re confident your pomegranate tree will flourish for years to come.

Editors' Recommendations

Kiera Baron
Former Digital Trends Contributor
Kiera Baron is a freelance writer and editor, as well as a budding digital artist, based in Upstate NY. She is currently one…
How to revive a struggling orchid and return it to its majestic former glory
We'll show you how to check the roots, remove pests, and provide the TLC your orchid needs to thrive
An orchid in a pot on the table

Orchids are beautiful houseplants native to tropical regions. Most often, when you buy them from a nursery, they’ll be in full bloom. This will give you an idea of the color and shape of their petals, which differ depending on the variety, so you can choose the best orchid variety for your home. Once you've brought it home and planted it in soil or in water, your orchid may thrive - or it might start to wilt.

It’s disheartening when your new plant turns out to be unhappy in the environment you've picked for it, and it can even make you feel like a bad plant parent. Luckily, most of the orchid's problems are fixable so long as you catch them early enough. Keep reading to learn how to revive an orchid and give it back its rightful place as the centerpiece of your indoor plant collection.
How do you bring back a wilting orchid?
When an orchid starts to fade, you’ll probably find yourself wondering: can you bring an orchid plant back to life? Can a dying orchid be saved? Unfortunately, it isn’t a straight yes or no answer. How to revive your orchid will depend largely on the symptoms and the root (no pun intended) of the problem. Sometimes it’s as easy as considering the plant's natural habitat and making adjustments to your home to fit its needs. Other times, you may have to do a bit of root maintenance to see results.

Read more
Incorporate these shower plants into your bathroom for a green infusion
These 7 plants help greenify your bathroom
Bathroom plant layout

As you turn your home into a jungle, transform your bathroom into paradise with the help of hanging shower plants. Adding extra greenery to your bathroom can switch up the ambiance for a lush vibe — it’ll be like taking a shower in the great outdoors while enjoying the comforts of your home. When picking out shower plants, keep humidity-loving species at the top of your list: Think ferns, figs, and more!

Curious about incorporating tropical vibes into this nook of your home? Read on to learn how to hang plants in the bathroom and which plants work best for this steamy environment.
Things to consider
Humidity and light
The bathroom is ideal for houseplants because of its humidity. However, keep in mind other requirements that your plants will need. Before you bring plants into your bathroom, consider factors such as light and temperature. If your bathroom doesn’t get a lot of light, invest in supplementary grow lights or pick plants that can thrive in low-light conditions. Also, take into account your bathroom temperature since some plants don't tolerate cold drafts.
How to hang the houseplants
Decide how you’ll hang your houseplants. Get creative with placement when building a plant paradise in the shower. Showerheads, caddies, shower rods, and curtain rods are great spots for hanging foliage, given that your planter isn’t too heavy. You can also take advantage of heavy-duty utility hooks that adhere to tiles.

Read more
Stargazer lilies are excellent warm-weather flowers – how to grow them for stunning blooms all summer long
Indoor and outdoor care for stargazer lilies
A cluster of stargazer lily flowers

Of the many popular flowers found in summer flower gardens, lilies are perhaps one of the most versatile. There is a range of colors, patterns, and even shapes available, so you're sure to find a lily that fits your garden. One popular lily variety is the stargazer lily, which has large, striking flowers. The petals of its blooms are pink with white edges and darker pink spots along the center of the petals. These stunning flowers are excellent centerpieces in summer gardens as well as indoor spaces. Here’s how to grow your own.
Indoor care
Stargazer lilies, like other lily varieties, can grow indoors with proper care. Indoor care for stargazer lilies begins with choosing the correct container. It needs to be deep and have sufficient drainage holes. Avoid shallow pots or those without drainage holes, such as ceramic pots. Likewise, you must use well-draining soil to avoid overwatering. Stargazer lilies enjoy moist soil, but they don’t tolerate standing water. Soil that is rich in organic matter is ideal.

Place your stargazer lily in your sunniest window, or where it can get light from a grow light if you don’t have access to a good window. Water your stargazer lily one to two times per week so the soil stays moist but not soggy. In the spring, freshen up the soil with a slow-release fertilizer to keep your lily healthy and blooming.

Read more