Bring a relaxing vacation into your home with a gorgeous plumeria plant. With lush blooms and a beautiful fragrance, the plumeria is the epitome of paradise. This stunning plant looks impressive, but it's surprisingly easy to grow indoors. If you want to grow your own plumeria flowers, then this plumeria care guide is for you! We'll walk you through every step of how to grow plumerias so your plant can thrive.
What is a plumeria?
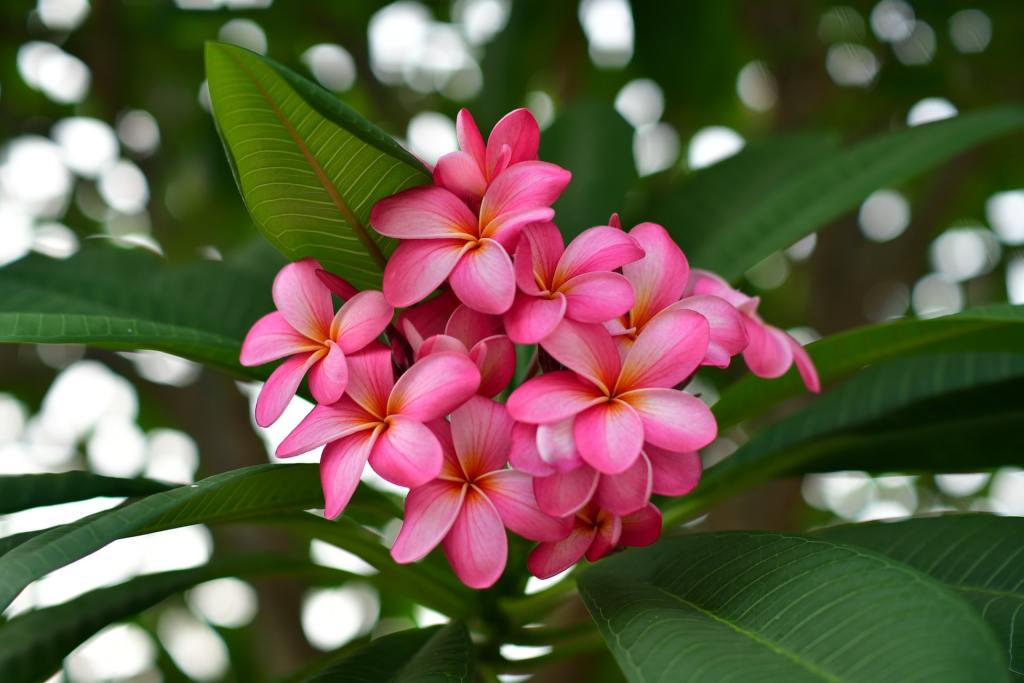
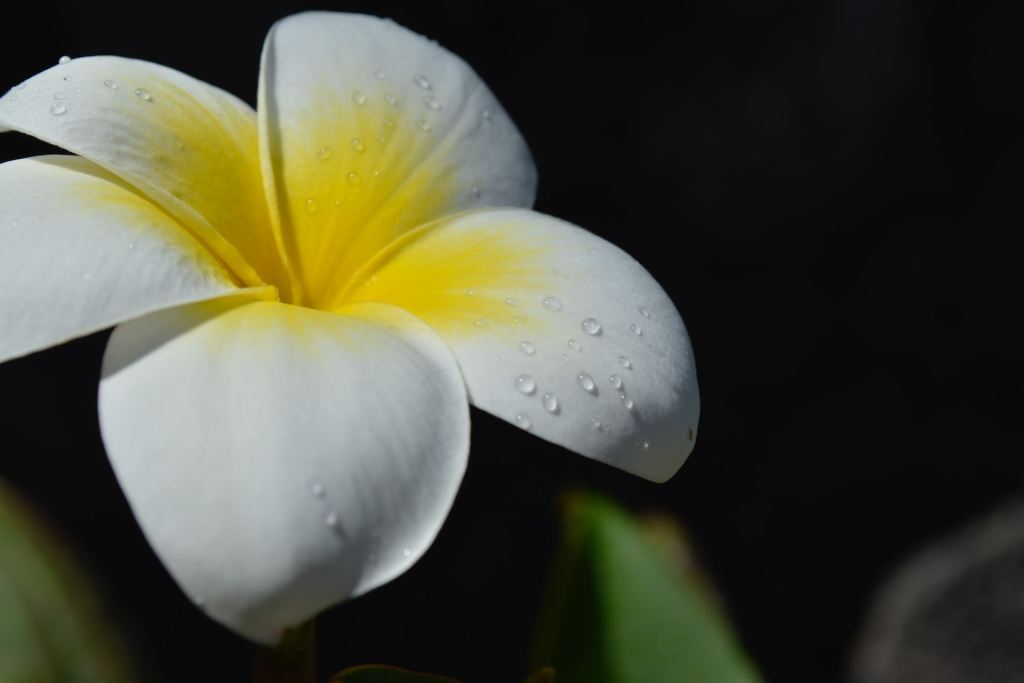
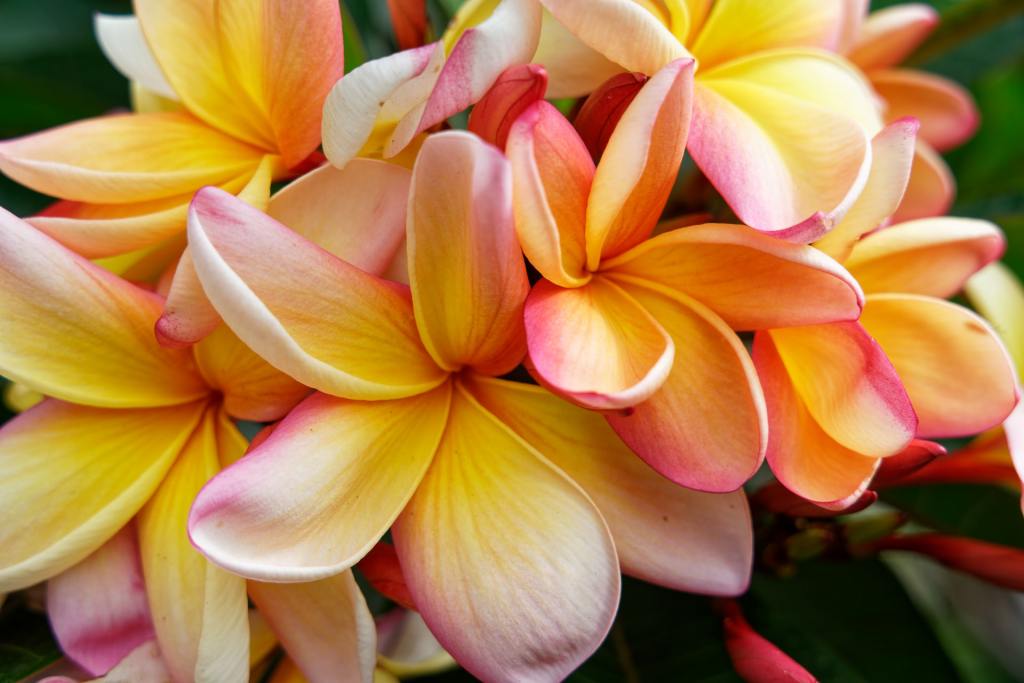
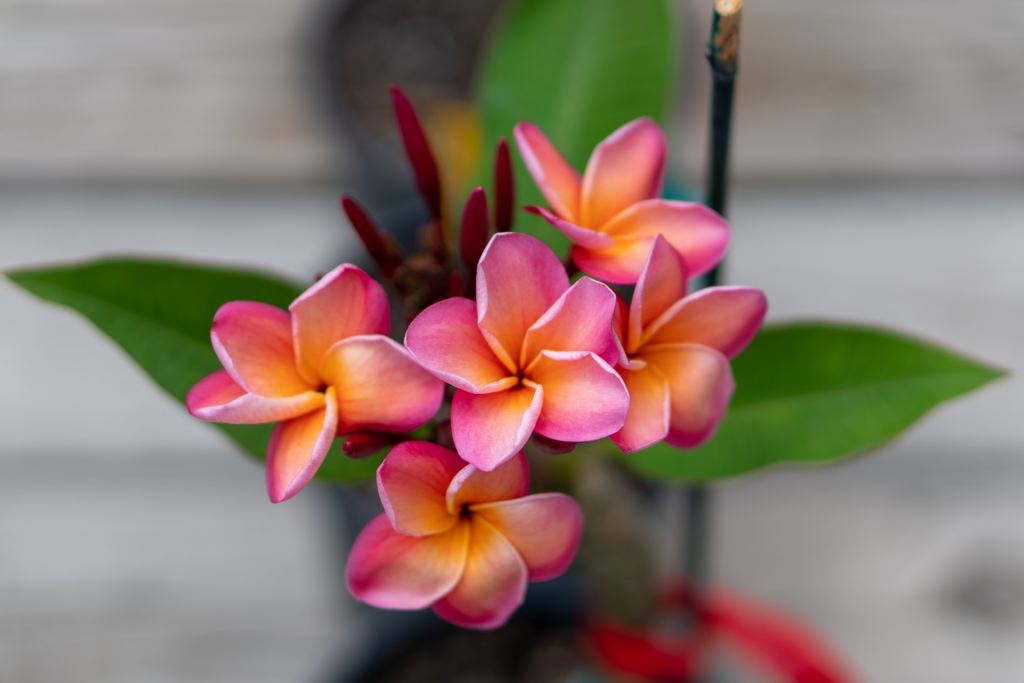
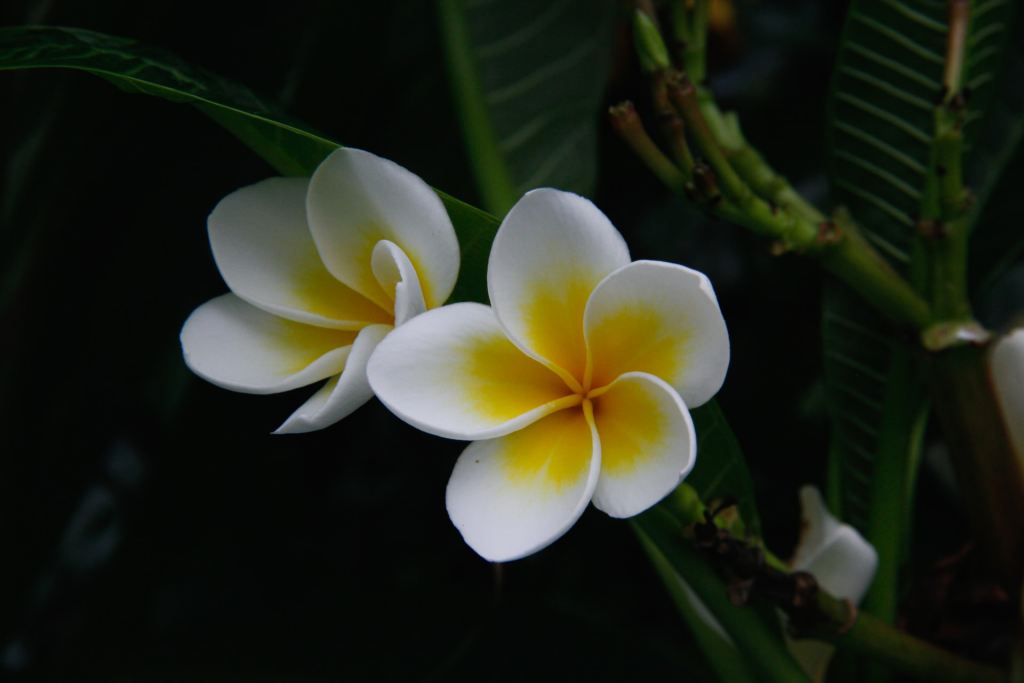
Also known as the frangipani flower, the plumeria genus consists of small trees and shrubs beloved for their fragrant, delicate blooms. Plumerias are native to tropical America and are commonly used in the leis you see at graduations or when you arrive in Hawaii. They feature leathery, oval leaves and waxy, 2-inch flowers with overlapping pinwheel-like petals that come in pink, white, orange, and yellow. Their floral scent is reminiscent of citrus, gardenia, and jasmine.
Although plumerias thrive best outdoors, they can be grown as houseplants in regions that aren’t in their hardiness zone. The general hardiness zone range for plumerias is zone 10 through 12, although this can vary within the genus.
How do you care for plumerias indoors?
Plumerias aren’t particularly difficult plants to grow — they’re actually fairly tolerant of drought and salt buildup when fully integrated into a landscape. Still, you definitely want to pay attention to certain factors when maintaining them, so that you can enjoy their beautiful flowers. Here are a few aspects of plumeria care to consider.
Step 1: Throughout the growing season, water your plumeria whenever the top feels dry — water deeply until you notice water leaving the drainage hole.
During the plant’s dormancy period in the winter, err on the side of underwatering.
Step 2: Give your plumeria well-draining soil.
Plumerias can thrive in containers inside your home, but they need lightweight soil to avoid root rot. When indoors, plumerias do well in a half-and-half mixture of potting mix and cactus soil.
Step 3: Place your plumeria in a well-lit area.
This should be either by a southern-facing window or underneath a set of grow lights. For beautiful blooms, the plumeria does best with 6 hours of full sun a day with some direct light.
Step 4: Leave your plumeria in a place that has a temperature range of 65 to 80 degrees Fahrenheit.
This plant is rather tender to frost, so you should keep it in temperatures above 50 degrees Fahrenheit. For cool winters, you must overwinter your plant indoors.
Step 5: Encourage blooming by applying a bloom-boosting fertilizer every month throughout the growing season.
Examples of fertilizers you can use include 5-30-5 and 4-10-7 solutions — anything with a high middle number, which indicates the phosphorus amount, should work.
When will plumerias bloom?
Plumeria flowers tend to bloom between May and November, and they can bloom all throughout the year in warm regions. If you notice your plant isn’t blooming as vigorously as it could be during the growing season, the culprit could be too little light or fertilizer. Move your plant to a brighter area and give it a bloom-boosting fertilizer that’s high in phosphorus.
In fact, you should bring it outside during the growing season if you can. Plumeria plants go into dormancy during the winter time, which is when the flowers and leaves will drop — don’t panic when this happens, as buds should start to appear during the spring.
Little maintenance or pruning is necessary with the plumeria plant, except to remove sick foliage or branches. In fact, too much pruning can delay flowering. If you do prune to shape your plant, consider doing it in the winter or early spring to avoid disrupting the bloom cycle.
How to propagate plumerias
Plumerias are very easy to propagate. Note: Do be careful when you handle plumeria, as the stems and leaves put out a sap that's a skin irritant. It’s best to handle them with gloves. Here's how to further multiply your plumeria plant to share it with fellow gardeners:
Step 1: Take a stem cutting with sharp, sterilized shears.
Step 2: Allow the wound to callus for three to five days.
Step 3: Dip the bottom part of the stem into rooting hormone. This step is optional.
Step 4: Place the stem cutting in potting mix for it to root.
Transplanting and repotting your plumeria
In most regions, plumerias are better suited to growing indoors or in a greenhouse. However, if you live somewhere more tropical, such as Hawaii or Florida, your plumeria plant can be transplanted into your outdoor garden. If your plumeria is still young, then you can transplant them like any other plant. Mature plumerias are a little trickier to transplant, as they'll need a bit of root pruning. This means trimming the edges of their roots, specifically the small, thin roots, to encourage more root growth once they are transplanted.
If you keep your plumeria indoors, you'll need to repot it every one to three years. Repot your plumeria plant in fresh soil and a clean container. If your plumeria is rootbound, loosen the roots some before replanting it. The new container should be at least a few inches bigger than the last one. Whether you are transplanting or repotting your plumeria, it's best to do so in late winter or early spring, before the plant begins preparing to bloom.
The key to a happy plumeria plant lies in giving it sufficient light and warmth. But even if you don’t live in a tropical region, you could still keep a plumeria thriving with measured care by overwintering it indoors and being mindful of your soil composition and plant food schedule. With a little patience, you’ll be rewarded with fragrant, stunning blooms that evoke a slice of vacation right in your home.