Is there anything more exciting than going out for pizza? Well, sure! There’s going out to your backyard to make a New York style pizza in your very own DIY outdoor pizza oven. Imagine it, the outdoors, a wood fire, and a fantastic experience you can share with friends and family. Now, allow your mouth to water for a moment …
Of course, you may not know how to build an outdoor pizza oven. That’s OK. Keep reading because we’re going to give you step-by-step instructions.

How does an outdoor pizza oven even work?
In case you don’t know it already, pizza ovens are traditionally made out of cement, clay, or bricks. They also typically have a big, arch-vaulted dome as part of their build, but that’s not always the case. The actual shape depends a bit on the preferences of the user and the region.
Permits and codes
To keep from violating any local ordinances, you should check with the local department that issues building permits. Ask about any zoning restrictions or building codes that might be connected to building an outdoor pizza oven. You should also talk to your local homeowner’s association (HOA) if you happen to live on a property that’s controlled by one.
Start building
Some might feel that building a pizza oven is a huge undertaking. Still, we’ve broken it down into some bite-sized steps that most building enthusiasts can handle. With that said, we’ll have you serving up homemade pies from your own authentic pizza oven in no time!
Oven base
Start with the foundation. You’ll need to dig a hole that matches the dimensions of the oven you plan to build. Next, pour cement into it. Once that’s filled, and the cement has solidified, it’s time to start building the walls of the oven’s base. You can use cement slabs for the base, too.
An alternate method is using small lintels as flagstones. With this method, you should be able to create space to store wood under the pizza oven. Be sure to leave two of the walls open so air can flow, which has the added benefit of keeping the wood dryer.
Once your base is complete, you’ll need to keep track of all the space you’ll need by outlining the oven’s floor plan.
Insulation
The next step is to start laying bricks. Under the oven’s floors, you’ll start building the bottom layer of walls. You can make these easily from regular red bricks and cement. Once the outer layer is finished, it’s time to put in a layer of insulation. This is a step you need to take care to do properly.
Now, this might sound a bit strange, but you’ll want to use old wine bottles if you plan to be a hard-core DIY’er. Otherwise, you can purchase products that are specially designed and sold to insulate pizza ovens. If you go the old wine bottle route, all you need to do is lay them down evenly. Then, take clay and sawdust and fill in the gaps.
Oven floor
Once the insulation and base are good to go, it’s time to build the oven’s floor. Start with a layer of build soil mix. Once you’ve put that layer down, you can begin laying the fire bricks. Start in the middle and work outward.
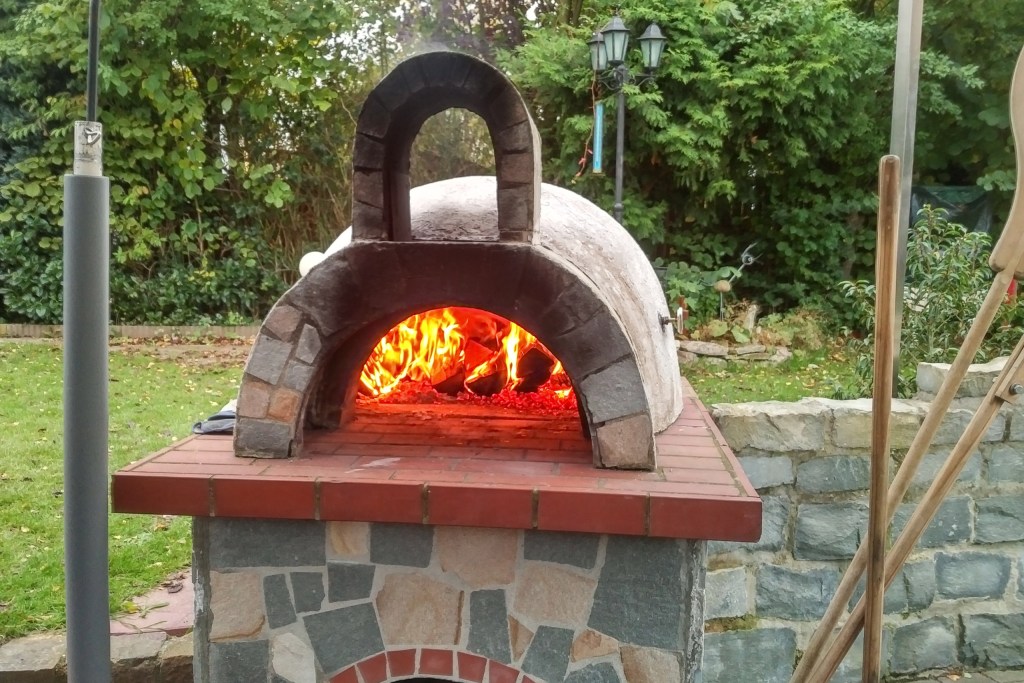
Dome
Now comes the part everyone notices when they first see the pizza oven … the dome! Start by drawing the dome’s outline on the floor bricks. Make sure to use a marker that doesn’t smear even when wet. Additionally, prepare well for this phase by purchasing 10 to 13 large buckets of clay. You’ll also need plenty of sand to use for mixing and to help structure the dome’s shape.
When you’re making the form, ensure that it’s compacted and is truly shaped like a dome. After finishing the form, wet some newspapers and make a layer over the form with them. Next, mix the clay and sand. Once it’s ready, take the mixture, make solid balls out of it, and lay them on the form. Build from the bottom up. Later, you can smooth everything out with a trowel.
Dry it out
This part requires the most patience. You need to let your newly built pizza oven sit there by itself for a few days (or weeks).
Once everything is dry, you are ready to cut out the oven’s mouth and chimney. Once that’s done, you’ll need to dig out the sand you used to make the dome’s form. Then, smooth out the inner walls with a large spoon and some water.
Finish the thing!
Add one final layer of insulation in the form of a clay and sand mixture. Add an outer layer of clay, and then the chimney, door, and roof. Once that’s done and dry, you can finish it all off by covering the dome with a layer of brick.
Voila! Your pizza oven is now the wonder of the neighborhood! Of course, you can cook all kinds of other things besides pizza in it, such as fish, bread, barbecue … you can just about name it and its yours for the cooking. Enjoy!