
Succulents are relatively low maintenance when it comes to care, and propagating them is no exception. While you can grow them in water as you would with many houseplants, there are actually several ways to create even more of these hardy plants to share with fellow succulent enthusiasts. If you’ve always wanted to know how to propagate succulents easily, read ahead to learn all of the best ways to go about it—it’s probably easier than you think!

How to propagate succulents in soil
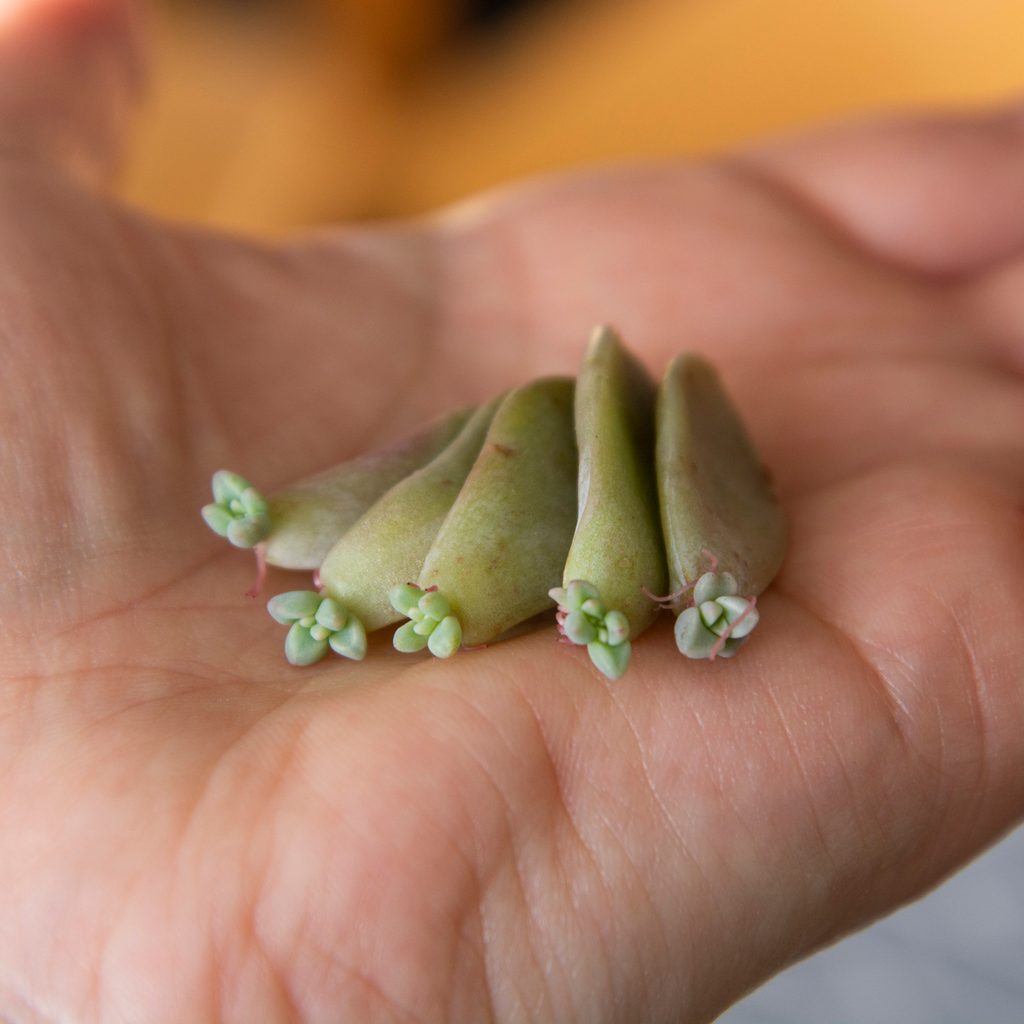
Propagate succulents with leaves
One of the easiest ways to propagate succulents is by placing their leaves in soil. It really is as simple as it sounds. Start by slowly and gently twisting mature leaves off of the succulent that you want to clone. Make sure that pieces of the stem aren’t attached to the leaves, as this could keep them from rooting properly. Leave the succulent pieces facing upwards on cactus soil for a few days to allow them to form a callus—this way, they won’t rot.
After three to four days, you can mist the soil and then again once it dries out. In a week’s time (or more, depending on your variety), roots should form from your cuttings—cover them with soil once they emerge and make sure to give your cuttings plenty of bright indirect light. You’ll see baby pups emerging after about a month. The original cuttings will likely start to die, so you can twist them off or leave them until they fall off naturally. Note that propagating this way works best with sedums and echeverias, where the fleshy leaves come off relatively easily.
Propagate succulents with stem nodes
To propagate succulents with their stem nodes, start by taking a cutting of the top leaves. After making the snip, gently remove the lower leaves. Let the nodes callus, then place the stem in soil and water when your potting medium dries out. (You can also try propagating the leaves with the aforementioned method!) In a few weeks, roots should form. Again, give your succulents bright indirect light to help them grow. Rooting hormone may help speed up the process, but it’s not strictly necessary for a successful propagation.
This method works excellently with aeoniums, which feature waxy leaves that form a rosette emerging from a single stem—you won’t even need to pluck off leaves from an aeonium. Just make a clean slanted cut at the stem with a pair of sanitized garden shears, let it callus for a few days, stick the cutting in soil, and watch roots grow in a couple of weeks.
How to propagate succulents in water
Propagate succulent stems above water
Yes, you can totally do hydroponics with your succulents, although you want to be careful when trying this method. Take a clean cut of your mother plant and remove the bottom leaves. Then, grab a jar of water and cover it with plastic wrap. Poke holes in it, and insert the exposed nodes above the water about half an inch, making sure that the stem never actually touches the water. As the water evaporates, replenish your supply. In two to three weeks, your roots should start to grow.
Propagate succulents on a wet paper towel
Another way in which you can propagate succulents is by leaving them on a paper towel. Let your succulent leaf cuttings dry out for a few days on a piece of paper towel on a tray until the ends dry. After a few days, spray the paper towel with water, repeating every few days. After a few weeks, you should start to see roots and pups. Some gardeners also place a clear lid with holes (or plastic wrap) over the paper towel as well. With both the jar and paper towel method, you can eventually transfer your succulents to soil. Just keep in mind that not all of your cuttings may succeed, as the roots may experience shock from being placed in a different medium.
Don’t be discouraged if not all of your succulents form roots and pups—since succulents have so many fleshy leaves and can grow prolifically, you’ll always have wiggle room to experiment. With leaf cuttings, fresh cactus soil, bright indirect light, and occasional spritzes of water, you’ll be able to share your succulents sooner than you think.


